Flowgrid Slam Shut | 13
Maintenance of the Shut-off Valve
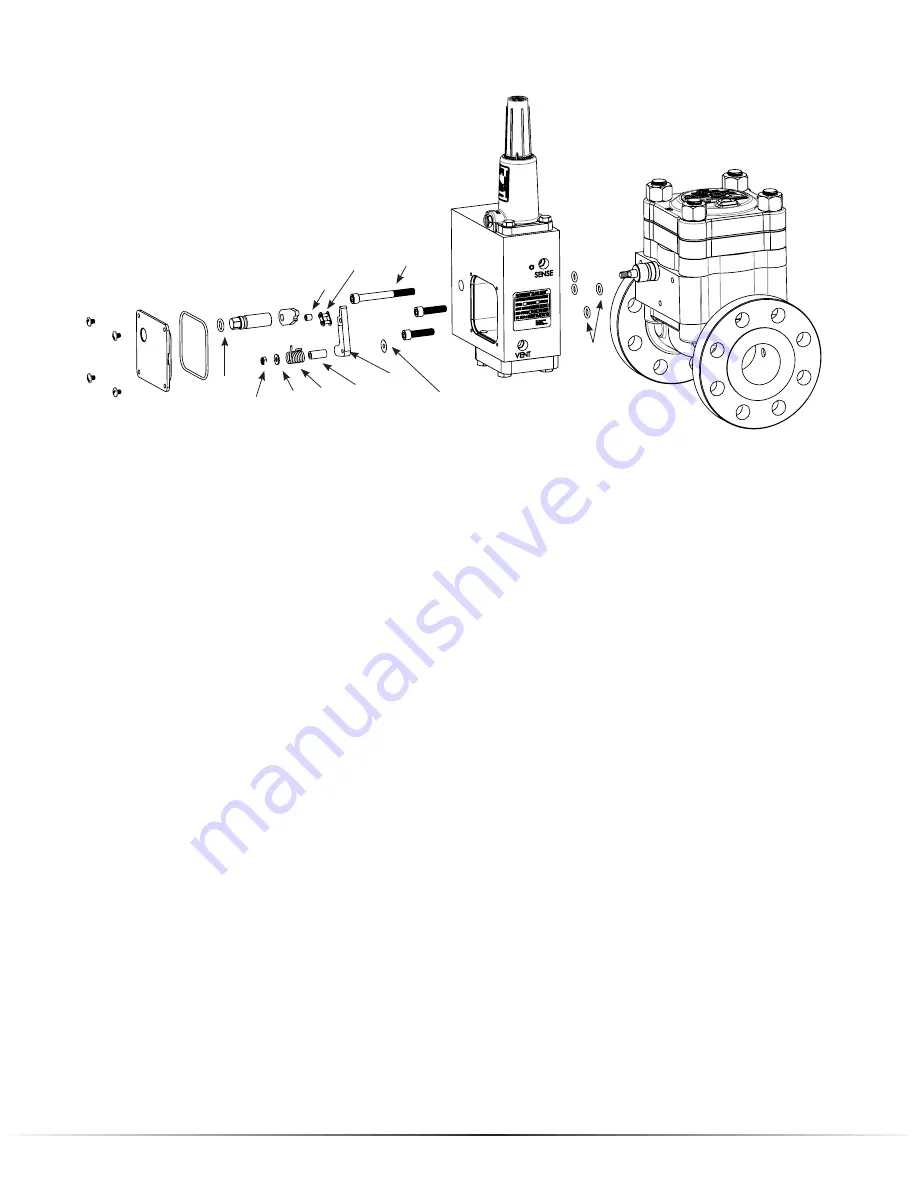
Controller Removal from the Shut-off Valve
1. Remove the sense line from the controller.
2. Remove the cover off of the latch cavity. Remove the
cover o-ring and discard.
3. If the shut off valve (flapper valve) is open using a screw
driver, lift up the short leg of the pawl lever causing the
valve to close.
4. Remove the locknut, washer, spring, spacer and pawl
lever.
5. Remove the front reset nut holding the flapper lever on
the flapper shaft. NOTE: The threads on the nut are left
hand. Discard the o-ring on the front reset nut.
6. With a ¼ inch hex wrench remove the three cap screws
holding the controller and latch module to the shut off
valve body.
7. The flapper lever is press fit on the shaft making removal
difficult. The lever is easily pulled off by using the control-
ler housing to drive it off the shaft. Grab the controller on
each side and rapidly pull the housing so it drives the lever
off. If necessary repeat the action.
8. Remove and discard the o-rings from the mating face of
the slam shut body, bushing and the controller and latch
module.
Locknut
Flapper
Lever
Screw
Controller
Assembly
O-Ring
Master
Link
Roller
Lever
Screw
Valve
Assembly
O-Ring
Washer
Spacer
Screw
Cover
O-Ring
Washer
Front Reset
Nut
O-Ring
Lever
Spring
2” Large Port
Flowgrid Slam Shut
Shown
Figure 9 - Controller Installation and Removal


