DVJ WHISPAIR
™
Dry Exhauster
|
7
soleplates, the machined top surfaces are used for leveling.
Scrape pads or surfaces clean, and remove burrs on high
points with a flat file.
When blower and driver have been factory mounted on
a common baseplate, the assembly is to be treated as a
unit for leveling purposes. Use the jack screws to establish
grouting space under the base flanges, and to level the base.
Adjust these screws until the indicated variation from level
does not exceed .001” per foot (.08 mm per m) in either
length or width. Any variations should all be in the same
direction, to minimize twist. The maximum allowable twist
is considered to be .001” per horizontal foot (.08 mm per
horizontal m) measured between any two sections of the
base.
Units mounted on soleplates are to be leveled in a similar
manner. The plates should be large enough to provide exten-
sions for leveling in both length and width on the finished
upper surfaces. Fasten the plates solidly to the blower feet,
which are machined flat and parallel to each other, then install
and level the blower carefully, using jack screws, shims or
wedges for adjusting.
When a satisfactory condition of level is obtained, turn the
anchor bolt nuts down snug but not tight. Elimination of twist
here is
very important
, and minor adjustments can be made
with shims directly under the blower feet.
ALIGNMENT
of the drive shafts when the blower unit and
its driver are direct coupled requires careful attention. This
precaution will not only help insure satisfactory coupling
operation, but will minimize chances for damage to either
driving or driven unit from vibration or thrust forces.
In package units with driver and blower mounted on a
common baseplate, the two shafts will have been put in
approximate alignment at the factory. However, baseplate
deflections can occur during shipping and installation. A
close coupling alignment should be obtained during leveling,
so that only small final adjustments will need to be made
after grouting. In a soleplate type installation, the separately
mounted driver must be positioned, leveled and aligned as
part of the installation procedure. Whether it is on soleplates
or on its own base, shims of 1/16” to 1/8” (2-3 mm) thick-
ness placed directly under the driver feet before setting will
permit more accurate final alignment. Spacing between the
two shaft ends as required by the coupling must also be
established. If a motor is being used that has end-play in the
shaft, be sure its rotor is located on magnetic center before
setting this spacing.
When blower is driven through V-belts, the driver must
be mounted on an adjustable base to permit tightening or
removing the belts. In this case the driver shaft height is of
no concern, but it must be parallel to the blower shaft and
level. To position the driver properly, both sheaves need to be
mounted on their shafts, and the shaft center distance must
be known.
The blower sheave, usually the larger one in diameter, must
be of the narrow hub type. Install it so that its inner hub face
is not more than 1/4” (6 mm) away from the bearing housing
end cover. The driver sheave should also be mounted as
close to its bearing as possible. Now position the driver so
that faces of the two sheaves are accurately in line, with
the adjustable base so located as to make 2/3 of its total
movement available in the direction away from the blower.
This positioning provides minimum belt wear and slip, and
allows sufficient adjustment for installation and tightening of
belts. Do not install belts until grouting has set and anchor
bolts are tightened.
Blowers intended for driving by V-belts may be provided with
an extended drive shaft and an additional outer bearing to
handle the side pull of the drive. They may be recognized
by the extended housing for the outer bearing. If necessary,
these units may also be used for direct coupling to the driver.
Blowers intended specifically for direct coupling have no
outer bearing, and may be seriously damaged if used for belt
drive. Consult your Sales Office for approval before belting
these units.
GROUTING
follows completion of leveling and preliminary
alignment. Assuming the foundation has been properly cured,
its top surface should first be roughened by chipping to
remove glazed areas and oil or grease removed with a strong
hot detergent or caustic solution.
Grouting serves not only to compensate for surface irregulari-
ties in the foundation and machine base but also to provide
restraint against shifting. Anchor bolts are used
for hold-down only. Therefore, the grout must be adequate
thickness under the soleplate or base flange, must flow into
anchor bolt sleeves and all interior cavities, and must have
minimum shrinkage during the setting period. By virtue of the
open frame design, it is recommended that the bed¬plate
be filled with concrete to a level equal to the top of the main
channels. Special grouting materials designed to counteract
shrinkage are commercially available, and are often preferred
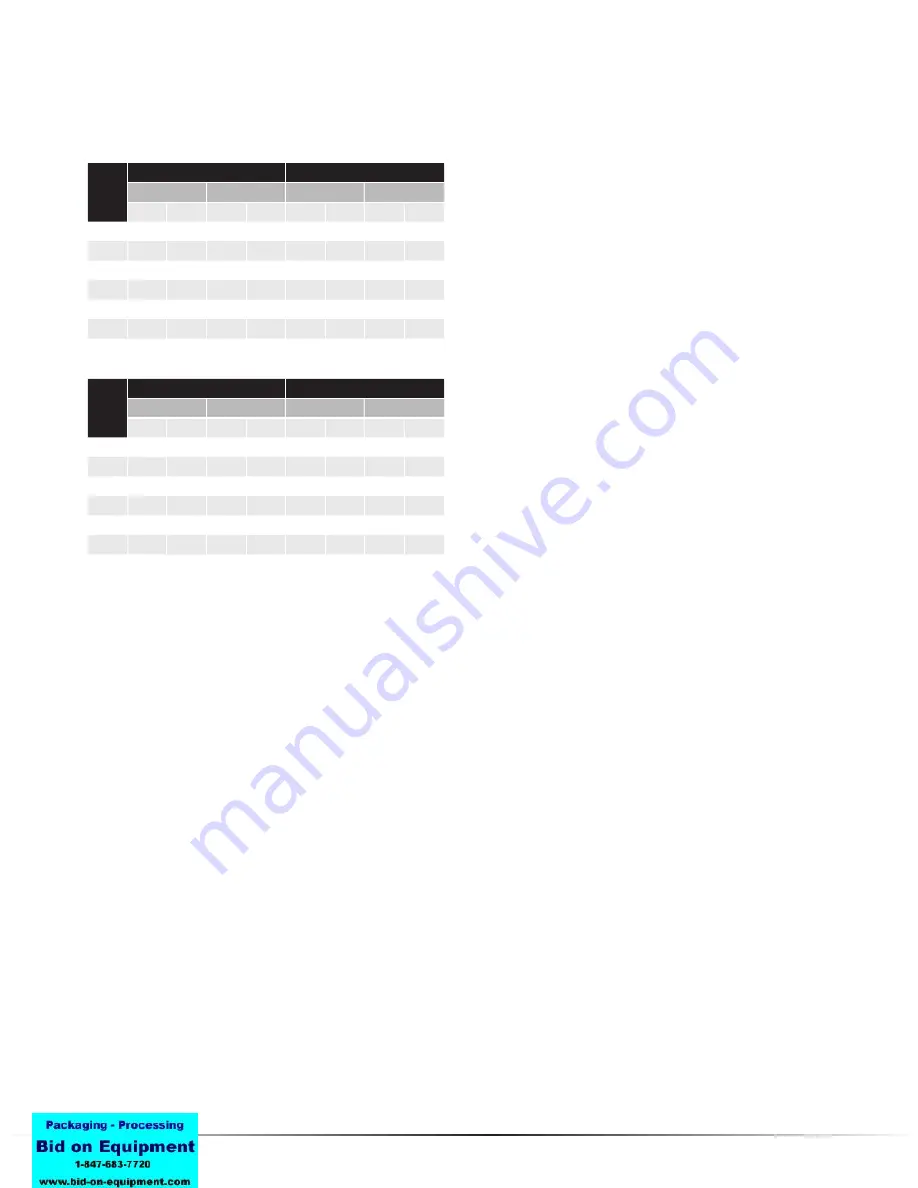
Table 2A - Standard Anchor Bolts in Inches
Table 2B - Standard Anchor Bolts in Centimeters
Unit
Frame
Size
For Soleplates
For Baseplates
Bolts
Sleeves
Bolts
Sleeves
Dia.
Lgth.
I.D.
Lgth.
Dia.
Lgth.
I.D.
Lgth.
1000
1
25
3
18
3/4
18
2-1/2
12
1200
1
25
3
18
3/4
18
2-1/2
12
1400
1-1/8
25
3
18
3/4
18
2-1/2
12
1600
1-1/8
25
3
25
1
25
3
18
1800
1-1/4
25
3
25
1
25
3
18
2000
1-1/4
25
3
25
1
25
3
18
Unit
Frame
Size
For Soleplates
For Baseplates
Bolts
Sleeves
Bolts
Sleeves
Dia.
Lgth.
I.D.
Lgth.
Dia.
Lgth.
I.D.
Lgth.
1000
2.4
64
7.5
46
2.0
46
6.5
30
1200
2.4
64
7.5
46
2.0
46
6.5
30
1400
3.0
64
7.5
46
2.0
46
6.5
30
1600
3.0
64
7.5
46
2.4
64
8.0
46
1800
3.0
64
7.5
46
2.4
64
8.0
46
2000
3.0
64
7.5
46
2.4
64
8.0
46
Summary of Contents for Roots DVJ WHISPAIR
Page 22: ...DVJ WHISPAIR Dry Exhauster 23 Figure 15 Assembly of 10 thru 12 DVJ V V Belt Drive Splash Lube ...
Page 23: ...24 Dresser Roots Figure 16 Sectional Assembly of 10 thru 14 DVJ V Blowers ...
Page 24: ...DVJ WHISPAIR Dry Exhauster 25 Figure 17 Sectional Assembly of 16 20 DVJ Common Lube ...
Page 25: ...26 Dresser Roots Figure 18 Sectional Assembly of 1016 DVJ V Units ...


