


SECTION 3
MACHINE TRANSPORT AND STORAGE
Page 4
OM515C520C99/1E
DRESSTA
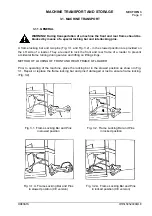
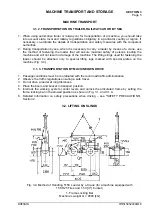
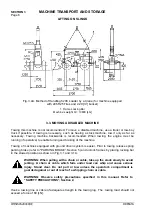
MACHINE TRANSPORT
Always tie down securely a machine for transport to prevent movement.
WARNING! When transporting a machine be especially careful during loading
and unloading. Use low gear range and low speed. Load and unload the machine
on even surface that makes full support for the machine and transport facility.
Block the transport facility so that it cannot move. Make use of loading platform
of sufficient strength, small approach angle and appropriate height.
1. Clean clay, oil and other slippery material of the loader tires.
2. The hydraulic, cooling and braking system should be filled up.
3. The fuel tank should be filled with app. 10 [l] of fuel.
4. The parking brake should be applied. The pressure in the tires should conform to this
instruction, see "TIRES”, Section 6.
5. The batteries should be fully charged, the electric system master switch turned off.
6. The starting switch should be in the neutral position and the key removed.
IMPORTANT !
When transporting this machine on a high speed carrier or railaway car, seal the
exhaust pipe and air intake openinings to prevent turbocharger damage.
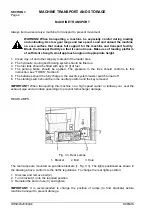
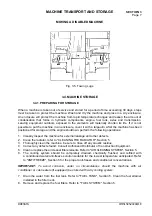
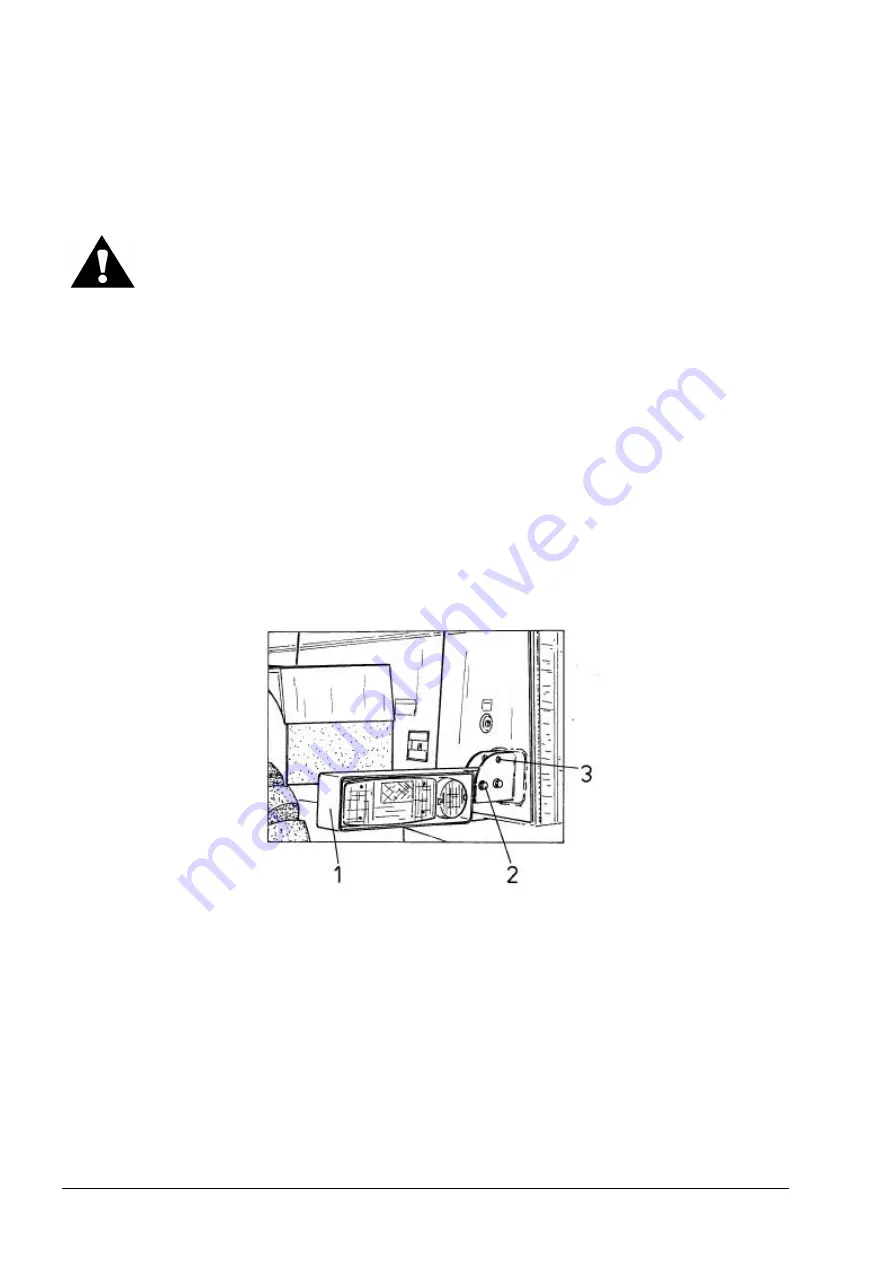
REAR LAMPS
Fig. 3.3. Rear Lamps
1. Bracket 2. Bolt 3. Hole
The rear lamps are mounted on pivotable brackets (1, Fig. 3.3). The lights positioned as shown in
the drawing above, conform to the traffic regulations. To change the rear lights position:
1. Unscrew and remove bolt (2).
2. Turn bracket (1) into the required position.
3. Reinstall the bolt in hole (3) and tighten.
IMPORTANT:
It is recommended to change the position of lamps (to fold brackets) before
machine transport to prevent damage.
Summary of Contents for 515C
Page 3: ...OM515C520C99 1E DRESSTA ...
Page 5: ......
Page 7: ......
Page 10: ...SECTION 1 INTRODUCTION ...
Page 12: ......
Page 17: ...SECTION 2 SAFETY PRECAUTIONS ...
Page 19: ......
Page 37: ...SECTION 3 MACHINE TRANSPORT AND STORAGE ...
Page 39: ......
Page 49: ...SECTION 4 OPERATING ...
Page 51: ......
Page 107: ...SECTION 5 MAINTENANCE ...
Page 165: ...SECTION 6 SPECIFICATIONS ...
Page 167: ......
Page 181: ...SECTION 6 SPECIFICATIONS Page 16 OM515C520C99 1E DRESSTA WIRING DIAGRAMS ...
Page 182: ...SPECIFICATIONS SECTION 6 Page 17 DRESSTA OM515C520C99 1E WIRING DIAGRAMS ...
Page 187: ...SECTION 6 SPECIFICATIONS Page 22 OM515C520C99 1E DRESSTA WIRING DIAGRAMS ...


