6
a.
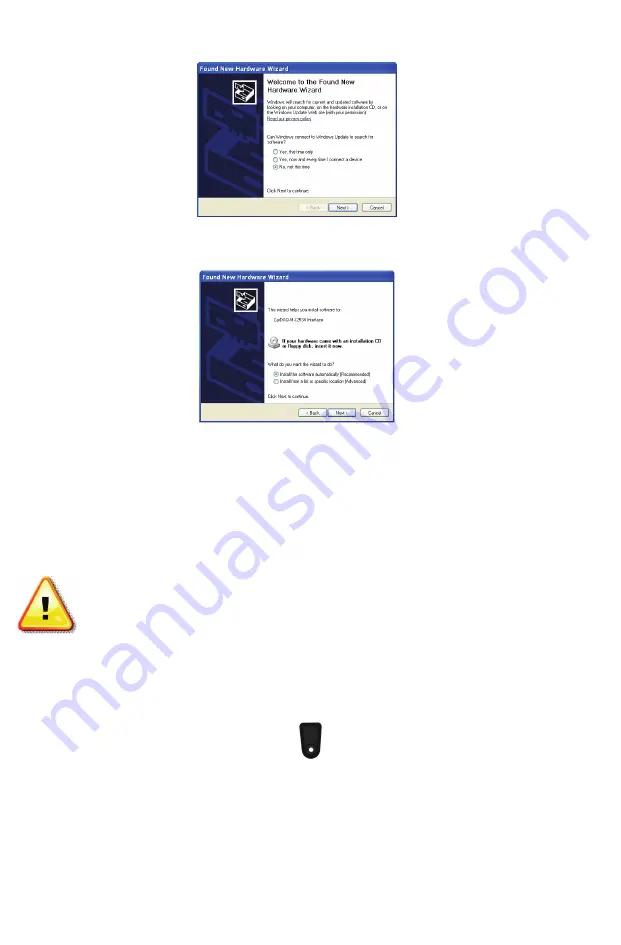
The “Found New Hardware Wizard” will pop up when you
connect your CarDAQ-M.
b.
Make sure “No, not this time” is selected and click [Next].
This screen appears:
c.
Select “Install the software automatically (Recommended)”
and click [Next]. After the progress bar finishes, click
[Finish]. Windows XP users are finished installing at this
point and can run the software they will be using with the
CarDAQ-M.
Adding an Expansion Module to CarDAQ-M
Note: Unplug all cables from CarDAQ-M before
connecting or disconnecting modules.
To add an expansion to CarDAQ-M:
1.
Remove the half tabs on the side of the CarDAQ-M with a 1/16”
Allen style wrench. This is the side with the “Vehicle” and
“Expansion-C” connectors. Save the screws you remove.
2.
Connect the expansion module so that the text on the labels read
the same direction. Make sure the USB port on the J2534-1
module is accessible.
Summary of Contents for CarDAQ-M J2534-1&2 Module
Page 1: ...CarDAQ M J2534 1 2 Module Quick Start Guide...
Page 14: ...14 Notes...
Page 15: ...15 Notes...


