07-01549 F 2011-07 Warranty 07-00422
2
Dri-Eaz Products, Inc.
OPERATING INSTRUCTION
Setting Up
1.
If there is standing water over ½ in. deep, remove it first
with a submersible pump or carpet wand.
NOTICE!
Do not
operate the Rover HVE in standing water over ½ in. deep
to keep from permanently damaging the motor.
2.
Before using the Rover HVE, remove the "easy water" (wa-
ter that can be easily removed from the surface) with a
standard wand connected to a portable or truckmount ex-
traction machine.
3.
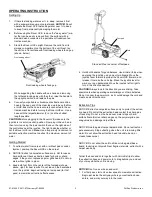
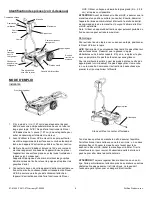
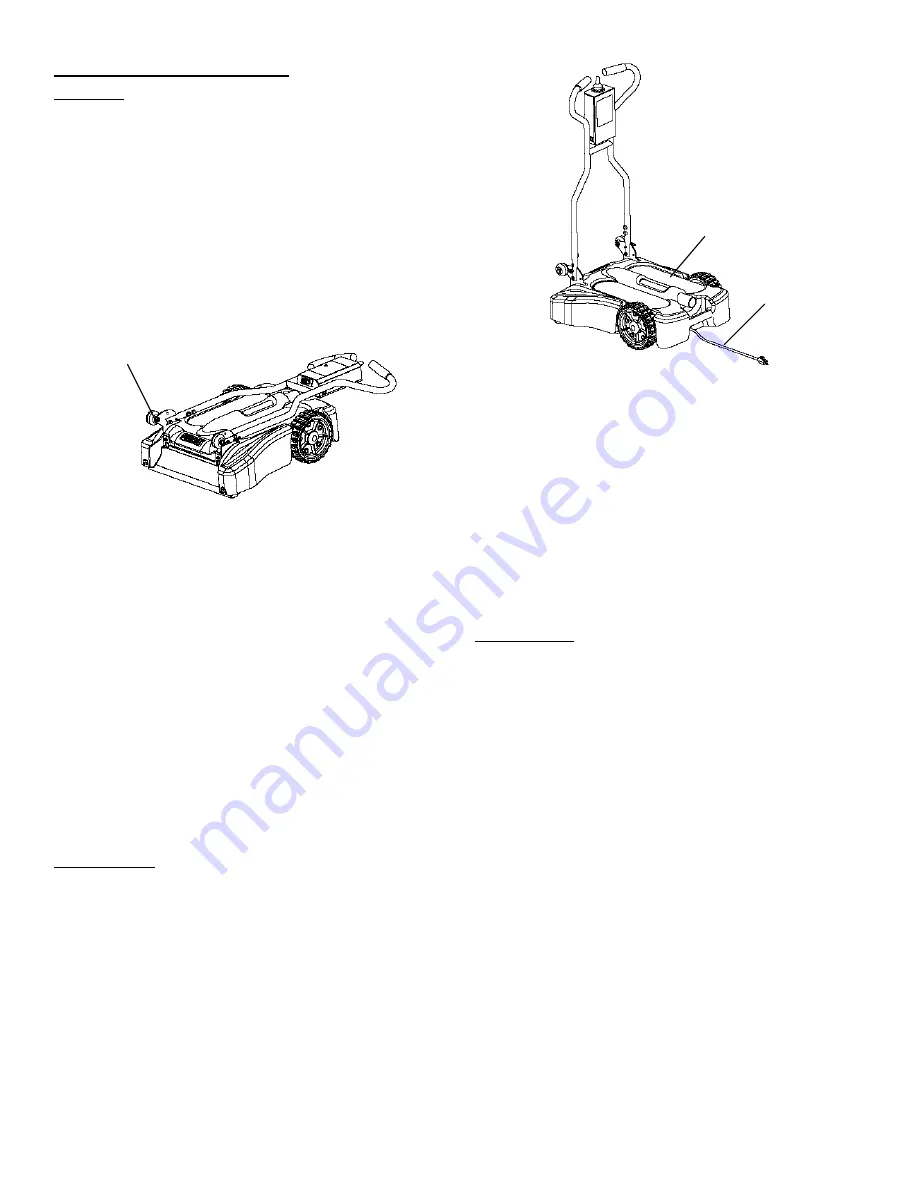
Stand the Rover HVE upright. Remove the cord from its
storage compartment on the bottom of the unit. Next, lay
the unit on a flat surface with front loading wheels facing up
(shown, below).
Front loading wheels facing up.
While supporting the handle with one hand and removing
the tethered locking pins with the other, raise the handle to
the upright position, and replace the pins.
4.
Connect your portable or truckmount extraction machine
hose to the open end of the clear take-up tube on the Rov-
er HVE. Ensure the hose is securely connected to the ex-
traction machine before turning the Rover HVE on. Use a
hose with the largest diameter (2 in.) and the shortest
length possible.
CAUTION!
Before plugging in the Rover HVE, make sure the
joystick is in center (neutral) position. Now plug in the unit, and
then turn it on using the lower switch found on the right side of
the control box near the joystick. The light indicates whether or
not the Rover HVE is on.
Note:
Use a super-duty truckmount or
portable extraction machine to extract the maximum amount of
water.
Getting Started
1. To extract water from carpet, with or without pad or under-
layment, position the Rover HVE on the carpet.
2. NOTICE!
Extract on carpeted surfaces only. Not for use on
hard surfaces. Check extraction head for burrs or sharp
edges; if they occur, replace polymer glide head. Do not op-
erate without glide in place.
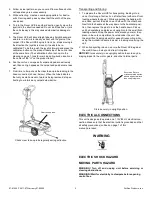
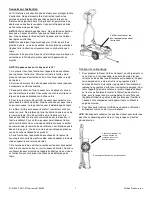
3. Keep both feet flat on the center of the footpads (shown
above, right) for best results. Do not lean on the handlebars
or on the joystick. Begin extracting on low speed (for first
pass) to maximize extraction effectiveness.
Stand with feet on center of footpads.
4. Hold both handles for good balance. Use minimal force when
operating the joystick, using one or two fingers. Move the
joystick lever forward to propel the Rover HVE forward, and
release it to make the unit stop. Move the joystick lever to-
ward you to go backwards. Move the joystick left or right to
turn in the direction desired.
CAUTION!
Always look in the direction you are driving. Take
special care when operating near stairways or other obstacles.
Do not run over the power cord, as it could damage the cord and
create an electrical hazard.
Extraction Tips
NOTICE! Extract on carpeted surfaces only to protect the extrac-
tion head. Do not let the extraction head contact the sharp pins
of tack strip. Do not run the head over metal strips or hard-
surface floors. Burrs or sharp edges on the polymer glide can
snag yarns and damage carpet fibers.
NOTICE! Guard against carpet delamination: Do not extract car-
pet excessively. Stop extracting when the unit is removing little
water. Do not allow the extraction head to buckle, bend, or
crease loose carpet.
NOTICE! Do not allow the unit to strike or rub against base-
board, tack strips or drywall. Near fragile materials, extract with a
carpet wand only.
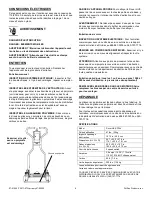
Tether the hose and cord together with Velcro® strips to allow
the extraction hose and power cord to drag behind you and out
of your way while the unit is moving.
NOTICE!
Don’t run over hose and cord!
1. For first pass, start unit on low speed to maximize extraction.
Begin just inside the entryway where your extraction hose
enters, and work your way into the room.
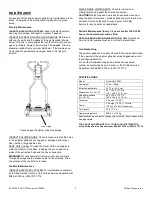
Cord
Front loading wheel
Footpad


