

07-01549 F 2011-07 Warranty 07-00422
4
Dri-Eaz Products, Inc.
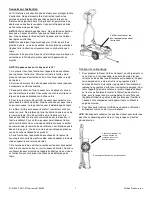
MAINTENANCE
Always turn off the power before performing maintenance proce-
dures. Unplug the unit before performing any service proce-
dures.
Monthly Maintenance
INSPECT ELECTRICAL SYSTEM: Inspect the electrical cord
and plug for damage, and repair or replace if needed.
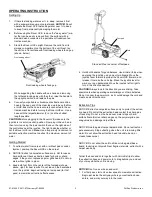
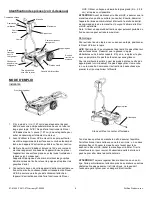
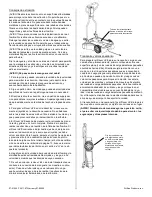
INSPECT EXTRACTION EDGES FOR DAMAGE: Before and
after each use, check the edges of the polymer glide (shown
below) for burrs or sharp edges that could catch a yarn or dam-
age carpet fibers. Replace polymer glide if damaged. Order re-
placement glides from your local distributor. If the stainless ex-
tractor head is accidentally damaged, sand or file lightly to
smooth.
Check edges of polymer glide for damage.
INSPECT POLYMER GLIDE: Check to make sure that the holes
in the polymer glide are not clogged or damaged with carpet
fiber, pet hair, large pebbles, etc.
KEEP UNIT CLEAN: To clean the Rover HVE, use soap and
water on all parts of the base, including the cover, and the in-
sides of the extraction head and the hose connection.
WARNING!
Do not allow water into the control box or motors
through openings like the access holes for the switches. Wipe
the exterior of the control box to clean.
Six-Month Maintenance
INSPECT ELECTRICAL SYSTEM: For maintenance contact an
Authorized Service Center, or the Dri-Eaz Service Department at
888-867-3235 or (360) 757-7776.
CHECK DRIVE COMPONENTS: Check for corrosion or
misalignment and inspect the entire drive system.
CAUTION!
Watch for pinch points and sharp burrs when han-
dling the sheet metal cover, careless handling could result in an
accident. Call an Authorized Service Center or Dri-Eaz
Service for any questions or assistance.
Periodic Maintenance (Every 1–2 years or after 1200–1500
hours of use, whichever comes first)
REPLACE BRUSHES IN DRIVE MOTORS. Have Authorized
Service Center replace brushes in motors to protect them.
Troubleshooting
The polymer glide can be easily cleared if it becomes obstructed.
If the opening of the polymer glide becomes clogged use a wire
to dislodge obstruction.
For all other troubleshooting and maintenance questions,
contact an Authorized Service Center, or the Dri-Eaz Service
Department at 888-867-3235 or (360) 757-7776
SPECIFICATIONS
Model
Rover HVE F354
Use weight
67 lbs. | 30 kg
Extraction path width
19.75 in. | 50.2 cm)
Dimensions (H × W ×D)
45.7 × 22.0 × 27.6 in.
116.1 × 55.9 × 70.1 cm
Folded dimensions
(H × W ×D)
40.5 × 22.0 × 10.7 in.
102.9 × 55.9 × 27.2 cm
Amp draw
3.0 amps (1.5 DC)
Power
3.0 amps (1.5 DC), 115 volts
110 W
|
0.148 HP each motor
Cord length
50 ft.
|
7.6 m
Operator weight limit
300 lbs.
|
136 kg
Specifications are subject to change without notice. Some values many
be approximate.
FOR PARTS AND SERVICE CALL YOUR LOCAL DISTRIBUTOR
or the Dri-Eaz Service Department at 888-867-3235 or (360) 757-7776
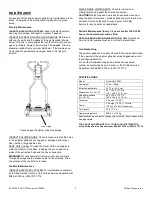
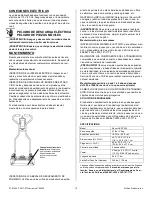
Polymer glide


