background image

Page 6

For technical questions, please call 1-800-444-3353.

Item 69947

SAFET

y

Op
ERA
TION

M

AINTENAN

c

E

SETU
p

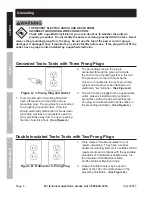
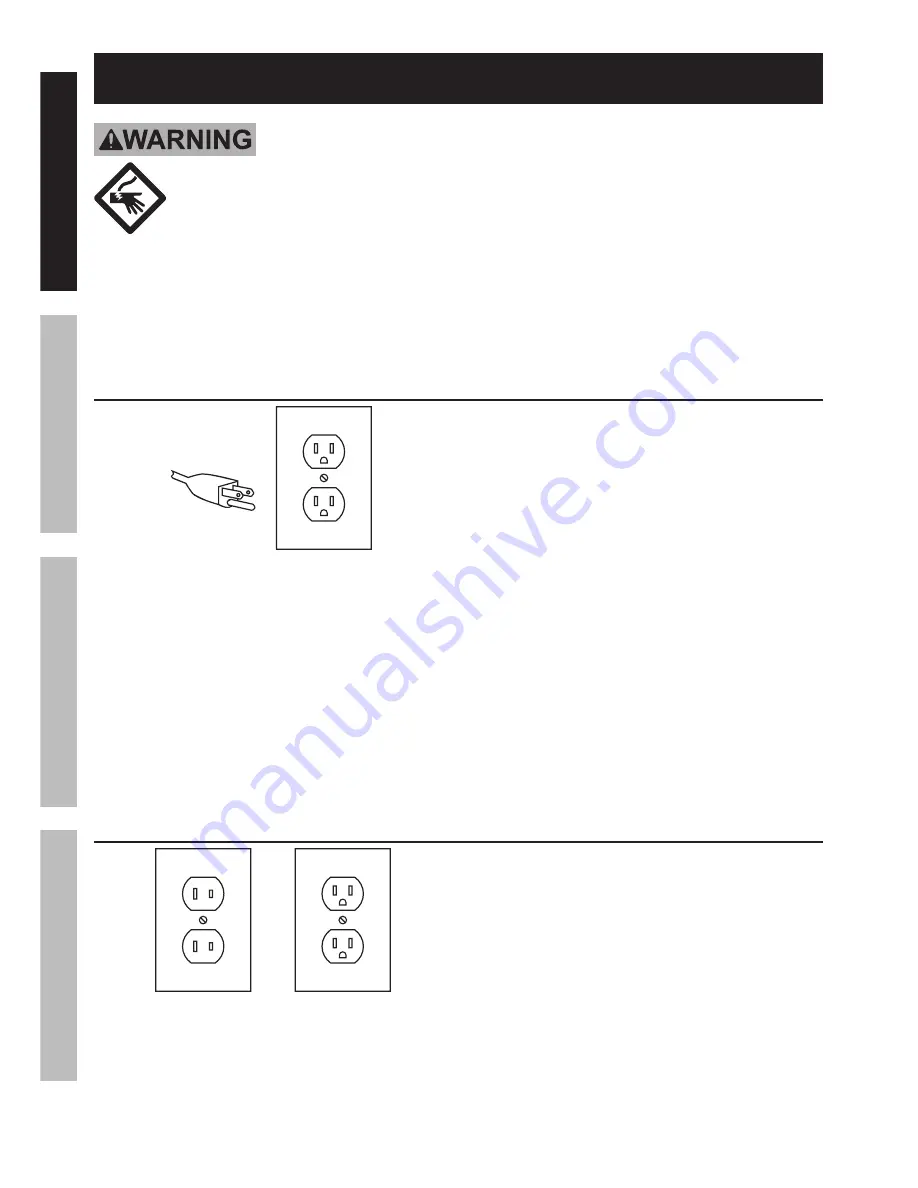
Grounding

TO pREVENT ELEcTRIc SHOcK AND DEATH FROM 

INcORREcT GROUNDING WIRE cONNEcTION: 

check with a qualified electrician if you are in doubt as to whether the outlet is 

properly grounded.  Do not modify the power cord plug provided with the tool.  Never 

remove the grounding prong from the plug.  Do not use the tool if the power cord or plug is 

damaged.  If damaged, have it repaired by a service facility before use.  If the plug will not fit the 

outlet, have a proper outlet installed by a qualified electrician.

Grounded Tools: Tools with Three prong plugs

Figure A:  3-prong plug and Outlet

1.  Tools marked with “Grounding Required” 

have a three wire cord and three prong 

grounding plug.  The plug must be connected 

to a properly grounded outlet.  If the tool 

should electrically malfunction or break down, 

grounding provides a low resistance path to 

carry electricity away from the user, reducing 

the risk of electric shock.  

(See Figure A.)

2.  The grounding prong in the plug is 

connected through the green wire inside 

the cord to the grounding system in the tool.  

The green wire in the cord must be the 

only wire connected to the tool’s grounding 

system and must never be attached to an 

electrically “live” terminal.  

(See Figure A.)

3.  The tool must be plugged into an appropriate 

outlet, properly installed and grounded in 

accordance with all codes and ordinances.  

The plug and outlet should look like those in 

the preceding illustration.  

(See Figure A.)

Double Insulated Tools: Tools with Two prong plugs

Figure B:  Outlets for 2-prong plug

1.  Tools marked “Double Insulated” do not 

require grounding.  They have a special 

double insulation system which satisfies OSHA 

requirements and complies with the applicable 

standards of Underwriters Laboratories, Inc., 

the Canadian Standard Association, 

and the National Electrical Code.

2.  Double insulated tools may be used in 

either of the 120 volt outlets shown in the 

preceding illustration.  

(See Figure B.)

Summary of Contents for 69947

Page 1: ......

Page 2: ...tion which if not avoided could result in minor or moderate injury Addresses practices not related to personal injury IMpORTANT SAFETy INFORMATION General power Tool Safety Warnings Read all safety warnings and instructions Failure to follow the warnings and instructions may result in electric shock fire and or serious injury Save all warnings and instructions for future reference The term power t...

Page 3: ...s alcohol or medication A moment of inattention while operating power tools may result in serious personal injury 2 Use personal protective equipment Always wear eye protection Safety equipment such as dust mask non skid safety shoes hard hat or hearing protection used for appropriate conditions will reduce personal injuries 3 prevent unintentional starting Ensure the switch is in the off position...

Page 4: ...e performed Use of the power tool for operations different from those intended could result in a hazardous situation Service Have your power tool serviced by a qualified repair person using only identical replacement parts This will ensure that the safety of the power tool is maintained Drill and Impact Drill Safety Warnings 1 Wear ear protectors with impact drills Exposure to noise can cause hear...

Page 5: ... Wash hands after handling California Health Safety Code 25249 5 et seq 15 The warnings precautions and instructions discussed in this instruction manual cannot cover all possible conditions and situations that may occur It must be understood by the operator that common sense and caution are factors which cannot be built into this product but must be supplied by the operator Vibration Safety This ...

Page 6: ... provides a low resistance path to carry electricity away from the user reducing the risk of electric shock See Figure A 2 The grounding prong in the plug is connected through the green wire inside the cord to the grounding system in the tool The green wire in the cord must be the only wire connected to the tool s grounding system and must never be attached to an electrically live terminal See Fig...

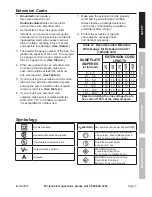
Page 7: ...doors make sure it is marked with the suffix W A W in Canada to indicate it is acceptable for outdoor use 7 Make sure the extension cord is properly wired and in good electrical condition Always replace a damaged extension cord or have it repaired by a qualified electrician before using it 8 Protect the extension cords from sharp objects excessive heat and damp or wet areas Table A Recommended Min...

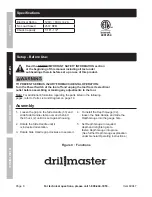
Page 8: ...cal outlet before assembling or making any adjustments to the tool Note For additional information regarding the parts listed in the following pages refer to Parts List and Diagram on page 14 Assembly 1 Loosen the grip on the Side Handle 33 and slide Side Handle clamp over and behind the Chuck 2 until it is set against housing 2 Rotate the Side Handle until it is in desired orientation 3 Rotate Si...

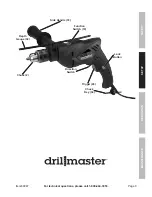
Page 9: ... For technical questions please call 1 800 444 3353 Item 69947 SAFETy OpERATION MAINTENANcE SETUp Side Handle 33 Depth Gauge 32 chuck 2 Function Switch 10 Direction Switch Trigger 28 Lock Button chuck Key 34 ...

Page 10: ...matching socket heads can also be used 3 Hand tighten the Chuck until the bit is held securely in place centered between the Chuck Jaws 4 Insert the tip of the Chuck Key into a hole on the side of the Chuck so that the teeth on the Key engage the gear on the Chuck Use the Key to tighten the Chuck securely and remove the Key 5 Set the Function Switch to the appropriate setting for the drill bit see...

Page 11: ...doors out of children s reach Metal Drilling Tips 1 Use a center punch not included to create a dimple for the bit to start 2 Start by drilling slowly to keep bit from wandering skating away from your starting point 3 When drilling large holes in metal start by drilling a smaller pilot hole then using a larger bit for the final size hole Wood Drilling Tips 1 Use bits specially designed for wood dr...

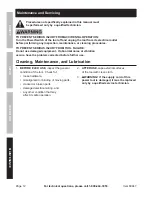
Page 12: ...ing procedures TO pREVENT SERIOUS INJURy FROM TOOL FAILURE Do not use damaged equipment If abnormal noise or vibration occurs have the problem corrected before further use cleaning Maintenance and Lubrication 1 BEFORE EAcH USE inspect the general condition of the tool Check for loose hardware misalignment or binding of moving parts cracked or broken parts damaged electrical wiring and any other co...

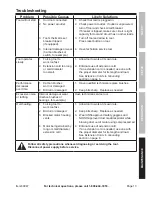
Page 13: ... needed use one with the proper diameter for its length and load See Extension Cords in Grounding section on page 6 Performance decreases over time 1 Carbon brushes worn or damaged 2 Bit dull or damaged 1 Have qualified technician replace brushes 2 Keep bits sharp Replace as needed Excessive noise or rattling Internal damage or wear Carbon brushes or bearings for example Have technician service to...

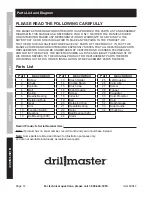
Page 14: ...S ALL RISK AND LIABILITY ARISING OUT OF HIS OR HER REPAIRS TO THE ORIGINAL PRODUCT OR REPLACEMENT PARTS THERETO OR ARISING OUT OF HIS OR HER INSTALLATION OF REPLACEMENT PARTS THERETO parts List Record product s Serial Number Here Note If product has no serial number record month and year of purchase instead Note Some parts are listed and shown for illustration purposes only and are not available i...

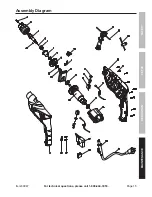
Page 15: ...Page 15 For technical questions please call 1 800 444 3353 Item 69947 SAFETy OpERATION MAINTENANcE SETUp Assembly Diagram ...

Page 16: ... the exclusion or limitation of incidental or consequential damages so the above limitation of exclusion may not apply to you THIS WARRANTY IS EXPRESSLY IN LIEU OF ALL OTHER WARRANTIES EXPRESS OR IMPLIED INCLUDING THE WARRANTIES OF MERCHANTABILITY AND FITNESS To take advantage of this warranty the product or part must be returned to us with transportation charges prepaid Proof of purchase date and...

Reviews: