Page 2
SKU 95527
for technical questions, please call 1-800-444-3353.
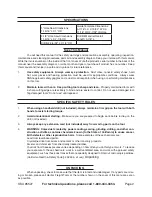
specifications
1” Hole Saw Dimensions:
1-15/16” L X 1” OD
Guide Template Dimensions:
5-7/16” L X 2-19/32” W X 2-
11/16” H X 2-7/32” ID Hole
2-1/8” Hole Saw Dimensions:
1-15/16” L X 2-1/8 OD
Drill Bit Mandrel Overall
Length: 3-7/8” L
Drill Bit: 2-5/32” L X 1/4” OD
save this Manual
You will need this manual for the safety warnings and precautions, assembly, operating, inspection,
maintenance and cleaning procedures, parts list and assembly diagram. Keep your invoice with this manual.
Write the invoice number on the inside of the front cover. Write the product’s serial number in the back of the
manual near the assembly diagram, or write month and year of purchase if product has no number. Keep
this manual and invoice in a safe and dry place for future reference.
use safety equipment. always wear eye protection. Dust mask, nonskid safety shoes, hard
hat, work gloves and hearing protection must be used for appropriate conditions. Always wear
ANSI-approved safety goggles and a dust mask/respirator when using or performing maintenance
on this tool.
Maintain tools with care. keep cutting tools sharp and clean. Properly maintained tools with
a sharp cutting edge are less likely to bind and are easier to control. Do not use a damaged tool.
Tag damaged tools “Do not use” until repaired.
specific safety rules
when using a handheld drill (not included), always maintain a firm grip on the tool with both
hands to resist starting torque.
avoid unintentional starting. Make sure you are prepared to begin work before turning on the
drill (not included).
always keep any extension cord (not included) away from moving parts on the tool.
warning: some dust created by power sanding, sawing, grinding, drilling, and other con-
struction activities, contains chemicals known [to the state of california] to cause cancer,
birth defects or other reproductive harm. Some examples of these chemicals are:
Lead from lead-based paints.
Crystalline silica from bricks and cement or other masonry products.
Arsenic and chromium from chemically treated lumber.
Your risk from these exposures varies, depending on how often you do this type of work. To reduce
your exposure to these chemicals: work in a well ventilated area, and work with approved safety
equipment, such as those dust masks that are specially designed to filter out microscopic particles.
(California Health & Safety Code § 25249.5,
et seq.
)
Unpacking
When unpacking, check to make sure that the item is intact and undamaged. If any parts are miss-
ing or broken, please call Harbor Freight Tools at the number shown on the cover of this manual as soon
as possible.
1.
2.
1.
2.
3.
4.
unpacking


