Installing Your 100 Series
Installing Your 100 Series
2-43
Connecting 100 Series
Congratulations! You are now close enough to the end that you should be able to taste it.
This is the second easiest of the final stages.
You should either have one or two water lines that end in
1/4 in. Quick Connect Shutoff Valve(s)
running to where you plan on locating
your new 100 Series. The first (or only) should be from your Water Source or
(for
Parallel Configuration
). We will refer to this line as
your
Source Line
. The second (if applicable) should be from your Accessory Appliance, or
1/4 in. Brass Compression Tee
if you have 2 Accessory Appliances. We will refer to this
as your
Accessory Line
.
1.
Move your new 100 Series to its final location. Do not plug the power cord in yet.
2.
Cut final short section(s) of tubing from
to run from the
1/4 in. Quick Connect Shutoff Valve(s)
to your 100 Series’s ports. Be sure to
include enough additional length to allow you to pull your 100 Series away from the wall
(for maintenance).
3. Now connect the section(s) of
A
1/4 in. Quick Connect Shutoff Valve(s)
of your
Source Line
and
Accessory Line
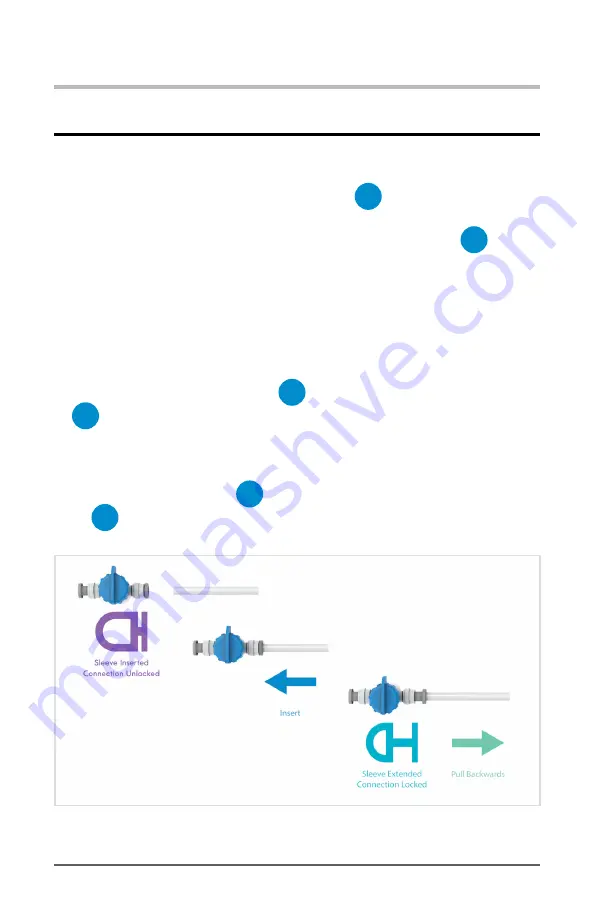
(if applicable). Use the standard quick connect method to attach them.
Diagram 2.7.3
Connect Tubing To Shutoff Valve


