Instructions for use TRS 130
11
Drive Medical GmbH & Co. KG | Last updated: 31.03.2020 | Errors and alterations excepted
EN
Indication
INDICATION:
Significant to full impairment of mobility/walking and
transfer in the case of structural and/or functional dama-
ge to the lower extremities (including amputation, after-
effects of injuries, musculoskeletal/neuromusculoskeletal
movement disorders)
• For use of the integrated toilet unit or to position over
a toilet.
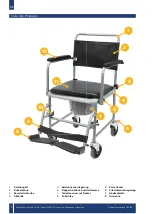
Scope of delivery
1 x
A
Wheeled commode
1 x
B
Bucket with cover
2 x
C
Footrests
1 x
D
Heel strap
1 x
E
Seat cover
1 x
F
Backrest with armrests
1 x
Instructions for use
1
A
E
F
B
C
Safety instructions
• Read these instructions for use carefully.
• All components should be checked for damage and a
secure fit prior to use.
• Clothing or body parts can be pinched when sitting
down, standing up, inserting the toilet bucket, as well
as when raising the armrests and locking them into
place.
• If you need to move over thresholds, do so slowly and
carefully, otherwise the wheels can become damaged!
• IMPORTANT
: If you need to move in reverse over
thresholds with a person sitting in the wheeled com-
mode, there is a risk of the armest lock coming loose.
• Avoid wet conditions – risk of slipping!
• When parking a wheeled commode, always use the
parking brakes.
• During transfer into/out of the wheeled commode, the
footrests must be swiveled out of the way and the lock-
ing brakes must be applied.
• Never use the footrests as assistance when getting up
– risk of tipping!
• The wheeled commode is significantly less stable than
a regular wheelchair, therefore avoid leaning to the
side – risk of tipping!
• Prevent unauthorized use, for example, by children.
• Take note of the permitted maximum weight of the
user. This information can be found in the technical
data in these instructions for use as well as on the
identification plate.
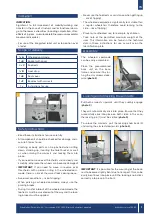
Assembly
The wheeled commode
can be easily assembled.
Place the preassembled
back unit on the base
frame and secure it by tur-
ning the star screws clock-
wise (
photo 2
).
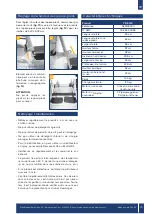
Locking and unlocking the armrests
Pull both armrests upwards until they audibly engage
(
photo 3
).
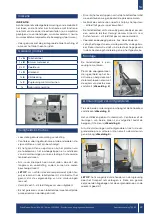
They will automatically click into place. Ensure that they
successfully click into place on both sides; in this case,
the locking pin (1) must be visible (
photo 4
).
To unlock the armrests, pull the locking knob back (2)
and swing the armrest downwards (
photo 4
).
IMPORTANT
: It is possible for the mounting of the back-
rest to become slightly bent due to transport; this can be
easily bent back into place until the locking knob clicks
correctly into place in the front.
D


