background image

installation instructions

1.   Remove product from carton and READ ALL  


  INSTRUCTIONS CAREFULLY before attempting to  
  install product.
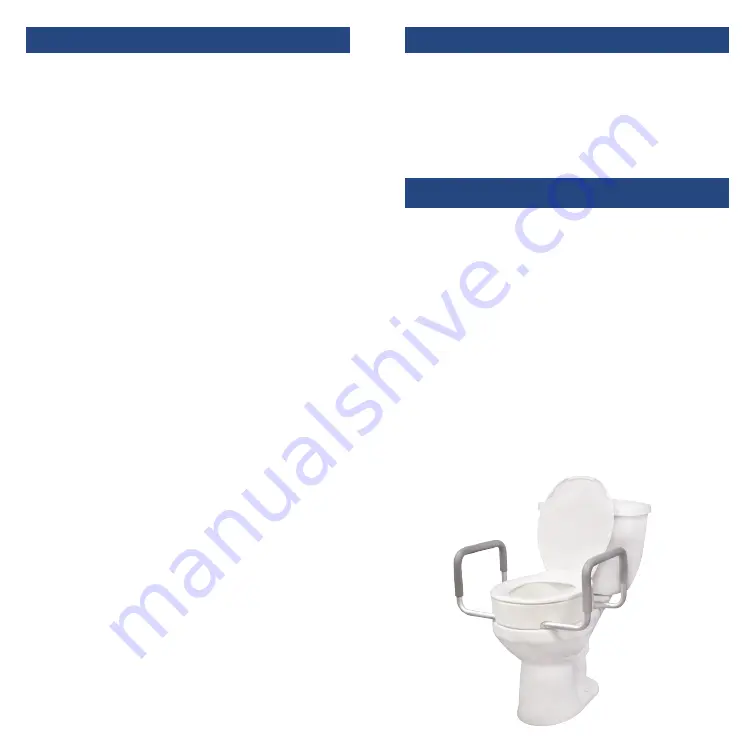
2.  If installation of arms is desired:
  a.  Place one arm at a time into the arm holes on the  
       raised toilet seat (the brass buttons on the arm  
       should be facing out, away from the toilet seat.)
  b.  Depress the brass button in the front of the arm  
       while sliding the arm into position.  You will hear a  
       “click” when the button is positioned properly.  
       (You will see the brass button pop through the  
       position hole.)
  c.  Repeat process for back of arm.
  d.  Repeat process for the other arm.
  e.  To remove the arm, depress the brass button while  
       pulling up on the arm.  Repeat for the back of 
       the arm.
3.   Remove existing toilet seat and lid from toilet. 
4.   Position toilet seat riser correctly on rim of toilet  
  bowl and center as necessary. 
5.    Attach original toilet seat to toilet bowl using the  

6" bolts, with washers and butteryfly nuts provided, so 
it is positioned over toilet seat riser. 

6.   Check for secure fit routinely before using product. 
  User’s weight should be centered over toilet seat, not  
  too forward or too far to one side, as unit may tip.
7.   If you have a style of toilet bowl that this product will 
  not fit properly, it is recommended that you 
  discontinue use.

cleaning instructions

1.   Use a non-abrasive detergent or household cleaner    
  with warm water.
2.   Rinse with warm water and wipe dry.
3.   DO NOT USE AN ABRASIVE CLEANER OR CLOTH    
  with this product, as damage may ensue.

caution

1.   Always be sure that the seat is correctly and securely  
  in place before using.
2.   Physically challenged users should be supervised or  
  assisted whenever using this product.
3.   This product is designed for use with the most 
  common types of toilet bowls. It will not fit all  
  toilet bowl types; be sure that the unit is correctly 
  installed, fits properly and is stable before use.
4.   The arms are for the purpose of providing assistance 
  when getting on and off the seat. DO NOT try to use 
  the arms to support full body weight during transfer, 
  as this may result in failure of the unit.

Weight Capacity: 300 lbs (136 Kg)

Rev.5.02.05.15

Summary of Contents for Drive 12402

Page 1: ...riser with removable arms for standard toilets elevador del asiento del inodoro con descansabrazos desmontables rehausseur de si ge de toilette avec bras amovibles pour toilette standard item 12402 ww...

Page 2: ...sitioned over toilet seat riser 6 Check for secure fit routinely before using product User s weight should be centered over toilet seat not too forward or too far to one side as unit may tip 7 If you...

Page 3: ...bre el elevador del asiento del inodoro 6 Controle rutinariamente que la instalaci n est firme antes de usar el producto El peso del usuario debe centrarse sobre el asiento para inodoro ni demasiado h...

Page 4: ...positionn au dessus du rehausseur de si ge de toilette 6 V rifiez que le si ge sur l vateur soit bien ajust avant son utilisation Le poids de l utilisateur doit tre bien centr sur le si ge ni trop en...

Page 5: ...11050 USA Made in China garant a limitada de por vida Su producto marca Drive est garantizado de por vida del producto por el comprador consumidor original de no tener defectos en los materiales y la...

Page 6: ...ls puissent vous assister de mani re fiable et s curitaire pendant de nombreuses ann es Cette garantie ne peut tre invoqu e dans les cas d usage inappropri de l appareil en cas de n gli gence ou d usu...

Page 7: ...able arms for elongated toilets elevador del asiento del inodoro con descansabrazos desmontables para los inodoros alongados rehausseur de si ge de toilette avec bras amovibles pour toilettes oblongue...

Page 8: ...sitioned over toilet seat riser 6 Check for secure fit routinely before using product User s weight should be centered over toilet seat not too forward or too far to one side as unit may tip 7 If you...

Page 9: ...sseur de si ge de toilette 6 Controle rutinariamente que la instalaci n est firme antes de usar el producto El peso del usuario debe centrarse sobre el asiento para inodoro ni demasiado hacia delante...

Page 10: ...ssus du rehausseur de si ge de toilette 6 V rifiez que le si ge sur l vateur soit bien ajust avant son utilisation Le poids de l utilisateur doit tre bien centr sur le si ge ni trop en avant ni trop d...

Page 11: ...reemplazo peri dico Si usted tiene preguntas acerca de su aparato Drive o esta garant a por favor contacte a un representante autorizado de Drive lifetime limited warranty Your Drive branded product i...

Page 12: ...ls puissent vous assister de mani re fiable et s curitaire pendant de nombreuses ann es Cette garantie ne peut tre invoqu e dans les cas d usage inappropri de l appareil en cas de n gli gence ou d usu...

Reviews: