background image

1.   Inspect all parts for shipping damage before assembly.  

If there is shipping damage - DO NOT USE.  Contact 

dealer/carrier for further instructions.

2.   Make certain that the height adjusting snap but-

tons fully protrude through the same respective hole 

of each leg extension.  This will ensure that the leg 

extensions are securely locked in position and an even 

height is achieved.

3.  Ensure ALL screws, nuts and/or bolts are tightened.
4.   Check the rubber tips on the leg extensions for rips, 

wear or if they are missing.  Immediately replace any 

or all if any of these imperfections exist.

5.   All four leg extensions with rubber tips MUST touch 

the floor simultaneously at all times.

6.  DO NOT stand on chair.

NOTE:

 To maintain the beauty of the original finish, clean 

with mild soap and rinse with warm water. Wipe bath seat 

dry after each use.

precautions

1.   Before use, adjust height of each leg to your specific 

needs, making sure all legs are at the same height.  

When desired height is reached, lock legs into place 

by aligning buttons into proper holes.

NOTE: 

Make sure all legs are set to the same height.

2.   To be sure legs are locked into place, push down or 

pull up on legs.

adjusting leg height

Weight Capacity: 400 lbs / 181 kg

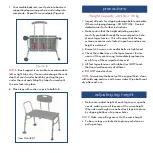
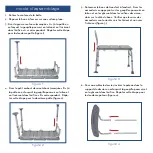
7.  To assemble backrest, insert pole into backrest       

  support by depressing push pin and sliding into    

  receptacle.  Repeat for second pole (Figure 5).

figure 5

NOTE:

  Back support is reversible to accommodate 

left or right tub entry. You can also change the seat 

depth of your transfer bench by pushing the pins 

under the seat and sliding the tubes forward until 

the pins lock into place.

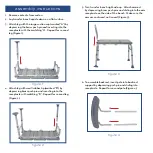
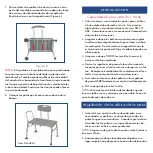
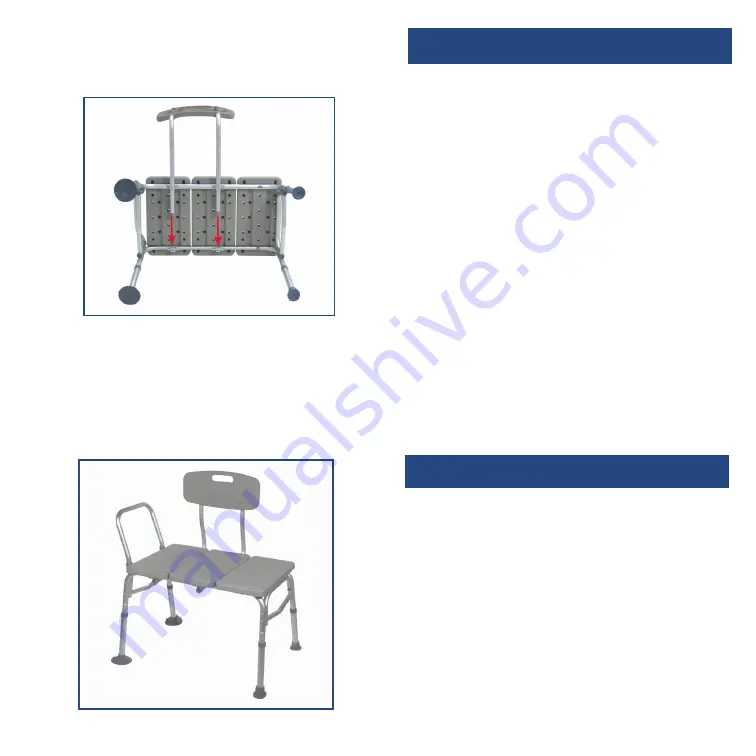
8.  Place legs with suction cups into bath tub.

Item # 12011KD-1

Summary of Contents for PreserveTech 12011KD-1A

Page 1: ...iodic replacement If you have a question about your Drive device or this war ranty please contact an authorized Drive dealer Drive recommends periodic visual inspection of this product by the user to...

Page 2: ...bber tip marked B by depressing brass push pin and inserting into the receptacle with matching B Repeat for second leg Figure 2 figure 1 figure 2 6 To assemble backrest insert pole into backrest suppo...

Page 3: ...of the original finish clean with mild soap and rinse with warm water Wipe bath seat dry after each use precautions 1 Before use adjust height of each leg to your specific needs making sure all legs a...

Page 4: ...resionando hacia abajo la clavija de pre si n de lat n e introduci ndola en el recept culo con la B coincidente Repita lo mismo con la segunda pata Figura 2 5 Coloque la banqueta de transferencia al d...

Page 5: ...Seque el asiento despu s de cada uso precauciones 1 Antes del uso ajuste la altura de cada pata a sus necesidades espec ficas verificando que todas las patas tengan la misma altura Cuando logre la alt...

Page 6: ...ille poussoir en laiton et en l ins rant dans l orifice B correspondant R p ter cette tape pour la deuxi me patte figure 2 5 Retourner le banc de transfert l endroit Fixer les accoudoirs en appuyant s...

Page 7: ...avon doux et rincer avec de l eau ti de Essuyer compl tement le si ge de bain apr s chaque utilisation pr cautions 1 Avant usage r gler la hauteur de chaque patte selon vos besoins particuliers en vou...

Page 8: ...ger Ces produits ne prot gent pas les utilisateurs contre les bact ries virus microbes et autres organismes patho g nes garant a limitada de por vida Su producto marca Drive est garantizado de por vi...

Reviews: