background image

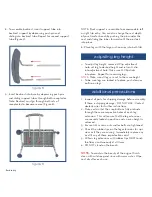
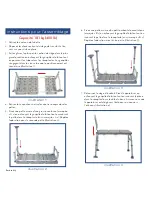
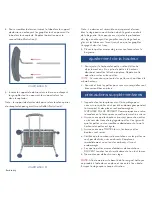
8.  To assemble backrest, insert support tube into  


  backrest support by depressing push pin and  


  sliding into backrest tube. Repeat for second support    

  tube (Figure 5).

figure 5

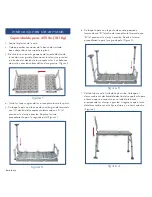
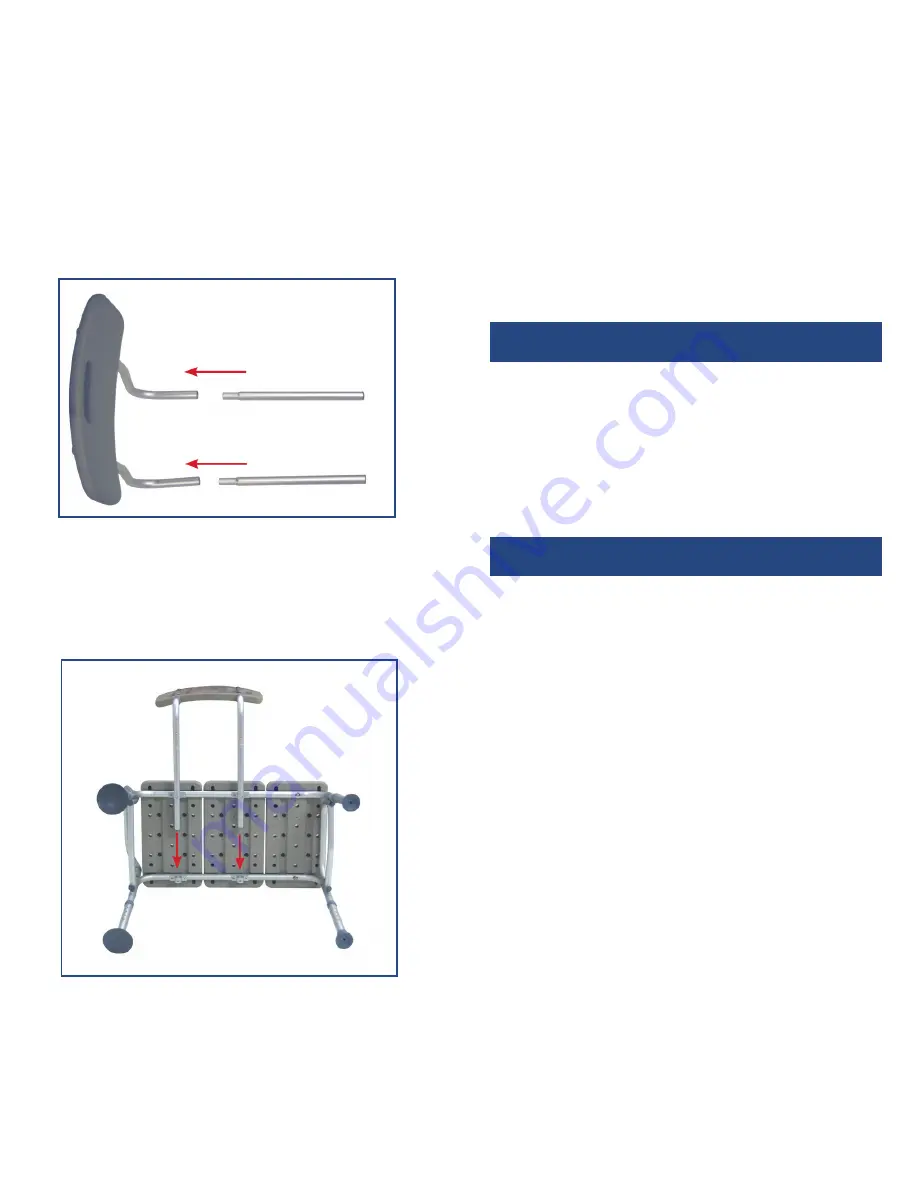
9.  Insert backrest into base by depressing push pins  

  and sliding support tubes through both receptacles.         

  Note: Backrest must go through both sets of           

  receptacles to become secure (Figure 6).

figure 6

NOTE:  Back support is reversible to accommodate left 

or right tub entry. You can also change the seat depth 

of your transfer bench by pushing the pins under the 

seat and sliding the tubes forward until the pins lock 

into place.
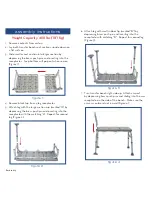
8.  Place legs with the large suction cups into bath tub.

1.  Inspect all parts for shipping damage before assembly.   

  If there is shipping damage - DO NOT USE.  Contact  

  dealer/carrier for further instructions.

2.  Make certain that the snap buttons fully protrude  

  through the same respective holes of each leg  

  extension.  This will ensure that the leg extensions  

  are securely locked in position and an even height is  

 achieved.

3.  Ensure ALL screws, nuts and/or bolts are tightened.

4.  Check the rubber tips on the leg extensions for rips,  

  wear or if they are missing.  Immediately replace any  

  or all if any of these imperfections exist.

5.  All four leg extensions with rubber tips MUST touch  

  the floor simultaneously at all times.

6.  DO NOT stand on the bench.

additional precautions

NOTE:


To maintain the beauty of the original finish, 

clean with mild soap and rinse with warm water. Wipe 

seat dry after each use.

adjusting leg height

1.  To adjust leg height, remove U-Clip adjustment 

  hole, set leg to desired height and return U-clip  

  into adjustment hole. Make sure U-Clip clicks  

  into place.  Repeat for remaining legs. 

NOTE:

 Make sure all legs are set to the same height.

2.  To be sure legs are locked into place, push down or  

  pull up on legs.

Rev.2.12.11.15

Summary of Contents for RTL12031KDR

Page 1: ...to shipment This Lifetime Limited Warranty is an expression of our confidence in the materials and workmanship of our products and our assurance to the consumer of years of dependable service This war...

Page 2: ...d inserting into the receptacle with matching B Repeat for second leg Figure 3 figure 1 figure 3 Weight Capacity 400 lbs 181 Kg 4 Remove black top from 4 leg receptacles 5 Attach leg with the large su...

Page 3: ...at the snap buttons fully protrude through the same respective holes of each leg extension This will ensure that the leg extensions are securely locked in position and an even height is achieved 3 Ens...

Page 4: ...a a presi n Repita el mismo procedimiento para la segunda pata Figura 3 figura 1 figura 3 Capacidad de peso 400 lbs 181 Kg 4 Quite las tapas negras de los 4 recept culos de las patas 5 Coloque la pata...

Page 5: ...2 Aseg rese de que los botones de ajuste a presi n salgan completamente por los hoyos respectivos para cada extensi n de la pata Esto asegurar que las extensiones de las patas est n bloqueadas de man...

Page 6: ...rant la patte dans le r ceptacle aussi marqu B R p tez l op ration avec l autre patte illustration 3 illustration 1 illustration 3 Capacit 181 kg 400 lb 4 Retirez les capuchons noirs des quatre r cept...

Page 7: ...T Communiquez avec votre revendeur ou le livreur pour conna tre la marche suivre 2 Assurez vous que les boutons ressort passent en entier au travers des trous de r glage des pattes Ceci garantit que l...

Page 8: ...dical depot Inc Port Washington N Y 11050 USA Hecho en China garantie vie limit e Ce produit Drive est garanti exempt de tout d faut de mat riau de fabrication ou de main d oeuvrepour la vie du produc...

Reviews: