background image


Pinch Force Meter BIA-1 BT 

Version 1.1 

                                                                                  Seite 

35

 von 

46


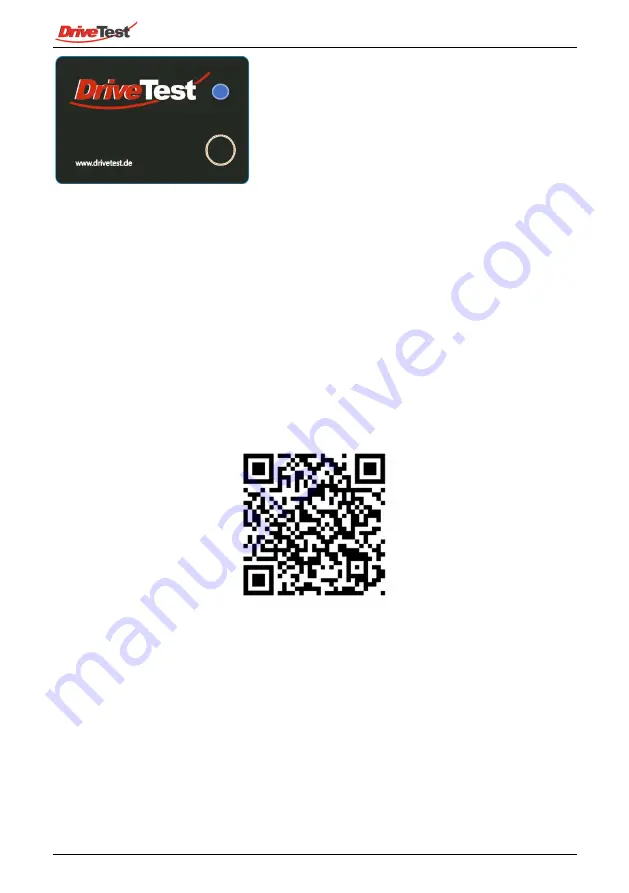
Figure 6: Device after turning it on 

Flashing blue 


Ready to connect 

Permanently blue 


Device is connected


11.3


Connecting 

The  device  can  whether  be  connected  via  Bluetooth  (Android  device)  or  via 
USB (PC).  
It has to be turned on (see chapter 11.2 “Turning On”) and the LED needs to 
be flashing in blue colour to establish a connection to the device. 

11.3.1


Bluetooth connection 

You will need the App Force Meter from Drive Test to connect your Android 
device to the measuring device. It can be downloaded in Google PlayStore™. 


Figure 7: QR-Code for Google PlayStore™ download 

Start the App Force Meter on your Android device and hit the connect symbol 
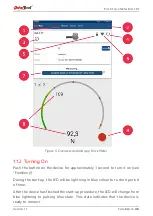
to connect to the sensor (see chapter 4.1 “Funktionsübersicht Android App”).  
The  LED  on  the  measuring  device  will  rapidly  blink  in  blue  colour  during 
establishing the connection. If the connection was successfully established, the 
LED on the  measuring device will  change to permanently blue light  and the 
Android App will show a symbol for “Connected”.  

Summary of Contents for BIA-1 BT

Page 1: ...BIA 1 BT Handbuch Manual...

Page 2: ......

Page 3: ...9 2 3 Betrieb 10 2 3 1 Batterie 10 2 3 2 Verletzungsgefahren 10 2 4 Lagerung 11 3 Vorbereitung zum Gebrauch 11 3 1 Batterie 11 4 Betrieb 11 4 1 Funktions bersicht Android App 11 4 2 Einschalten 12 4 3...

Page 4: ...Schlie kraftmessger t BIA 1 BT Version 1 1 Seite 4 von 46 6 Au erbetriebnahme 19 6 1 Entsorgung 19 7 Anhang 20 7 1 EG Konformit tserkl rung 20 7 2 Glossar 21 7 3 Abbildungsverzeichnis 22...

Page 5: ...ung von Kr ften der folgenden Normen und Richtlinien entwickelt DIN EN 14752 35 E Abs 5 StVZO N here Informationen zu den hier angef hrten Normen finden Sie auf unserer Website siehe dazu Kapitel 5 4...

Page 6: ...Schlie kraftmessger t BIA 1 BT Version 1 1 Seite 6 von 46 Abbildung 1 BIA 1 BT Set Ger tefunktionen Taster 7 LED 8 USB Anschluss Buchse 9 Abbildung 2 Ger tefunktionen...

Page 7: ...che von 100 mm Durchmesser Der Abstand der Stempelfl chen betr gt in entspanntem Zustand 115 mm Der maximal m gliche Weg ist 30 mm d h bei maximaler Kraft betr gt der Abstand der Stempelfl chen 85 mm...

Page 8: ...Durchmesser 130 x 130 x 115 mm Kraftmessung Bereich 0 300 N Aufl sung 1 N Genauigkeit der gr ere Toleranzwert ist g ltig 3 N oder 3 v Messwert Erfassfrequenz rate 250 Hz 4 ms Stromversorgung 5 V Glei...

Page 9: ...men werden 2 2 Transport Ein Transport des Ger tes sollte immer in dem zum Lieferumfang geh renden Transportkoffer erfolgen Da in dem Ger t eine Lithium Polymer Batterie eingebaut ist unterliegt der T...

Page 10: ...Daten Die Anforderungen zur Handhabung der Batterie entnehmen Sie bitte dem Sicherheitsdatenblatt f r Lithium Polymer Batterien auf der Website unseres Batterielieferanten www dynamis batterien de 2...

Page 11: ...atterie Der im Ger t integrierte Akku sollte vor Gebrauch auf einen ausreichenden Ladezustand kontrolliert werden F r n here Informationen zum Laden des Ger tes lesen Sie bitte Kapitel 4 6 Aufladen 4...

Page 12: ...2 Einschalten Zum Einschalten des Ger ts bet tigen Sie den Taster auf dem Ger t siehe Ger tefunktionen auf dem Ger t f r ca 1 Sekunde Nach dem Einschalten leuchtet die auf dem Ger t befindliche LED k...

Page 13: ...in blauem Licht pulsieren 4 3 1 Bluetooth Verbindung F r die Verbindung des Messger ts mit dem Android Ger t wird die App Force Meter von Drive Test ben tigt Die App steht im Google PlayStore zum Dow...

Page 14: ...aket f r diese Software ist auf dem USB Stick gespeichert Die Software PinchPilot starten und das Messfenster ber Sensor Messen oder Strg M ffnen Abbildung 8 Messfenster Software PinchPilot Nach dem V...

Page 15: ...iner T rkante anzulegen und bei der Schlie bewegung des T rfl gels mitzuf hren bis das bewegliche Teil des Messger tes vom anderen T rfl gel getroffen wird Dabei sollte das Ger t m glichst nicht verka...

Page 16: ...LED auf dem Ger t wieder blau 4 5 Ausschalten Das Ger t l sst sich durch einen langen Tastendruck 3 s ausschalten Alternativ kann das Ger t auch ber die Android App ausgeschaltet werden siehe dazu 4 1...

Page 17: ...ne Zeit von etwa 4 Stunden um vollst ndig geladen zu sein 4 7 Fehler Fehler im Ger t werden durch eine schnell blinkende rote LED signalisiert Nach 5 Sekunden schaltet sich das Ger t automatisch ab Bi...

Page 18: ...mit Kr ften ber dem definierten Kraftbereich siehe Kapitel 1 5 Technische Daten kann das Messger t jedoch zerst ren oder funktionsunf hig machen 5 3 Garantie Der Hersteller gew hrt dem K ufer eine Gar...

Page 19: ...f llen und der Sendung beizulegen Sie finden dort auch wichtige Informationen den Versand betreffend Bei Reklamationen Garantieleistungen Wartungen oder Kalibrierungen senden Sie Ihr Ger t bitte an Dr...

Page 20: ...ynamis batterien de f r einen rtlichen Partner der Ihnen bei der Batterieentsorgung behilflich ist 7 Anhang 7 1 EG Konformit tserkl rung Der Bereitsteller und die unterlagenbevollm chtigte Person ist...

Page 21: ...te benannt Genauigkeit Grad der bereinstimmung zwischen angezeigtem und richtigem Wert Grenzwert Maximal zul ssige Gr e Richtlinie Bezeichnet einen Satz von Parametern und Grenzwerten nach denen eine...

Page 22: ...4 Versandkennzeichnung 9 Abbildung 5 Funktions bersicht Android App Force Meter 12 Abbildung 6 Ger t nach dem Einschalten 13 Abbildung 7 QR Code f r Google PlayStore Download 13 Abbildung 8 Messfenste...

Page 23: ...BIA 1 BT Manual...

Page 24: ......

Page 25: ...31 2 2 Transportation 31 2 3 Operation 32 2 3 1 Battery 32 2 3 2 Risks 32 2 4 Storing 33 3 Preliminary 33 3 1 Battery 33 4 Operation 33 4 1 Function Overview Android App 33 4 2 Turning On 34 4 3 Conn...

Page 26: ...Pinch Force Meter BIA 1 BT Version 1 1 Seite 26 von 46 6 Shutdown 41 6 1 Disposal 41 7 Appendix 42 7 1 EC certificate of conformity 42 7 2 Glossary 43 7 3 List of figures 44...

Page 27: ...of the following applicable standards and guidelines DIN EN 14752 35 E Abs 5 StVZO Please find detailed information to the given standards on our website refer chapter 5 4 Contact 8 2 Product Descript...

Page 28: ...Pinch Force Meter BIA 1 BT Version 1 1 Seite 28 von 46 Figure 1 BIA 1 BT Set Functions Button 7 LED 8 USB socket 9 Figure 2 Device functions...

Page 29: ...diameter each In home position the distance between the right and left initiation area is 115 mm The maximum displacement is 30 mm i e the minimum area distance is 85 mm In idle position the sensor h...

Page 30: ...300 g Dimensions 130 mm diameter 130 x 130 x 85 mm Force Measuring Range 0 300 N Resolution 1 N Accuracy greater value applies 3 N or 3 of measured value Sampling frequency rate 250 Hz 4 ms Power supp...

Page 31: ...pening or disassembling of the device is restricted to Drive Test personnel due to safety and warranty reasons 9 2 Transportation We highly recommend to use the transportation case included in the set...

Page 32: ...ined operating temperature of 0 to 45 C during charging and 10 to 60 C during discharging refer chapter 1 5 Technical Specifications Please find the battery cell s safety notice on the website of our...

Page 33: ...ry cell which is built in the device has to checked for proper charging state before use For detailed information about charging please read the corresponding chapter 11 6 Charging 11 Operation In the...

Page 34: ...on the device for approximately 1 second to turn it on see Functions During the start up the LED will be lightning in blue colour for a short period of time After the device has finished the start up...

Page 35: ...tion You will need the App Force Meter from Drive Test to connect your Android device to the measuring device It can be downloaded in Google PlayStore Figure 7 QR Code for Google PlayStore download St...

Page 36: ...ndow via Sensor Measurement or Ctrl M for measuring Figure 8 Measurement window in software PinchPilot The LED will show a permanently blue light after connecting to the device 11 4 Measuring The meas...

Page 37: ...red values are displayed in the software Figure 10 Device during measurement Permanently yellow Device is measuring The device will perform a taring action after initiating the measurement This will t...

Page 38: ...he LED on the measuring device will give feedback about the remaining battery in certain cases If the LED is showing a permanently red LED after turning it on then the device has to be charged The rem...

Page 39: ...t devices are very precise instruments but can be damaged by inappropriate treatment like dropping etc To ensure proper function we recommend an annual calibration interval of one year The calibration...

Page 40: ...ive Test is limited to the repair of the delivered equipment Further liability is excluded 12 4 Contact On our website you will find product descriptions to this and other products Additionally you wi...

Page 41: ...also electronic devices in general require a special handling for disposal You can send the device back to us for disposal If you do so please contact us in advance of your shipping refer chapter 5 4...

Page 42: ...e manufacturer or of his representative is Drive Test GmbH Adi Maislinger Str 9 81373 M nchen Deutschland hereby certify that the device BIA 1 BT meets the intend of the applicable directives 2014 35...

Page 43: ...ion of measurements and the way the results are tested basis of guidelines are standards Limits Maximum permitted quantity Pinch force FE mean value of effective forces measured sequentially at the sa...

Page 44: ...Figure 4 Shipping label 31 Figure 5 Overview Android App Force Meter 34 Figure 6 Device after turning it on 35 Figure 7 QR Code for Google PlayStore download 35 Figure 8 Measurement window in softwar...

Page 45: ......

Page 46: ......

Reviews: