background image

LOBIT300GT Quad

ASSEMBLY  MANUAL

Vol 1.0

-     1     -

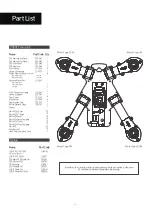
List of Screws and Nuts

1:1 Scale

- - - - - - - - - - - - - - - - - - - - -

- - - - - - - - -

- - - - - - - - - - - - - - - - - - - - -

- - - - - - - - - - - - - - - - - -

- - - - - - - - - - - - - - -

- - - - - - - - - - - - - - - - - - - - - - - - -

- - - - - - - - - - - - - - - -

- - - - - - - - - - - - - - - - - - - - -

- - -

M2.5 x 5mm

M2.5 x 15mm

M3 x 6mm

M3 x 8mm
Tapping

(Side cover)

M3 x 12mm

M2 x 3mm
Tapping

M3 Nut

M3 Washers

Damper

x 32 ea

x 8 ea

x 18 ea

x 16 ea

x 20 ea

x 4 ea

x 20 ea

x 16 ea

x 8 ea

M3 x 12mm

M3 x 5mm 
Spacer

M3 Nut

Damper

x 4 ea

x 4 ea

x 4 ea

x 4 ea

- - - - - - - - - - - - - - -

- - - - - - - - - - - - - - - - - - - - - - - -

- - - - - - - - - - - - - - - -

- - -

300GT Frame Kit

300GT Main PCB Board

Summary of Contents for LOBIT300GT Quad

Page 1: ...andNuts 1 1 Scale M2 5x5mm M2 5x15mm M3x6mm M3x8mm Tapping Sidecover M3x12mm M2x3mm Tapping M3Nut M3Washers Damper x32ea x8ea x18ea x16ea x20ea x4ea x20ea x16ea x8ea M3x12mm M3x5mm Spacer M3Nut Damper...

Page 2: ...ping Nut M3 Washers M3 HexaWrench HandTool PartCode 30CB41 30CB42 30CB43 30CB44 LOAL43 LOPL31 LOPL41 LOPL40 LOAL41 LOAL42 LOCB41 LOPL42 LOPL45 LOPD11 LOBE42 Qty 1 1 2 2 4 1 8 1 1 8 1 1 4 4 1 1 1 32 8...

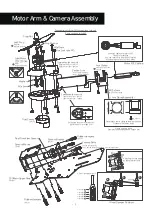
Page 3: ...41 Camera Bolts Fixed Damper Position Cutting 3 5 4 3 Tier level Tier level Tier level Tier level Tier level 1 2 3 4 5 3 Two motors in front two motors in back Four motors in total Top view Bottom vie...

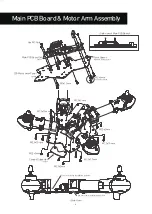
Page 4: ...CB41 32PC41 M3x12mm 5mm Spacer Main PCB Board Spacers M3x6mm XT60 Clamp Bolts M2 5x5mm M2 5x5mm M2 5x15mm M2 5x5mm M2 5x15mm M2 5x5mm M2 5x15mm M2 5x15mm Canopy Supporter LOCB41 Side view of Main PCB...

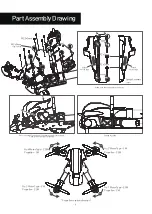
Page 5: ...m J1 J2 J4 USB external port ESC Connector J2 J4 PPM Setup J4 S BUS Setup Side Cover M3 x 8mm Tapping Bolt LOPL45 Attach non slip pad for battery to Main Roof Panel Tie up Velcro Battery Straps using...

Page 6: ...CW Propeller CCW No 3 Motor Type CW Propeller CCW No 1 Motor Type CCW Propeller CW Canopy installed Put front part of canopy on front arm as the picture shows Then press rear part of canopy CW CW CCW...

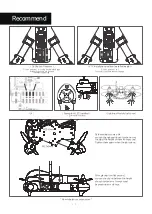
Page 7: ...ide Fix it on position 1 or 2 for easier frequency channel change 1 2 How to balance carbon arms LED Module is optional M2 5x5mm M2 5x5mm By loosening screws a bit you can change positions of carbon a...

Page 8: ...Please visit www drogen co kr to find out more about us 8 Tel 82 070 5066 1232 Customersupport E mail drogen drogen co kr Contactinformation...

Page 9: ......

Page 10: ......

Reviews: