background image

CHARGER 

INSTRUCTION MANUAL

C1 - XR AC/DC SMART BALANCE CHARGER

15

14

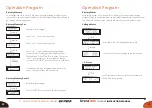
Operation Program

Operation Program

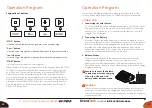
Explanation of Buttons

“STOP” button

It is used to stop the process or go back to the previous step.

“Dec./-“button

It is used to go through the menus and decrease the parameter value.

“Inc./+”button

It is used to go through the menus and increase the parameter value.

“START”button

It is used to enter parameter or start program.
When you want to alter the parameter value in the program, press the START/

ENTER button to make it blink and then change the value by pressing DEC 

and INC button. The value will be stored by re-pressing the START/ENTER 

button. If there is another parameter which can be altered in the same 

screen, on confirming the first parameter value, the next parameter value 

will start to blink and you can set it. When you are ready to start to program, 

press and hold the START/ENTER button for 3 seconds. When you want to 

stop the program or go back to the previous step/screen, press the BATT 

PROG/STOP button once.

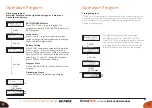
Here are the detailed procedures to make the charger work. All the 

screens and operations will take LiPo-CHARGE program for example

CONNECTION

1  Connecting to Power Source

C1-XR comes with the built in switching power supply. You can connect the 

AC power cord directly to the main AC socket (100-240V AC) or attaching 

directly to 12V car batteries. It is critically important that you use a fully 

charged 13.8V car battery

2  Connecting the Battery

Important!!! Before connecting a battery it is absolutely essential to check 

one last time that you have set the parameters correctly. If the settings are 

incorrect, the battery may be damaged, and could even burst into flames 

or explode. To avoid short circuits between the banana plugs, always 

connect the charge leads to the charger first, and only then to the battery. 

Reverse the sequence when disconnecting the pack.

3  Balance Socket.

The balance wire attached to the battery must be connected to the 

charger with the negative marking. Take care to maintain correct 

polarity!(See the wiring diagram below.) This diagram shows the correct 

way to connect your battery to the AC while charging in the balance charge 

program mode only.

Ensure to connect the battery 


to balance port when charging 


LiPo, Lilon, LiFe and LiHV 


battery under balance mode.

WARNING

Failure to connect as shown in this diagram will damage this charger. To 

avoid short circuit between the charge lead always connect the charge 

cable to the charger first, then connect the battery. Reverse the sequence 

when disconnecting.

Summary of Contents for EV-PEAK C1-XR

Page 1: ...INSTRUCTION MANUAL C1 XR AC DC SMART BALANCE CHARGER...

Page 2: ...operating procedures very intuitive When the battery is working you can directly check the battery capacity battery voltage charging time and internal resistance on the screen C1 XR comes with a memor...

Page 3: ...play Type LCD Cooling system 1 cooling fan Weight 380g Safety timer 1 720min or turn off Discharge current 0 1A 2 0A Discharge power max5w Memory 10 different charge discharge profiles External port 1...

Page 4: ...charge lithium battery varies fast charge reduce the duration of charging whereas store state can control the final voltage of your battery so as to store for a long time and protect useful time of th...

Page 5: ...know the specifications of the battery to be charged or discharged to ensure it meets the requirements of this charger If the program is set up incorrectly the battery and charger may be damaged It c...

Page 6: ...he battery manufacturer Only batteries that are expressly stated to be capable of quick charge are allowed to be charged at rates higher than the standard charge current Connect the battery to the ter...

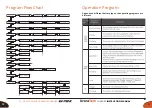
Page 7: ...CHARGER INSTRUCTION MANUAL C1 XR AC DC SMART BALANCE CHARGER 13 12 Program Flow Chart Operation Program Depends on different battery types the operating programs are different...

Page 8: ...ting to Power Source C1 XR comes with the built in switching power supply You can connect the AC power cord directly to the main AC socket 100 240V AC or attaching directly to 12V car batteries It is...

Page 9: ...time status battery type battery cell count charge current battery pack total voltage elapsed time and charge capacity Final voltage when the program ends Capacity cut off ON and value of the set cap...

Page 10: ...a long time and protect useful time of the battery it automatically charge discharge the battery to a safe voltage For different battery type the end voltage are different LiPo 3 8V LiHV 3 85V LiFe 3...

Page 11: ...e setup process Battery Memory Set Battery Meter With this program user can check the battery cell voltage input voltage output voltage inner temperature and external temperature Please connect the ba...

Page 12: ...Setting The charger will operate with default values for the essential user settings when it is powered on for the first time The screen displays the following system settings in sequence and the use...

Page 13: ...04 108 EC Error Message Error Message Incorrect polarity connected Charger and battery connection is wrong Input short circuit Input voltage less than required value Battery total voltage is lower tha...

Page 14: ...harger If it is over one year since the purchase date an appropriate cost will be charged users need bear the transportation cost back and forth The warranty does not cover incorrect installation comp...

Page 15: ...Please Contact Dronetech NZ Email support dronetech co nz Phone 09 836 6088 www dronetech co nz...

Reviews: