Manual, Ultra High Sensitivity Aerosol Spectrometer (UHSAS)
DOC-0210 Rev E-4
2 8
© 2017 DROPLET MEASUREMENT TECHNOLOGIES
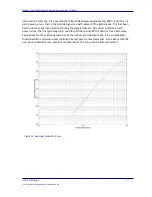
In principle, if all the relative gains are known accurately, and the calibration curve is known, the
instrument need only be calibrated in an absolute sense at one point—at any point, in fact. In
practice it is best to use a few trusted particles. For factory calibration, the NIST SRM 1963 100
nm standard reference material is used to fix the calibration at one point. Along with the
relative gains and calibration curve, the instrument is then calibrated over its range. Other
points in the instrument’s range are checked for accuracy with reference particles such as the
NIST SRM 1691 269 nm.
In some cases, the user may have preferred particles to use for calibration. In this case as many
particles as needed may be used. If the particles do not all fall on the pre-set instrument
calibration curve, the calibration curve is altered slightly to ensure that the particles return
results that are the stated particle sizes. The information representing signal size for a given
particle size is entered in the software and is referred to as a calibration reference point.
Whenever changes are made to the relative gain parameters, the calibration curve, or the
calibration reference points, the new parameters are used when the next bin map is generated
and committed to the instrument.
5.2 Calibration Procedure
All calibration is performed from the
Calibration
tab on the UHSAS screen. To access this tab,
the instrument needs to be in Calibration mode. Users must enter a password on the
Configuration
tab to put the instrument in this mode.
5.2.1
Reasons for Calibration
The calibration curve is shown on the
Calibration Curve
sub-tab. This curve may need to be
altered from the pre-set values in order to accommodate several possible inconsistencies:
•
Particles that have been inconsistently sized with other methods
•
Nonlinearities in the instrument’s detection electronics
•
Improved empirical data on the non-power-law portion of the curve
It may also be necessary to recalibrate the size scale of the UHSAS. Some reasons for this
include:
•
The laser power has dropped and cannot be fully restored
•
Internal relative calibration has degraded
•
Other types of particles (not PSL) with a different index of refraction are being used
•
The calibration must agree with previously used standard materials
The following sections outline the calibration process. A description of additional features on
the
Calibration
tab is presented in section 13.0.
5.2.2
Step One: Relative Gain Calibration
1)
If you haven’t already done so, commit a size histogram using the
Commit
button.


