WJ-8611 DIGITAL VHF/UHF RECEIVER
MAINTENANCE 6-3
3.
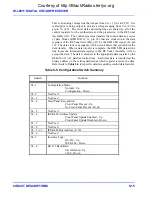
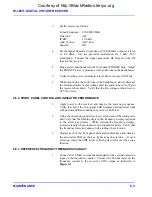
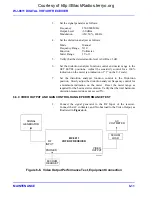
Set the receiver as follows:
Tuned Frequency: 250.00000 MHz
Detection:
AM
IF BW:
10.0 kHz
Gain Control:
AGC Fast
Squelch:
Off
4.
Set the Signal Generator to produce a 250.000 MHz output at a level
of -90 dBm. Set the generator modulation for 1 kHz, 50%
modulation. Connect the signal generator's RF Output to the RF
Input of the receiver.
5.
Plug a stereo headphone into the front panel PHONES Jack. Adjust
the PHONES Level to produce a clear audio tone in the headphones.
6.
Verify that the power consumption level does not exceed 50 Watts.
7.
While monitoring the audio tone in the headphones, slowly decrease
the autotransformer output voltage until the audio tone cuts off, and
the receiver shuts down. Verify that the line voltage at shut down is
90 VAC or less.
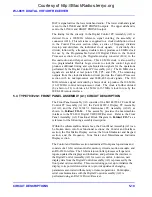
6.6.2 FRONT PANEL CONTROL AND INDICATOR PERFORMANCE
1.
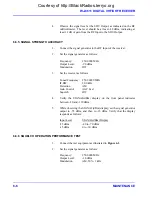
Apply power to the receiver, and observe the power-up sequence.
Verify that all of the front panel LED displays and indicators light
with uniform brilliance during the power-up LED test.
2.
Using the numeric keypad arrow keys, select each of the tuning rates
and verify that the flashing digit in the frequency display responds
to the arrow key presses. While viewing the frequency display,
rotate the tuning wheel clockwise and counterclockwise. Verify that
the frequency tunes in response to the tuning wheel rotation.
3.
Operate each of the front panel dedicated control keys and observe
the associated LED on the key lights at each selection. At each
selection, rotate the EDIT knob, verifying its control over the active
function.
6.6.3 REFERENCE FREQUENCY TIMEBASE ACCURACY
1.
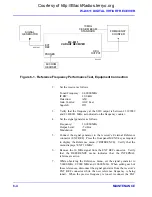
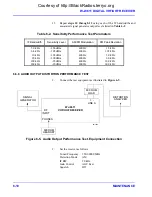
Connect the 10 MHz cesium beam standard to the external reference
input on the frequency counter. Connect the 50-ohm input on the
frequency counter to the receiver’s SDU output, as illustrated in
Figure 6-1
.
Courtesy of http://BlackRadios.terryo.org
Summary of Contents for WJ-8611
Page 3: ...A B blank Courtesy of http BlackRadios terryo org...
Page 4: ...THIS PAGE INTENTIONALLY LEFT BLANK Courtesy of http BlackRadios terryo org...
Page 19: ...1 i SECTION 1 GENERAL DESCRIPTION Courtesy of http BlackRadios terryo org...
Page 20: ...1 ii THIS PAGE INTENTIONALLY LEFT BLANK Courtesy of http BlackRadios terryo org...
Page 29: ...2 i SECTION 2 INSTALLATION Courtesy of http BlackRadios terryo org...
Page 30: ...2 ii THIS PAGE INTENTIONALLY LEFT BLANK Courtesy of http BlackRadios terryo org...
Page 47: ...3 i SECTION 3 LOCAL OPERATION Courtesy of http BlackRadios terryo org...
Page 48: ...3 ii THIS PAGE INTENTIONALLY LEFT BLANK Courtesy of http BlackRadios terryo org...
Page 85: ...4 i SECTION 4 REMOTE CONTROL Courtesy of http BlackRadios terryo org...
Page 86: ...4 ii THIS PAGE INTENTIONALLY LEFT BLANK Courtesy of http BlackRadios terryo org...
Page 119: ...5 i SECTION 5 CIRCUIT DESCRIPTIONS Courtesy of http BlackRadios terryo org...
Page 120: ...5 ii THIS PAGE INTENTIONALLY LEFT BLANK Courtesy of http BlackRadios terryo org...
Page 143: ...6 i SECTION 6 MAINTENANCE Courtesy of http BlackRadios terryo org...
Page 144: ...6 ii THIS PAGE INTENTIONALLY LEFT BLANK Courtesy of http BlackRadios terryo org...
Page 167: ...7 i SECTION 7 REPLACEMENT PARTS LIST Courtesy of http BlackRadios terryo org...
Page 168: ...7 ii THIS PAGE INTENTIONALLY LEFT BLANK Courtesy of http BlackRadios terryo org...
Page 243: ...A i APPENDIX A 8611 SM SIGNAL MONITOR OPTION Courtesy of http BlackRadios terryo org...
Page 244: ...A ii THIS PAGE INTENTIONALLY LEFT BLANK Courtesy of http BlackRadios terryo org...
Page 267: ...FP i FOLDOUTS Courtesy of http BlackRadios terryo org...
Page 268: ...FP ii THIS PAGE INTENTIONALLY LEFT BLANK Courtesy of http BlackRadios terryo org...
Page 298: ...Courtesy of http BlackRadios terryo org...


