WJ-8611 DIGITAL VHF/UHF RECEIVER
6-14 MAINTENANCE
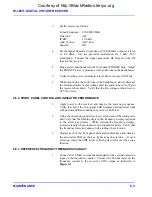
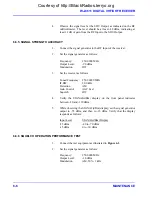
Tuned Frequency 20.00000 MHz
Detection
Mode
AM
IF BW
200 kHz
Gain Control
AGC Fast
Squelch
On
7.
Set the signal generator to produce a 20.000 MHz CW signal, with
an output level of -60 dBm.
8.
Observe the signal level at the SDU Output, as indicated on the RF
millivoltmeter. The level should be at least -48 dBm, indicating at
least 12 dB of gain from the RF Input to the SDU Output.
9.
Return the signal generator to 20.0000 MHz.
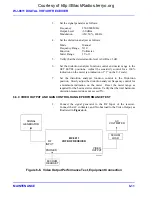
receiver, remove connector A3A2P1 from the J2 connector on the
Digital Assembly. Using the oscilloscope, monitor the signal at the
center pin of A3A2P1. Verify that the signal is present. Verify that
a 250 kHz ±1 kHz sinewave is present. The amplitude of the signal
will be 0.2V peak-to-peak or less.
11.
Reconnect A3A2P1 to the J2 connector.
12. From the underside of the receiver, remove the A3A2P2 connector
from J4 on the Digital Assembly (A2). Using the oscilloscope,
check the signal at the center pin of A3A2P2. The signal should be
a 100 MHz sinewave at a level of from 2 to 2.5 V peak-to-peak.
13. Reconnect A3A2P1 to the J2 connector. [When A3A2P2 is
disconnected, the Digital Assembly is totally disabled. After it is
reconnected, perform a COLDSTART power-up to ensure a reliable
restart of the control processor. Power the receiver off. While
holding the “CE” key pressed, power the receiver on. When the
message “COLDSTART!” is displayed, release the “CE” key.]
14. If the results obtained in
steps 1 through 13
are not as indicated,
verify the control link from the Digital Assembly. From the SETUP
menu, set the receiver to perform an F1-F2 scan between 20 and
1000 MHz. Set the step size to 100 kHz. Set the Squelch to ON.
Press the SCAN key to initiate the scan.
Courtesy of http://BlackRadios.terryo.org
Summary of Contents for WJ-8611
Page 3: ...A B blank Courtesy of http BlackRadios terryo org...
Page 4: ...THIS PAGE INTENTIONALLY LEFT BLANK Courtesy of http BlackRadios terryo org...
Page 19: ...1 i SECTION 1 GENERAL DESCRIPTION Courtesy of http BlackRadios terryo org...
Page 20: ...1 ii THIS PAGE INTENTIONALLY LEFT BLANK Courtesy of http BlackRadios terryo org...
Page 29: ...2 i SECTION 2 INSTALLATION Courtesy of http BlackRadios terryo org...
Page 30: ...2 ii THIS PAGE INTENTIONALLY LEFT BLANK Courtesy of http BlackRadios terryo org...
Page 47: ...3 i SECTION 3 LOCAL OPERATION Courtesy of http BlackRadios terryo org...
Page 48: ...3 ii THIS PAGE INTENTIONALLY LEFT BLANK Courtesy of http BlackRadios terryo org...
Page 85: ...4 i SECTION 4 REMOTE CONTROL Courtesy of http BlackRadios terryo org...
Page 86: ...4 ii THIS PAGE INTENTIONALLY LEFT BLANK Courtesy of http BlackRadios terryo org...
Page 119: ...5 i SECTION 5 CIRCUIT DESCRIPTIONS Courtesy of http BlackRadios terryo org...
Page 120: ...5 ii THIS PAGE INTENTIONALLY LEFT BLANK Courtesy of http BlackRadios terryo org...
Page 143: ...6 i SECTION 6 MAINTENANCE Courtesy of http BlackRadios terryo org...
Page 144: ...6 ii THIS PAGE INTENTIONALLY LEFT BLANK Courtesy of http BlackRadios terryo org...
Page 167: ...7 i SECTION 7 REPLACEMENT PARTS LIST Courtesy of http BlackRadios terryo org...
Page 168: ...7 ii THIS PAGE INTENTIONALLY LEFT BLANK Courtesy of http BlackRadios terryo org...
Page 243: ...A i APPENDIX A 8611 SM SIGNAL MONITOR OPTION Courtesy of http BlackRadios terryo org...
Page 244: ...A ii THIS PAGE INTENTIONALLY LEFT BLANK Courtesy of http BlackRadios terryo org...
Page 267: ...FP i FOLDOUTS Courtesy of http BlackRadios terryo org...
Page 268: ...FP ii THIS PAGE INTENTIONALLY LEFT BLANK Courtesy of http BlackRadios terryo org...
Page 298: ...Courtesy of http BlackRadios terryo org...


