background image

English

I N STA LLAT IO N M AN UAL

 The concentric system is constructed from (the flue spigot of) the appliance.
If, due to constructional circumstances, the concentric system is placed first, it is possible to connect the  appliance 
by means of a telescopic pipe piece.

5.8.2 Construction of the concentric system

Depending on the configuration of the concentric system, the appliance must be further adjusted with a possible 
restrictor slide and/or air inlet guide.
See Tables 4 and 6 for determining the correct adjustment and section 'Adjustment of the appliance' for the 
method of working.
 
The concentric system with wall or roof terminal has to comply with the following conditions:

In appendix 2, table 4 or 5 you can find whether a concentric pipe should be connected and what the 
minimum vertical length would have to be.

Determine the permissibility of the required configuration.

 
When using a 

wall terminal (C11)

 the following applies:

The total vertical pipe length, when using a wall terminal, may have a maximum length that can be found in 
appendix 2, table 4.

The minimum vertical pipe length, when using a wall terminal, can be found in appendix 2, table 4.

The total horizontal pipe length, when using a wall terminal, may have a maximum length that can be found 
in appendix 2, table 4 (excluding wall terminal; see appendix 3, fig. 5).

 
When using a 

roof terminal (C31)

 the following applies:

The construction of the chosen system, when using a roof terminal, must be permissible according to 
Appendix 2, Table 5 (See the method of working described below).

 
The working method below indicates how the permissibility is determined of a concentric system when using a 
roof terminal.
1) Count the number of 45° and 90° bends required (15° and 30° bends are also allowed).
2) Count the total number of whole metres of horizontal pipe length.
3) Count the total number of metres of vertical and/or sloping pipe length (roof terminal excluded).
4) In the first 2 columns of Table 5, look for the number of bends required and the total horizontal pipe length.
5) In the top row of Table 5, look for the required total vertical and/or sloping pipe length.
6) A box with a letter means that the chosen concentric system is permitted.
7) Use Table 6 to determine how the appliance should be adjusted.

5.8.3 Placing the concentric system

!Caution

Maintain a distance of at least 50 mm between the outside of the concentric system and the walls and/or the 
ceiling (see section 5.4). If the system is built in (for instance) a cove, it should be made with non combustible, 
heat-resistant material all around it.

Use heat-resistant insulation material when passing through combustible material.

Create a terminal for the concentric system with the following diameters:
- The pipe di25 mm for a passage through non combustible material (see Appendix 3, fig. 40).
- The pipe di200 mm for a passage through combustible material. Insulate the surrounding free 
space with at least 60 mm mineral wool (see Appendix 3, fig. 41).

The rosette of the wall terminal is too small to seal the opening in case of passage through combustible 
material. That is why a heat-resistant intermediate plate of sufficient size should first be mounted to the wall. 
Then, the rosette is mounted on the intermediate sheet.

 
The roof terminal can end in a sloping and a flat roof.
The roof terminal can be supplied with an adhesive plate for a flat roof or with a universally adjustable tile for a 
sloping roof.
 

!Caution

Some heat-resistant insulation materials contain volatile components that will spread an unpleasant smell for a 
prolonged time; these are not suitable.
 
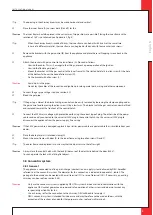
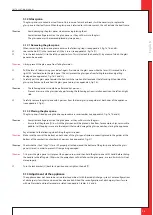
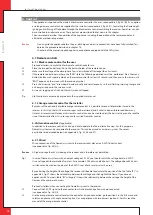
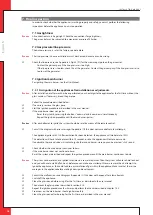
Place the concentric system as follows:

Ø

Build the system up from (the flue spigot of) the appliance.

Ø

Connect the concentric pipe pieces and, if necessary, the bend(s).

Ø

On each connection, apply a clip binding with silicon sealing ring.

10

Summary of Contents for Metro 200XT

Page 1: ...E n g l i s h Store this document in a safe place Metro 200XT RCH Metro 200XT Tunnel RCH Installation manual DRU 686484 EN US 0420 8 G20 G25 G25 3 Natural gas EN 959 100 05 EN...

Page 2: ...the chimney breast 5 7 Placing the control hatch 5 8 Concentric system 5 9 Connection to an existing chimney C91 5 10 Additional instructions 5 11 Construction frame 5 12 Glass panes 5 13 Adjustment...

Page 3: ...ent system or DRU CM system the accompanying installation manual should also be read completely and carefully before installation work is started The following symbols are used in the manuals to indic...

Page 4: ...wiring Place heat resistant electrical wiring away from the appliance and as low as possible in the chimney breast This has to do with the temperature development in the chimney breast Only use the fl...

Page 5: ...ally by means of the remote control In case of switching on manually the appliance will first return to full load Caution The appliance s control unit is characterized by stringent safety requirements...

Page 6: ...ection may only be mounted vertically so that the gas hose can be connected vertically at the bottom The gas connection is permitted in a zone blue hatched area in the figure To the left and right of...

Page 7: ...to account The minimum construction measurements according to Appendix 3 Fig 1 and 2 The construction height of the appliance Provide a gas connection at the location For details see section 5 2 Make...

Page 8: ...nimum 30 cm distance between the top of the ventilation hole outgoing and the ceiling of the house The measurements of the glass pane so that it can be placed removed after placing the chimney breast...

Page 9: ...t of the control hatch Connect the 230V mains voltage with protective earth using the correct type of plug The other side of the power cable can be easily connected to the universal 230V plug in the c...

Page 10: ...ngth 3 Count the total number of metres of vertical and or sloping pipe length roof terminal excluded 4 In the first 2 columns of Table 5 look for the number of bends required and the total horizontal...

Page 11: ...ide by means of four screws Caution When using the wall terminal place the terminal with a downward slope of 1 cm metre towards the outside in order to prevent rain water from raining in 5 9 Connectio...

Page 12: ...frame of of this appliance can be adapted from the 4S setting to the 3S setting see appendix 3 fig 2 and 6 The 3S setting allows the bottom side of the pane to connect to the floor or the platform Cau...

Page 13: ...t and right side Carefully remove the glass pane with 2 persons from the lower glass pane guides at both sides of the appliance see appendix 3 fig 8 5 12 2 Placing the glass pane The glass pane is fit...

Page 14: ...ermiculite plate consisting of 4 sections in the appliance as indicated see appendix 3 fig 18b Plate numbers 1 2 3 and 4 are intended for the Metro 200XT FRONT and plate numbers 1 2 5 and 6 for the Me...

Page 15: ...can influence the flame picture by moving the vermiculite Caution The burner deck has to remain covered with vermiculite in order to prevent reduction of the burner s life span Fill the burner and the...

Page 16: ...emote control it is possible to read all information stored in the receiver In this way the last 20 error messages can be retrieved and it will also be possible to read how many times an error occurre...

Page 17: ...e by means of an RJ45 plug according to the instructions in the manual that is supplied with this module Now follow the steps described in the modbus protocol manual It is available from the supplier...

Page 18: ...e until the main burner ignites Caution After each attempt to ignite the system should be reset by means of the remote control Consult the diagram with error messages Appendix 1 if this does not succe...

Page 19: ...tion of the main burner does not comply with the above mentioned requirements 7 4 Flame picture The flame picture can only really be assessed when the appliance has been burning for several hours Vola...

Page 20: ...l against unintended ignition by other wireless remote controls such as car keys and garage door openers Point out the 230 Volt connection Instruct the user about the appliance and the remote control...

Page 21: ...ctly Ionization pin blocked measure ionization flow when 0 and 1 8 uA Ionization pin defective measure ionization current when 0 Make sure the connectors of the communication cable make proper contact...

Page 22: ...defective Diff pressure hoses leak Diff pr sensor defective Ctrl signal cable defective Concentric system defective and or leaking ESYS defective burner device Premature interruption ignition cycle al...

Page 23: ...lite tray Glow material Remote control Mains lead Control hatch Back up self tapping screws for benefit of glass pane assembly Key bolts Hexagonal nut M8Washer M8 Compression fitting 15 mm x G3 8 Sock...

Page 24: ...ar mbar mm mm kW kW kW kW Type of heat output room temperature control Single stage heat output no room temperature control Two or more manual stages no room temperature control With mechanic thermost...

Page 25: ...er of meters horizontal pipe length excluding wall terminal 0 4 Table 4 Conditions for setting the appliance See Figure 5 Air inlet guide N A Restrictor slide N A Distance of restriction in mm N A 1 m...

Page 26: ...Air inlet guide N A Table 6 Conditions for the adjustment of the appliance with a roof terminal Restrictor slide N A Distance restrictor in mm N A G20 G25 3 Caution In case of a roof terminal without...

Page 27: ...ndix 3 Figures 27 430 1900 min 1026 max 1076 50 465 230 30 474 min 214 max 264 38C 2290 3 1964 200 130 2215 B B Metro 200XT min 1026 max 1076 1900 430 50 min 214 max 264 474 467 30 30 1964 200 130 221...

Page 28: ...2 min 50 max 100 min 467 Metro 200XT RCH min 471 Metro 200XT Tunnel RCH 1968 min 1675 V Tot min 2x 260cm 2 B A min 450 min 450 C 38c 2292 4 min 450 min 1000 C 2 2 B 2 2 A PowerVent min 280 min 230 max...

Page 29: ...E n g l i s h INSTALLATION MANUAL 29 C G F D A E H B 38C 1747 b 0 38C 1868 d 0 4 3...

Page 30: ...E n g l i s h INSTALLATION MANUAL 30 0 4m 0 8 4m 38C 744ZW 1x90 4x M O N 2 4S 3S 38C 2153 0 6 5...

Page 31: ...E n g l i s h INSTALLATION MANUAL 31 X 3 1 T U 2 38C 2148 0 38C 2149 0 7b 7a...

Page 32: ...E n g l i s h INSTALLATION MANUAL 32 38C 2295 0 D C 8...

Page 33: ...E n g l i s h INSTALLATION MANUAL 33 38p 0638 0 38P 0432 38p 0639 0 38P 0434 38p 0022 38P 0608 38P 0028 1 38P 0609 13 9 10 14 11 15 12 16...

Page 34: ...E n g l i s h INSTALLATION MANUAL 34 38p 0627 2 A F G H E D K L J I B C 2x 2x 17...

Page 35: ...E n g l i s h INSTALLATION MANUAL 35 2 3 4 1 B 38c 2297 0 1 2 3 5 4 6 6 5 Front 16x Tunnel 14x Front Tunnel 38p 0628 1 38p 0629 1 A 18a 18b 19...

Page 36: ...E n g l i s h INSTALLATION MANUAL 36 38p 0630 1 B C 38p 0631 0 E D 21 20...

Page 37: ...E n g l i s h INSTALLATION MANUAL 37 38p 0632 1 F G 22...

Page 38: ...E n g l i s h INSTALLATION MANUAL 38 38p 0633 1 G H 38p 0634 1 I J 24 23...

Page 39: ...E n g l i s h INSTALLATION MANUAL 39 38p 0635 1 K 38p 0636 1 L C 26 25...

Page 40: ...E n g l i s h INSTALLATION MANUAL UK 38p 0637 1 II I III I II III 27...

Page 41: ...E n g l i s h INSTALLATION MANUAL 41 2x W 6x 38C 2294 0 V 2 3 4 1 B 38c 2296 0 1 2 3 5 4 6 6 5 Front 16x Tunnel 14x Front Tunnel 38p 0641 1 Q Q D 28 29 30...

Page 42: ...E n g l i s h INSTALLATION MANUAL 42 38C 1871 0 Modbus WiFi Router W R D B O A 0 3 V L N L N 0 3V C D B 38P 0790 0 max 0 5A 250VAC 30VDC max 80W 230VAC A PowerVent 36 35...

Page 43: ...i s h INSTALLATION MANUAL 43 1 98 Off 1 98 Off B2 B1 B U B U C B D 38p 0319 2 P1 P2 G IN A Min 12 5 mm Min 12 5 mm 38C 2321 0 Min 100 mm Min 100 mm Min 60 mm Min 60 mm Min 0 mm Min 0 mm 38C 2311 0 37...

Page 44: ...E n g l i s h DRU Verwarming B V The Netherlands Postbus 1021 NL 6920 BA Duiven Ratio 8 NL 6921 RW Duiven EN...

Reviews: