English
IN ST AL LA TI ON MAN UA L
UK
F12
F13/F14
F15
F15
(PowerVent®)
F16
F17
ESYS is not released
( no ionisation <0.8 µA) Flame loss
when only the main burner (F13) is on
or both burners (F14) are on
No burner device
(see "C" in appendix 3, fig. 38)
High limit error
Fan doesn't start,
appliance doesn't spark
Fan starts,
appliance doesn’t spark
Hardware Error ESYS
3 subsequent, unsuccessful
ignition cycles
Error messages
ESYS is in hard-lock
Ionisation pin short-circuited
Ionisation current too critical
(0.8 ≤ Iionisation < 1.8 µA)
Suffocation due to poor flue
gas channel
Suffocation when using
PowerVent
®
24 hour check control
(only in case of F13)
Gas has fallen away
Gas control defective
(see "A" in app. 3, fig. 38)
Burner device came loose
from burner device
Burner device incorrectly
mounted
Pins on the connector on the
gas control are bent
High limit bridge defective
Fan defective
Diff. pressure hoses leak
Diff. pr. sensor defective
Ctrl signal cable defective
Concentric system defective
and/or leaking
ESYS defective
(burner device)
Premature interruption ignition cycle,
also see F08
Wait half hour until ESYS
resets itself
Remove chips, vermiculite or
glow material lying against
the ionisation pin
Increase ionisation current to ≥ 1.8 µA
by rearranging vermiculite and
removing chips and dust from the
burner openings
Check the concentric system
Check the setting of the appliance
Check the pressure setting of
the PowerVent
®
system
Reset with remote control
(consult Powervent
®
manual)
Check gas supply
Replace the gas control
Attach the burner device
Mount the burner device
correctly
Bend them straight
Check High limit bridge ESYS
Replace fan
Check connections and hoses
Replace/repair
Replace diff. pr. sensor
Replace control cable
Check concentric system for
leaks and defects
Repair/replace
Replace ESYS (burner device)
After 30 min. F17 can be reset
w. mains voltage on appliance,
see F08
Error code
Problem
Possible cause
Remedy
Summary of Contents for Metro 200XT
Page 29: ...E n g l i s h INSTALLATION MANUAL 29 C G F D A E H B 38C 1747 b 0 38C 1868 d 0 4 3...
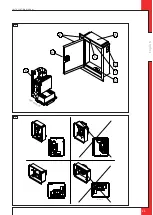
Page 31: ...E n g l i s h INSTALLATION MANUAL 31 X 3 1 T U 2 38C 2148 0 38C 2149 0 7b 7a...
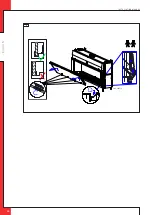
Page 32: ...E n g l i s h INSTALLATION MANUAL 32 38C 2295 0 D C 8...
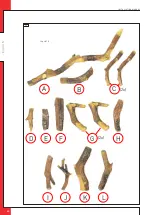
Page 34: ...E n g l i s h INSTALLATION MANUAL 34 38p 0627 2 A F G H E D K L J I B C 2x 2x 17...
Page 36: ...E n g l i s h INSTALLATION MANUAL 36 38p 0630 1 B C 38p 0631 0 E D 21 20...
Page 37: ...E n g l i s h INSTALLATION MANUAL 37 38p 0632 1 F G 22...
Page 38: ...E n g l i s h INSTALLATION MANUAL 38 38p 0633 1 G H 38p 0634 1 I J 24 23...
Page 39: ...E n g l i s h INSTALLATION MANUAL 39 38p 0635 1 K 38p 0636 1 L C 26 25...
Page 40: ...E n g l i s h INSTALLATION MANUAL UK 38p 0637 1 II I III I II III 27...


