4
English
s a x o
s l
80 -
i n s t r u c t i o n
f o r
i n s ta l l at i o n
➠
place the wood set exactly as described;
➠
make sure thermocouple 2 and the space around it are kept free;
➠
make sure the pilot burner and the space around it is kept free;
➠
avoid dirt in gas pipes and connections;
➠
mount a gas tap directly next to the appliance;
➠
check the connections for gastightness before using the appliance;
➠
use heat resistant electrical connectors;
➠
place the electrical connections in such a way that they are free from the appliance;
➠
avoid blocking of the pressure equalization hatch(es) on top of the appliance;
➠
check whether the pressure equalization hatch(es) fit well onto the sealing surface, prior to building in the appliance;
➠
replace torn or broken panes;
➠
do not ignite the appliance until it is fully installed.
4. Instructions
Observethefollowingitemsduringinstallationinordertoguaranteeaproperandsafeoperationoftheappliance:
➠
mount the control box supplied as low as possible;
➠
avoid that the ignition cable runs over the receiver;
➠
avoid that the ignition cable touches or crosses the antenna;
➠
avoid that the ignition cable runs alongside metal parts, in order to prevent weakening of the spark;
➠
properly finish the edges in case of a tight construction;
➠
do not apply plaster on or over the flanges;
➠
avoid damaging the panes during removal/placing;
➠
clean the panes before you use the appliance, in order to prevent dirt from burning in the glass.
➠
make sure that the wires of thermocouple 2 cannot come into contact with hot parts.
5.
Removing the packaging
Notethefollowingitemswhenremovingthepackaging:
➠
Check the appliance for damages during transport.
➠
If necessary, contact DRU Service.
Afterremovingthepackaging,youshouldhavethefollowingcomponents:
- Socketspanner;youwillfinditinthespacebetweentheassemblyframeandthecombustionchamber;
- Decorativestrips;youwillfindthemintheabovementionedspaceaswell;
- Frontpane;youwillfinditinthesameboxastheappliance-providedwithprotectivecorners;
- Boxcontainingparts;youwillfinditinthecombustionchamber.
➠
Remove the box containing parts from the combustion chamber.
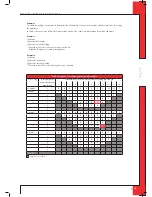
Inappendix1/table4youcanseewhichpartsyoushouldhaveafterremovingthepackaging.
➠
Contact DRU Service if you do not have all the parts after you finished removing the packaging.
➠
Dispose packaging in accordance with local regulations.
6. Installation
Readthismanualcarefullytoensureaproperandsafeoperationoftheappliance.
!Caution
Install the appliance in the order described in this chapter.
6.1 Regulations
- Observetheapplicable(installation)regulations.
- Observetheregulations/instructionsinthismanual.
6.2 Type of gas
Thetypeplateindicatesforwhichtypeofgas,gaspressureandforwhichcountrythisapplianceisintended.Thetype
plateisconnectedtoachain.Itshouldremainconnectedtothechain.
Caution
Check whether the appliance is suitable for the type of gas and the gas pressure used at the location.
6.3 Gas connection
Placeagastapinthegasconnection,closetotheappliance.
Caution
- Avoid dirt in the gas pipe and the connections;
- Do not turn the gas tap when connecting the gas pipe.
UK
Summary of Contents for Saxo SL 80
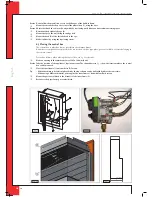
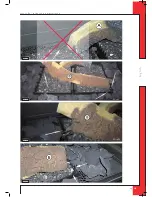
Page 17: ...17 E n g l i s h saxo sl 80 instruction for installation Afb 16c Afb 16d Afb 16e Afb 16f UK...
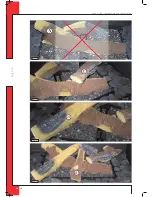
Page 18: ...18 E n g l i s h saxo sl 80 instruction for installation Afb 16i Afb 16j Afb 16g Afb 16h UK...
Page 27: ...27 saxo sl 80 Notes...
Page 28: ...DRU Verwarming B V The Netherlands Postbus 1021 NL 6920 BA Duiven Ratio 8 NL 6921 RW Duiven...

