22
Laminating a Single
Unmounted
Image
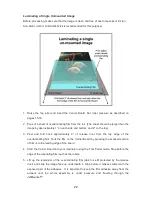
Before processing, make sure that the image is clean and free of dust or specks of lint (an
Anti-Static cloth or Anti-Static Wisk is recommended for this purpose).
1. Raise the top roller and insert the Carrier Board. Set roller pressure as described on
pages 15-16.
2. Pre-cut a sheet of overlaminating film from the roll. (The sheet should be larger than the
image by approximately 1” on each side and bottom, and 2” on the top).
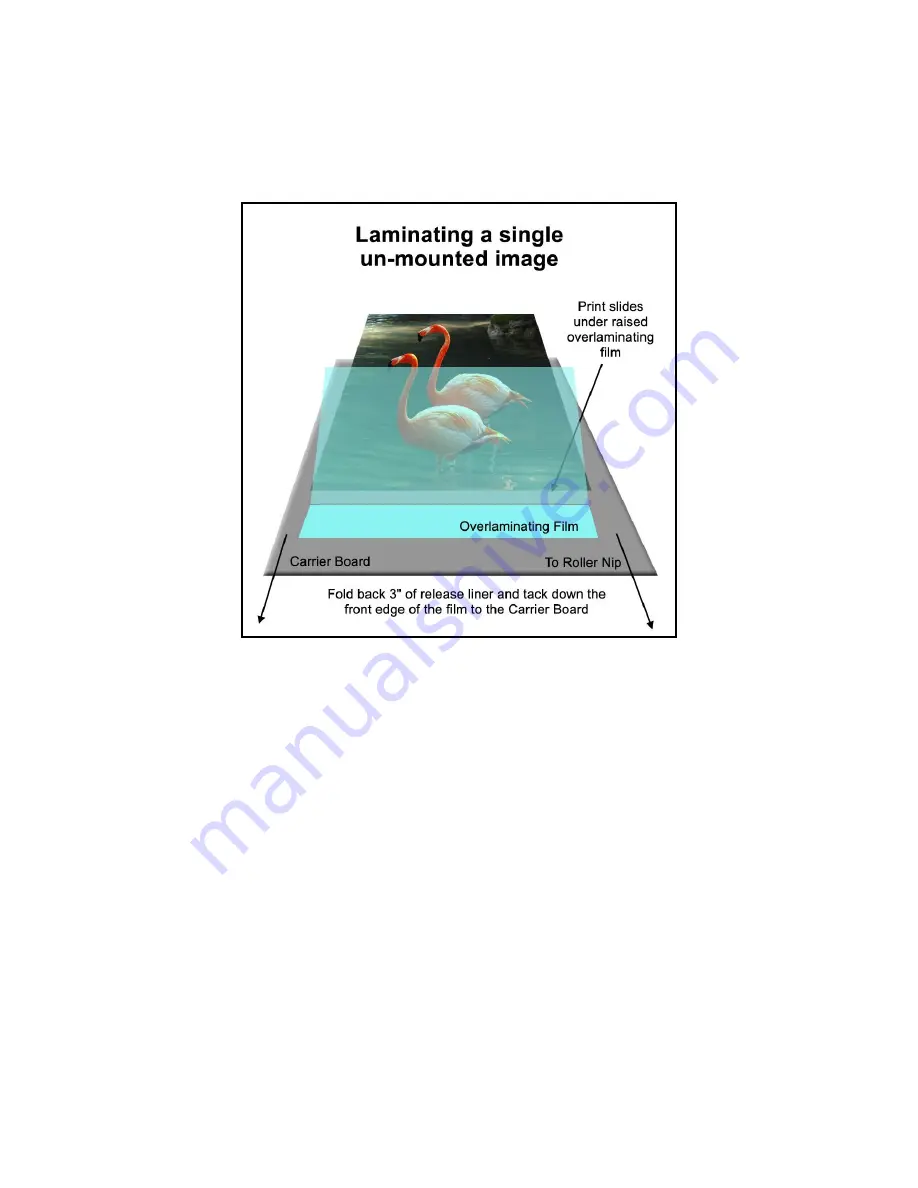
3. Peel and
fold back approximately 2” of release liner from the top edge of the
overlaminating film. Tack the film on the Carrier Board by pressing the exposed section
of film onto the leading edge of the board.
4. Start the Carrier Board into your laminator using the Foot Pedal mode. Stop before the
edge of the laminating film reaches the rollers.
5. Lift up the remainder of the overlaminating film (which is still protected by the release
liner) and slide the image face up underneath it. Stop before it makes contact with the
exposed part of the adhesive. It is important to keep the film adhesive away from the
artwork until the whole assembly is under pressure and traveling through the
Jet
Mounter
™
.


