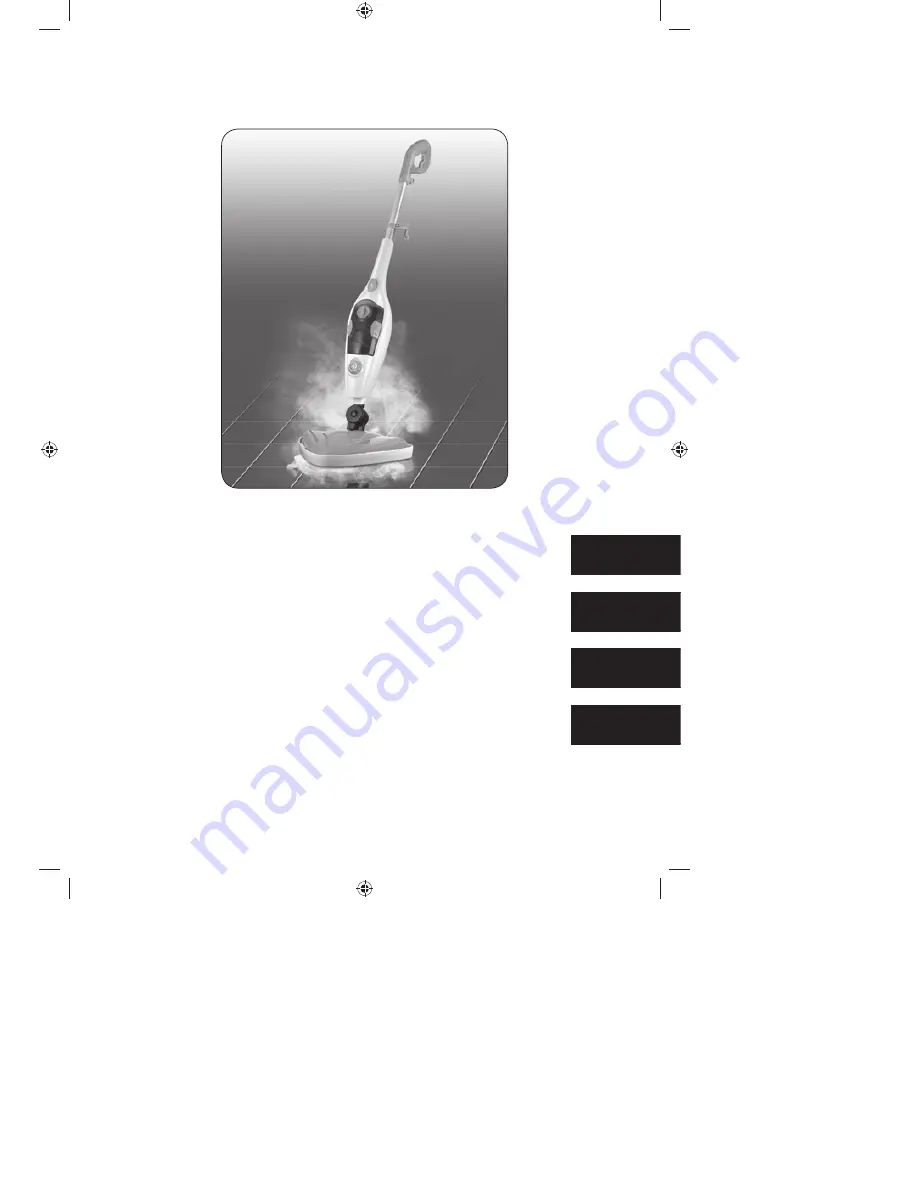
background image

Z 08336_V3

Gebrauchsanleitung

ab Seite 3

Instruction manual

starting on page 16

Mode d’emploi

à partir de la page 30

Handleiding

vanaf pagina 44

DE

GB

NL

FR

08336_DE-GB-FR-NL_V3.indb   1

08336_DE-GB-FR-NL_V3.indb   1

12.11.2013   09:41:39

12.11.2013   09:41:39

Summary of Contents for JJ-SC-005B

Page 1: ...tung ab Seite 3 Instruction manual starting on page 16 Mode d emploi à partir de la page 30 Handleiding vanaf pagina 44 DE GB NL FR 08336_DE GB FR NL_V3 indb 1 08336_DE GB FR NL_V3 indb 1 12 11 2013 09 41 39 12 11 2013 09 41 39 ...

Page 2: ...2 08336_DE GB FR NL_V3 indb 2 08336_DE GB FR NL_V3 indb 2 12 11 2013 09 41 43 12 11 2013 09 41 43 ...

Page 3: ...g als Handdampfgerät _________________________________________ 12 Nach dem Gebrauch_________________________________________________ 13 Reinigung und Pflege ___________________________________________ 13 Aufbewahrung ________________________________________________ 14 Fehlerbehebung _______________________________________________ 14 Technische Daten _____________________________________________ 15...

Page 4: ... einem Fachmann ob Ihre Bodenbeläge zur Reinigung mit dem Dampfbesen geeignet sind Probieren Sie die Reinigung immer erst an einer kleinen Stelle aus Das Gerät ist nicht geeignet für die Reinigung von unversiegelten Holzfußböden weichem Kunststoff Holzmöbeln Leder Synthetische Stoffe Samt oder andere empfindliche Materialien dürfen mit dem Gerät nicht behandelt werden Das Gerät ist nicht für die V...

Page 5: ...elektrisches Gerät selbst zu reparieren oder Teile zu ersetzen Bei Defekten darf das Gerät nicht mehr benutzt werden Suchen Sie den nächsten Kundendienst Fachmann auf oder kontaktieren Sie in Schadensfällen den Kundenservice Schalten Sie das Gerät bei Schäden Störungen sofort aus Schließen Sie das Gerät nur an eine vorschriftsmäßig installierte Steckdose mit Schutzkontakten an Die Steckdose muss a...

Page 6: ...ungsmittel oder Zusätze in das Gerät Dadurch können Sie das Gerät zerstören und ein sicheres Arbeiten ist nicht mehr garantiert Richten Sie den Dampf nie länger als ca 10 Sekunden auf eine Stelle Dies kann zu Beschädigungen an der Oberfläche führen Von Oberflächen die mit Wachs behandelt wurden kann das Wachs durch die Hitze und den Dampf entfernt werden Überfüllen Sie den Wassertank nicht Nehmen ...

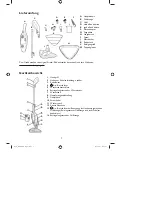
Page 7: ...ng de Geräteübersicht 1 Handgriff 2 Haken zur Kabelaufwicklung drehbar 3 Kabelhalter 4 An Ausschalter 5 Wassertankverschluss 6 Entriegelungstasten des Wassertanks 7 Wassertank 8 Dampfmengeneinstellung 9 Dampfdüse 10 Stromkabel 11 Wasserventil 12 Kontrollleuchten 13 An Ausschalter bei Benutzung als Handdampfgerät ohne Griffstange Bei eingesetzter Griffstange ist dieser Schalter deaktiviert 14 Entri...

Page 8: ...n Spatel I zum Entfernen von hartnäckigen Verschmutzungen z B auf Herden Öfen Abzugshauben Vor dem ersten Gebrauch ACHTUNG Erstickungsgefahr Halten Sie das Verpackungsmaterial von Kindern und Tieren fern 1 Packen Sie alle Teile aus und überprüfen Sie den Lieferumfang auf Vollständigkeit siehe Kapitel Lieferumfang und Transportschäden Falls die Bestandteile Schäden aufweisen sollten verwenden Sie d...

Page 9: ...d her 3 Stecken Sie das Ende der Griffstange in die obere Öffnung der Haupteinheit A Die Griffstange muss hörbar einrasten Zum Abnehmen der Griffstange drücken Sie die Entriegelungstaste 14 und ziehen Sie die Griffstange gleichzeitig heraus 4 Drehen Sie den oberen Haken zur Kabelaufwicklung 2 nach oben und den unteren nach unten und wickeln Sie das Netzkabel um die beiden Haken Um das Netzkabel sc...

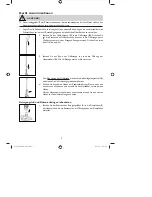
Page 10: ...chzeitig heraus Bodentuch und Teppichgleiter anlegen Das Bodentuch K haftet mittels Klettverschlüsse am Reinigungsfuß Legen Sie es an den Reinigungsfuß an und drücken Sie es fest Nach dem Gebrauch ziehen Sie es einfach vom Reinigungsfuß ab Zum Reinigen von Teppichen legen Sie den Teppichgleiter M flach auf den Boden und stellen Sie den Reinigungsfuß mit Bodentuch in den Teppichgleiter Wassertank f...

Page 11: ... heiß sein Warten Sie daher einige Minuten bis das Tuch die Düse vollständig abgekühlt ist bevor Sie es abnehmen Vorsicht Sachschaden Sehr kalte Glasflächen Fenster im Winter s dürfen mit dem Gerät nicht gereinigt werden Prüfen Sie vor jedem Gebrauch das Bodentuch auf Verschleiß Es darf nicht verwendet werden wenn es sichtbar verschlissen oder beschädigt ist Ihr Bodenbelag könnte beschädigt werden...

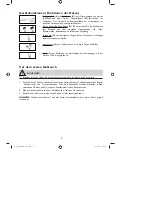
Page 12: ... zurück über den Fußboden Der Boden wird dabei gereinigt 10 Wenn die Kontrollleuchten rot blinken ist im Tank zu wenig Wasser Bevor Sie den Tank auffüllen drücken Sie den An Ausschalter Bevor Sie das Bodentuch auswaschen oder wenn Sie mit der Bodenreinigung fertig sind drücken sie den An Ausschalter und ziehen Sie den Netzstecker aus der Steckdose Ziehen Sie nie am Kabel sondern immer am Stecker 1...

Page 13: ...im Abschnitt Nach dem Gebrauch Nach dem Gebrauch 1 Schalten Sie das Gerät aus und ziehen Sie den Netzstecker 2 Nehmen Sie nach jeder Benutzung den Wassertank aus der Haupteinheit heraus und entleeren Sie ihn in ein Waschbecken 3 Lassen Sie das Gerät und Zubehör vollständig abkühlen 4 Reinigen Sie das Gerät und Bodentuch wenn Sie es benutzt haben wie im Kapitel Reinigung und Pflege beschrieben Rein...

Page 14: ... für Kinder und Tiere unzugänglichen Ort Vor Wiederinbetriebnahme des Gerätes sollte der Wassertank immer auf Restwasser kontrolliert werden und falls nötig vollständig entleert werden Fehlerbehebung Sollte das Gerät nicht ordnungsgemäß funktionieren überprüfen Sie bitte zunächst ob Sie ein Problem selbst beheben können Kontaktieren Sie ansonsten den Kundenservice Versuchen Sie nicht ein defektes ...

Page 15: ...tank ist leer Füllen Sie den Wassertank auf siehe Kapitel Wassertank füllen Ist der Tank nicht richtig in der Haupteinheit eingesetzt Prüfen Sie ihn auf richtigen Sitz Die Düse ist verstopft Reinigen Sie die Düse Technische Daten Modellnummer JJ SC 005B Artikelnummer Z 08336 Stromversorgung 220 240 V 50 Hz 1500 W Schutzklasse grad I IPX4 Kapazität Wassertank max 350 ml ca 20 Minuten Betriebsdauer ...

Page 16: ...r ________________________________________ 25 After use _________________________________________________________ 26 Cleaning and care _____________________________________________ 26 Storage _____________________________________________________ 27 Troubleshooting ______________________________________________ 27 Technical data ________________________________________________ 28 Disposal _________...

Page 17: ... cleaning on a small area first The appliance is not suitable for cleaning unsealed wooden floors soft plastic wooden furniture or leather The appliance may not be used to treat synthetic fabrics velvet or other sensitive materials The appliance is not intended to be used outdoors This device may be used by children ages 8 and over as well as persons with impaired physical sensory or mental capaci...

Page 18: ... the appliance to a properly installed socket with protective earth contacts The socket must also be easily accessible after the appliance has been connected The mains voltage must correspond to the technical data of the appliance Only use proper extension cords whose technical data correspond to those of the appliance Lay the mains cord such that it is not crushed or creased and such that it does...

Page 19: ...r apply the vapour stream to one area for more than approximately 10 seconds Otherwise it could damage the surface Surfaces which have been treated with wax may lose their wax coat due to heat and steam Do not overfill the water tank Use tap or distilled water to fill the appliance Other liquids may cause damage to the appliance Never operate the appliance without water Do not allow the appliance ...

Page 20: ... shopping de Appliance overview 1 Handle 2 Rotatable hook for winding up the cord 3 Cord holder 4 On Off switch 5 Water tank cap 6 Release buttons for the water tank 7 Water tank 8 Steam quantity control 9 Steam nozzle 10 Power cord 11 Water valve 12 Power LEDs 13 On Off switch when used as a handheld steam cleaner without handle bar this switch is deactivated when the handle bar has been inserted...

Page 21: ... and grooves Spatula I for removing stubborn dirt e g on stoves ovens cooking hoods Prior to first use ATTENTION Danger of suffocation Keep the packaging material away from children and animals 1 Unpack all parts and make sure that the product contents are complete see chapter Product contents and check for any damages from transport If any components are damaged do not use them Instead contact th...

Page 22: ...back and forth for this 3 Insert the end of the handle bar in the top opening of the main unit A The handle bar must audibly lock into place To remove the handle bar depress the release button 14 and pull the handle bar out at the same time 4 Turn the top hook for winding up the cord 2 up and the bottom one down and wind the power cord around both hooks In order to quickly unwind the power cord ag...

Page 23: ...me time Attaching the floor pad and carpet cleaning head The floor pad K is attached to the cleaning head with Velcro straps Place it on the cleaning head and push it firmly After use simply pull it off of the cleaning head To clean carpets place the carpet cleaning head M flat on the floor and place the cleaning head with the floor pad in the carpet cleaning head Filling the water tank ATTENTION ...

Page 24: ... after use For this reason wait a few minutes for the cloth nozzle to cool off completely before you remove it ATTENTION Damage to property Do not use the device on very cold glass surfaces Each time before using the appliance check the floor pad for wear It may not be used if it is visibly worn down or is damaged Otherwise it could damage your floor Only use the appliance when it is functional an...

Page 25: ...t the floor pad or once you have finished cleaning the floor push the On Off switch and pull the mains plug out of the socket Never pull on the cord but always on the plug 11 Wait a few minutes for the appliance to cool off before you remove the floor pad Be aware that when turning off the appliance a wet area can form beneath the cleaning head 12 Follow the instructions in the section After use U...

Page 26: ...pliance and pull the mains plug out of the socket and let the appliance cool off completely before you clean it or remove accessories Scalding hazard The floor pad may be very hot shortly after use For this reason wait a few minutes for the cloth to cool off completely before you remove it Never immerse the main unit in water or other liquids Make sure that the main unit the power cord or the powe...

Page 27: ...ise contact the customer service department Do not attempt to repair a defective appliance yourself Problem Potential cause solution The handle and the handlebar do not fit together the handle does not lock into place It is possible that the cable winder becomes twisted at the handle during the production process This prevents the handle from locking into the handlebar Turn the cable winder slight...

Page 28: ...Has the tank been properly inserted in the main unit Check to make sure it is properly seated The nozzle is plugged Clean the nozzle Technical data Model number JJ SC 005B Product number Z 08336 Power supply 220 240 V 50 Hz 1500 W Safety class level I IPX4 Water tank capacity max 350 ml approximately 20 minutes operating time when the tank is full Disposal The packaging material can be recycled Di...

Page 29: ...29 08336_DE GB FR NL_V3 indb 29 08336_DE GB FR NL_V3 indb 29 12 11 2013 09 41 46 12 11 2013 09 41 46 ...

Page 30: ... _______________________________ 39 Après l utilisation ___________________________________________________ 40 Nettoyage et entretien__________________________________________ 40 Rangement __________________________________________________ 41 Suppression des défauts _________________________________________ 41 Données techniques____________________________________________ 42 Élimination __________...

Page 31: ...r si vos revêtements de sol peuvent être nettoyés avec le balai à vapeur Testez toujours le nettoyage sur un petit endroit L appareil ne convient pas au nettoyage de sol en bois non vitrifié en PVC mou ni aux meubles en bois en cuir Les tissus synthétiques le velours et d autres matières sensibles ne doivent pas être traitées avec l appareil L appareil n est pas destiné à une utilisation en plein ...

Page 32: ...r des pièces En cas de défaut l appareil ne doit plus être utilisé Recherchez un service après vente spécialiste le plus proche ou contactez le service après vente en cas de dommages En présence de dommages dysfonctionnements arrêtez immédiatement l appareil Branchez l appareil uniquement à une prise électrique installée selon les règles en vigueur et comportant des contacts protégés Après le bran...

Page 33: ...ez jamais de détergent ou d additif dans l appareil Ceci pourrait détruire l appareil et ne plus garantir la sécurité de travail N orientez jamais la vapeur plus de 10 secondes sur un endroit Sinon ceci pourrait endommager la surface La chaleur et la vapeur peuvent enlever la cire des meubles qui sont traités de cette manière Ne faites pas déborder le réservoir d eau Pour le remplissage utilisez d...

Page 34: ...le de l appareil 1 Poignée 2 Crochet pour enrouler le câble pivotant 3 Porte câble 4 Interrupteur marche arrêt 5 Bouchon du réservoir d eau 6 Touches de déverrouillage du réservoir d eau 7 Réservoir d eau 8 Réglage de la quantité de vapeur 9 Buse de vapeur 10 Câble électrique 11 Robinet d eau 12 Voyants lumineux 13 Interrupteur marche arrêt pour l utilisation comme appareil à main sans barre poign...

Page 35: ...eté dans les joints et les rainures Spatule I pour supprimer les saletés récalcitrantes p ex sur les fourneaux les fours les hottes aspirantes Avant la première utilisation ATTENTION Risque d asphyxie Gardez le matériel d emballage loin des enfants et des animaux 1 Déballez toutes les pièces et vérifiez si la livraison est complète voir chapitre Étendue de la livraison et s il y a des dommages de ...

Page 36: ...z l extrémité de la barre poignée dans l ouverture supérieure de l unité principale A La barre poignée doit émettre un clic Pourretirerlabarrepoignéeappuyezsurlatouchededéverrouillage 14 et retirez en même temps la barre poignée 4 Faites tourner le crochet du haut de l enrouleur de câble 2 vers le haut et le crochet du bas vers le bas et enroulez le câble autour des deux crochets Pour dérouler rap...

Page 37: ...irer l adaptateur de buses appuyez sur le bouton et tirez en même temps l adaptateur pour le sortir Placer le chiffon de sol et le patin à moquettes Le chiffon de sol K adhère au moyen de bandes Velcro sur le pied de nettoyage Placez le sur le pied de nettoyage et appuyez le fortement Après usage retirez le simplement du pied de nettoyage Pour nettoyer des moquettes placez le patin à moquettes M à...

Page 38: ... refroidissement l eau dans le réservoir reste chaude Soyez prudent Coupez toujours l appareil et débranchez la fiche de la prise électrique avant de retirer le chiffon de sol ou de changer de buse ATTENTION Risque d ébouillantement Le chiffon de sol la buse peut être très brûlant pendant et immédiatement après son utilisation Pour cette raison attendez quelques minutes que le chiffon la buse ait ...

Page 39: ...Après avoir tourné le bouton il faut attendre quelques secondes avant que la quantité de vapeur sélectionnée s installe 8 Maintenez l appareil par la poignée et inclinez le légèrement par rapport au sol pour débloquer le blocage standard 9 Poussez le pied de nettoyage lentement d avant en arrière sur le sol Le sol est ainsi nettoyé 10 Lorsque les voyants lumineux clignotent en rouge ceci indique q...

Page 40: ... de la prise électrique Ne tirez jamais par le câble mais toujours par la fiche 8 Attendez quelques minutes que l appareil ait refroidi Ensuite vous pouvez remplacer la buse 9 Suivez les instructions du paragraphe Après l utilisation Après l utilisation 1 Arrêtez l appareil et débranchez la prise électrique 2 Avant chaque utilisation retirez le réservoir d eau de l unité principale et videz le dan...

Page 41: ...atures extrêmes à de fortes variations de température au rayonnement direct du soleil ou à l humidité Rangez l appareil dans un endroit hors gel sec propre frais et inaccessible pour les enfants et les animaux Avant la remise en service de l appareil il faut toujours contrôler si le réservoir d eau contient des résidus d eau et si besoin est le vider totalement Suppression des défauts Si l apparei...

Page 42: ... vide Remplissez le réservoir d eau voir chapitre Remplir le réservoir d eau Est ce que le réservoir est correctement en place dans l unité principale Vérifiez qu il soit bien fixé La buse est bouchée Nettoyez la buse Données techniques Numéro de modèle JJ SC 005B Numéro d article Z 08336 Alimentation électrique 220 à 240 V 50 Hz 1500 W Catégorie degré de protection I IPX4 Capacité du réservoir d ...

Page 43: ... importateur DS Produkte GmbH Am Heisterbusch 1 19258 Gallin Allemagne Tél 49 0 38851 314650 Appel payant Tous droits réservés 08336_DE GB FR NL_V3 indb 43 08336_DE GB FR NL_V3 indb 43 12 11 2013 09 41 48 12 11 2013 09 41 48 ...

Page 44: ...ls handstoomreiniger _________________________________________ 53 Na het gebruik _____________________________________________________ 54 Reiniging en onderhoud _________________________________________ 54 Bewaring____________________________________________________ 55 Oplossing van fouten ___________________________________________ 55 Technische gegevens __________________________________________...

Page 45: ...e reiniging altijd eerst op een kleine plaats Het apparaat is niet geschikt voor de reiniging van onverzegelde houten vloeren zachte kunststof houten meubelen leder Synthetische stoffen fluweel of andere gevoelige materialen mogen niet worden behandeld met het apparaat Het apparaat is niet bestemd voor het gebruik in openlucht Dit apparaat mag door kinderen vanaf de leeftijd van 8 jaar en door per...

Page 46: ... klantenservice Schakel het apparaat meteen uit bij schade storingen Sluit het apparaat alleen aan op een reglementair geïnstalleerd geaard stopcontact Het stopcontact moet ook na de aansluiting goed toegankelijk zijn De spanning moet overeenstemmen met de technische gegevens van het apparaat Gebruik alleen reglementaire verlengsnoeren waarvan de technische gegevens overeenstemmen met die van het ...

Page 47: ... een veilige werking niet meer gegarandeerd Richt de stoom nooit langer dan 10 seconden op een plaats Dit kan leiden tot beschadigingen aan het oppervlak Van oppervlakken die met was werden behandeld kan de was door de hitte en de stoom worden verwijderd Maak de watertank niet te vol Vul de watertank met gedestilleerd water of leidingwater Bij andere vloeistoffen kan het apparaat worden beschadigd...

Page 48: ...t van het apparaat 1 Handgreep 2 Haak voor de snoerwikkeling draaibaar 3 Snoerhouder 4 Aan uit schakelaar 5 Sluiting van de watertank 6 Ontgrendeltoetsen van de watertank 7 Watertank 8 Instelling van de stoomhoeveeleid 9 Stoommondstuk 10 Stroomsnoer 11 Waterventiel 12 Controlelampjes 13 Aan uit schakelaar bij het gebruik als handstoomreiniger zonder grijpstang Als de grijpstang is geplaatst is dez...

Page 49: ...il in voegen en spleten Spatel I voor het verwijderen van hardnekkig vuil bijv op fornuizen ovens dampkappen Voor ingebruikname OPGELET Verstikkingsgevaar Houd het verpakkingsmateriaal weg van kinderen en dieren 1 Pak alle onderdelen uit en controleer het leveringspakket op volledigheid zie hoofdstuk Leveringspakket en transportschade Als er onderdelen schade zouden vertonen mag u deze niet gebrui...

Page 50: ... 3 Steek het uiteinde van de grijpstang in de bovenste opening van de hoofdeenheid A De grijpstang moet hoorbaar vastklikken Om de grijpstang te verwijderen drukt u op de ontgrendeltoets 14 en trekt de grijpstang er tegelijk uit 4 Draai de bovenste haak voor de snoerwikkeling 2 naar boven en de onderste naar beneden en wikkel het elektrische snoer rond de beide haken Om het elektrisch snoer snel t...

Page 51: ...endelclip hoorbaar vastklikt Om de mondstukadapter te verwijderen drukt u op de vergrendelclip en trekt de adapter er tegelijk uit Vloerdoek en tapijtglijder plaatsen De vloerdoek K kleeft met klittenbandsluitingen vast aan de reinigingsvoet Leg hem op de reinigingsvoet en druk hem aan Na gebruik trekt u hem gewoon van de reinigingsvoet Om tapijten te reinigen legt u de tapijtglijder M plat op de ...

Page 52: ...aat is uitgeschakeld komt er nog gedurende enkele seconden hete stoom uit Ook na het afkoelen blijft het water in de tank nog heet Wees voorzichtig Schakel het apparaat steeds uit en trek de stekker uit het stopcontact alvorens de vloerdoek te verwijderen of het mondstuk te vervangen OPGELET Verbrandingsgevaar De vloerdoek het mondstuk kan tijdens en na het gebruik zeer heet zijn Wacht daarom enke...

Page 53: ...n de stoomhoeveelheid kunt u de hoeveelheid stoom verhogen OPMERKING Als u aan de knop hebt gedraaid duurt het nog enkele seconden tot de respectieve hoeveelheid stoom is ingesteld 8 Houd het apparaat aan de handgreep en beweeg het lichtjes naar de vloer om de standvergrendeling los te maken 9 Schuif de reinigingsvoet langzaam naar voren en achteren over de vloer De vloer wordt hierbij gereinigd 1...

Page 54: ...le minuten tot het apparaat is afgekoeld Daarna kunt u het mondstuk vervangen 9 Volg de instructies in het afdeling Na het gebruik Na het gebruik 1 Schakel het apparaat altijd uit en trek dan de stekker uit 2 Neem na elk gebruik de watertank uit de hoofdeenheid en giet het wateruit in een lavabo 3 Laat het apparaat en de onderdelen volledig afkoelen 4 Reinig het apparaat en de vloerdoek als u ze h...

Page 55: ... ontoegankelijke plaats Vooraleer u het apparaat opnieuw in gebruik neemt moet de watertank steeds op resterend water worden gecontroleerd en indien nodig volledig worden leeggemaakt Oplossing van fouten Functioneert het apparaat niet naar behoren dan dient u eerst na te gaan of u het probleem zelf kunt oplossen Contacteer in het andere geval de klantenservice Probeer niet een defect apparaat eige...

Page 56: ...t Reinig het mondstuk Technische gegevens Modelnummer JJ SC 005B Artikelummer Z 08336 Stroomvoorziening 220 240 V 50 Hz 1500 W Veiligheids graad I IPX4 Inhoud watertank max 350 ml ca 20 minuten bedrijfsduur bij een volle tank Verwijdering Het verpakkingsmateriaal is recycleerbaar Verwijder de verpakking op een milieuvriendelijke manier en geef ze mee met de inzameling van recycleerbare materialen ...

Page 57: ...57 08336_DE GB FR NL_V3 indb 57 08336_DE GB FR NL_V3 indb 57 12 11 2013 09 41 49 12 11 2013 09 41 49 ...

Page 58: ...Platz für Ihre Notizen Room for your notes Place pour prendre des notes Ruimte voor uw notities 08336_DE GB FR NL_V3 indb 58 08336_DE GB FR NL_V3 indb 58 12 11 2013 09 41 49 12 11 2013 09 41 49 ...

Page 59: ...Platz für Ihre Notizen Room for your notes Place pour prendre des notes Ruimte voor uw notities 08336_DE GB FR NL_V3 indb 59 08336_DE GB FR NL_V3 indb 59 12 11 2013 09 41 49 12 11 2013 09 41 49 ...

Page 60: ...08336_DE GB FR NL_V3 indb 60 08336_DE GB FR NL_V3 indb 60 12 11 2013 09 41 49 12 11 2013 09 41 49 ...

Reviews: