1.
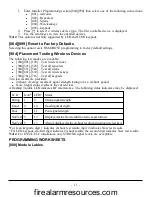
Enter Installer Programming section [902][106] (Delete HSM2HOSTx).
2.
Press [*] to delete.
Permanently Mount
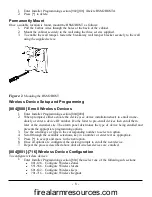
Once a suitable location is found, mount the HSM2HOST as follows:
1.
Pull the Corbus wires through the holes at the back of the cabinet.
2.
Mount the cabinet securely to the wall using the three screws supplied.
3.
To enable the wall tamper, fasten the breakaway wall tamper bracket securely to the wall
using the supplied screw.
Figure: 2
Mounting the HSM2HOST
Wireless Device Setup and Programming
[804][000] Enroll Wireless Devices
1.
Enter Installer Programming section [804][000].
2.
When prompted, either activate the device (see device installation sheet) to enroll imme-
diately or enter a device ID number. Do the latter to pre-enroll devices then enroll them
later at the customer site. The alarm panel determines the type of device being enrolled and
presents the appropriate programming options.
3.
Use the scroll keys or type in the corresponding number to select an option.
4.
Scroll through the available selections, key in a number or enter text as appropriate.
5.
Press [*] to accept and move to the next option.
6.
Once all options are configured, the system prompts to enroll the next device.
7.
Repeat the process described above until all wireless devices are enrolled.
[804][001]-[716] Wireless Device Configuration
To configure wireless devices:
1.
Enter Installer Programming section [804] then select one of the following sub-sections:
l
001-128 – Configure Wireless Zones
l
551-566 – Configure Wireless Sirens
l
601-632 – Configure Wireless Keys
l
701-716 – Configure Wireless Keypads
- 8 -
firealarmresources.com


