WS4945
Wireless Door/Window Contact
This Installation Manual shall be used in conjunction with the Installation Manual of the DSC wireless
receiver and control panel with which this device is intended to be used.
Powering the WS4945
For your added convenience, the WS4945 comes with the battery pre-installed. To activate, hold the WS4945
firmly in one hand and pull the plastic tab in the direction indicated.
Locate Transmitter
Select the location where the WS4945 is to be mounted.
NOTE: RF signals can be affected by metal objects, including
metal doors or large mirrors
.
Such locations should be avoided, they can interfere with proper operation.
Enrolling, Programming and Placement
Enroll the WS4945 by programming the 6-digit serial number (located on the WS4945) into the receiver. Once
the WS4945 is enrolled, you must perform a Module Placement test to ensure the location you have chosen is
suitable. The following outlines the basic steps for programming and enrolling this device on PowerSeries receiv-
ers. For additional options or for other receivers please refer to the specific receiver installation manuals.
Step 1 – Program Electronic Serial Number (ESN)
Section [804], subsections [01] – [32]
[01] Zone 1 ... [32] Zone 32
Enter the 6 digit ESN located on the WS4945 into the next available zone slot.
Step 2 – Program Zone Definition
Section [001] – [004]
Define corresponding zone with appropriate zone type [Ex. Delay (01), Instant (03), etc.]
Step 3 – Enable Wireless Zone Attribute
Section [101] – [132]
Turn Option [8] ON (wireless zone attribute) in corresponding zone attribute section.
NOTE: All wireless devices must be tested for good signal strength from where they are positioned.
Step 4 – Device Placement Test
Section [904], subsections [01] – [32]
Open and close the contact by moving the magnet away from the WS4945. The panel will
indicate the test result through the siren (and also through the keypad):
1 bell squawk/beep on LCD keypad/LED 1 on LED keypad) indicates GOOD placement
that the resistance of the wire does not exceed 100 Ohms. The contact and transmitter must also be in the same
room. Only one contact can be used. If an external contact is used, do not install the magnet.
NOTE: Ensure all wiring is stripped to 1/4” (6mm) max. and does not touch any of the components.
Tamper Switch
Out of the box the WS4945 comes equipped with case tamper detection. If the case is removed, the WS4945 will
report a zone tamper to the control panel. For added security the WS4945 was designed to provide wall tamper
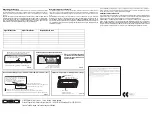
monitoring as well. Simply replace the short rubber actuator (see Figure D) with the longer one that is included.
With this option, if the case is opened or if the WS4945 is removed from it's location, a tamper will be sent to the
control panel. It is strongly recommended that mounting screws be used when using the wall tamper option.
Installation Instructions - For Service Persons Only


