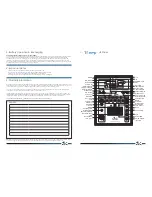
2. Operating Instructions
How to operate the USB/SD-Card Player
1. To Power LED
Press POWER On to turn the LED light incoming.
2. To LCD Display
LCD status display window behavior when the behavior is written in English or numbers.
3. To Mode
When you select your mode.(USB / SD-Card)
4. To Power/Volume
The power and volume control switch.
5. To Forward Track
Forward search / cold feature is the ability to turn to the next track.
6. To Backward Track
Back search / Rewind feature is the ability to turn to the previous track.
7. To Folder Search
Folder is a search feature.
8. To -10
MP3 file search function back 10 per.
9. To +10
MP3 file search function next 10 results.
Point the Remote Control Unit infra red beam at the USB/SD-Card Player
and press desired function button on the USB/SD-Card Player Section to control.
The buttons allow you to Switch On/Off (Power LED), Select Track (Back/Forward),
Volume, MODE, FOL, -10, +10.
Note: This unit does not control the volume, which needs to be adjusted manually.
Using the UHF Wireless Microphone
1.
Open the battery compartment of wireless hand-held mic or belt-pack transmitter mic
and insert supplied 2 x AA type batteries in their c/- polarity.
2.
Set Ch-number of amplifier and microphone both to same number by Ch-selector
switch using supplied plastic “I” screw driver. ( Please see the schematic below )
3.
Clockwise insert the supplied BNC wireless antenna into it’s socket on the operating panel.
4.
Plug your wired microphone into the combination jack on the operating panel.
5.
Turn on the main power on/off switch. Power-on LED will be illuminated.
6.
Adjust the volume level of wired mic and try while setting treble/bass to proper level.
7.
Adjust the volume level of wireless mic on the amplifier. Turn on the switch of wireless
mic and try. The on-air LED next to the Ch-selector switch will be illuminated.
8.
In the case of frequency interference occurring, try to set Ch to another Ch-number.
9.
Use the aux in/out RCA jack to feed out or feed in audio signals to and from another source.
Using the Wired Microphone
1.
Turn on the main power on/off switch, the power-on LED will be illuminated
2.
Plug 1/4” plug into the wired mic socket and adjust the volume using the wired mic volume knob.
NOTE: Wired microphones are also as sensitive to feedback as wireless microphones, therefore it is advisable to follow the same advice as in the
above information for optimum performance
Using Auxiliary Equipment
1.
Use the Aux in/out jack connection to feed in or out audio signals from another source
2.
Typical sources to feed into the amplifier are MP3 players, DVD players, laptops and palm devices
etc. where you want to amplify the sound to larger audiences.
3.
The feed out socket can be used to connect to amplifiers and mixers.
Supplied plastic screwdriver
Amplifier
Belt-pack Hand-held mic
Please keep the
volume (Gain)
as factory set
1 POWER LED
2 LCD DISPLAY
3 MODE
4 -10
5 +10
6 USB/SD-CARD SLOT
7 POWER/VOLUME FOR SWITCH
8 FOLDER A SEARCH
9 BACK SKIP/FAST
10 FORWARD SKIP/FAST
① ② ③ ④
⑦
⑤
⑥
⑧
⑨
⑩


