5
2.4. Mechanical assembly
2.4.1. Pre-assembly Drive - preparation for mounting the actuator on the gate
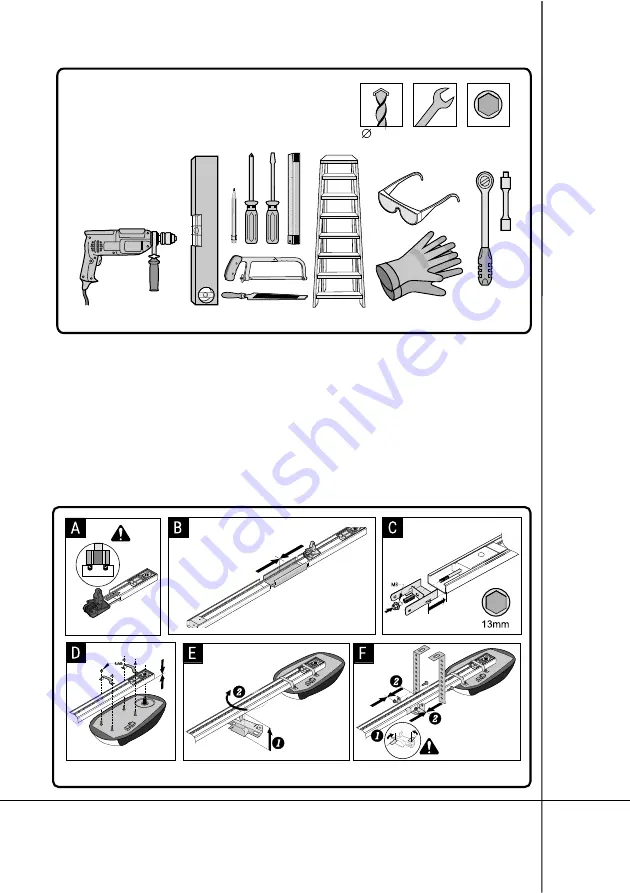
Prepare the elements as shown in Fig. 1. Slide the trolley, Fig.1 [4] on the rail, as shown in Fig.4A.
Assemble the rail as shown in Fig. 4B, paying attention to the precise sliding of the rail elements
with the connecting fitting.
Slip the front element on the rail and put the bolt through it so that it is possible to "grab it" from the
other side with the help of a spring and a nut, Fig.4C. Using a suitable wrench
tighten the screw until the
toothed belt is stretched.
Referring to Figure 4D, mount the drive head to the rail, paying attention to the correct positioning
of the drive shaft in the toothed belt pulley spline.
After mounting the drive head, you can proceed to install the ceiling hanger as shown in Figs 4E and
4F. Other slings can be used if required, e.g. for a much higher mounting surface. Also install the cable
supporting the unlocking of the drive.
Fig. 3.
Materials and tools necessary for the assembly of the set.
M
echanical assembly
10mm
10mm
13mm
13mm
2x
2x
Fig. 4.
Pre-assembly of the drive.
Summary of Contents for GO801/1001
Page 12: ...10 ...


