background image

INSTALLATION/OWNER'S MANUAL

AM/FM Gauge Hole Receiver

MGH17BT

Front and Rear Inputs

Summary of Contents for MGH17BT

Page 1: ...INSTALLATION OWNER S MANUAL AM FM Gauge Hole Receiver MGH17BT Front and Rear Inputs ...

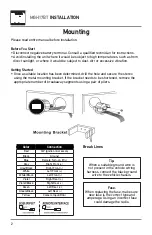
Page 2: ... mounting bracket If the bracket needs to be shortened remove the appropriate number of breakaway segments using a pair of pliers Fuse When replacing the fuse make sure new fuse is the correct type and amperage Using an incorrect fuse could damage the radio Tip When a suitable ground wire is not present in the vehicle wiring harness connect the black ground wire to the vehicle chassis Break Lines ...

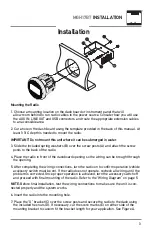
Page 3: ...rd opening so the wiring can be brought through the opening 5 After completing the wiring connections turn the radio on to confirm operation vehicle accessory switch must be on If the radio does not operate recheck all wiring until the problem is corrected Once proper operation is achieved turn the accessory switch off and proceed with final mounting of the radio Refer to the Wiring Diagram on pag...

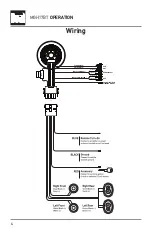
Page 4: ...4 MGH17BT OPERATION Wiring FUSE ANT USB AUX REAR LINE OUT STEERING WHEEL PHONE JACK Ø3 5 2P RCA CABLE YELLOW 2P RCA CABLE GRAY ANTØ3 BLACK USBØ5 BLACK RED MOLDNNG WHITE MOLDING RED MOLDNNG WHITE MOLDING ...

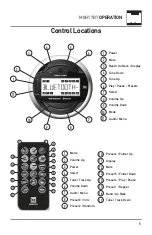
Page 5: ...at Band Go Back Tune Track Down 1 2 3 4 5 6 7 8 9 10 11 12 13 14 15 16 17 Mode Volume Up Power Select Tune Track Up Volume Down Audio Menu Preset 3 Intro Preset 2 Random 4 6 15 13 14 16 17 12 1 2 3 5 7 8 9 10 11 Select Volume Up Volume Down Mode Audio Menu 1 2 3 4 5 6 7 8 9 10 11 Power Mute Band Go Back Display Tune Down Tune Up Play Pause Presets ...

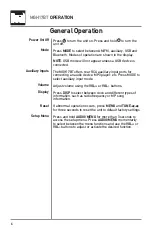
Page 6: ...ut mode Adjust volume using the VOL or VOL buttons Press DISP to select between clock and different types of information such as radio frequency or MP song information If abnormal operation occurs press MENU and TUNE nn for three seconds to reset the unit to default factory settings Press and hold AUDIO MENU for more than 3 seconds to access the setup menu Press AUDIO MENU momentarily to select be...

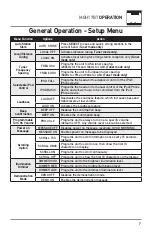
Page 7: ...e which increases bass and treble levels at low volume LOUD ON Activates the Loudness feature Beep Confirmation BEEP OFF Disables the confirmation beep BEEP ON Enables the confirmation beep Programmable Turn On Volume PRO VOL Programs unit to always turn on at a specific volume default is OFF Any volume level 1 46 can be selected Power on Message MESSAGE OFF Disables power on message example GOOD ...

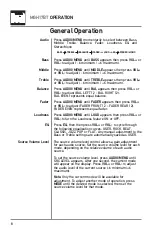
Page 8: ...e ON or OFF Press EQ then then press VOL or VOL to cycle through the following equalization curves USER ROCK BEAT CLASSIC JAZZ POP or FLAT Any manual adjustment to the Bass or Treble settings are automatically saved as USER The source volume level control allows a gain adjustment for each audio source Set the source volume level for each mode depending on the relative volume of each audio source T...

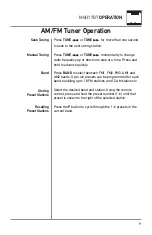
Page 9: ...ep at a time Press and hold to advance quickly Press BAND to select between FM1 FM2 FM3 AM1 and AM2 bands Up to six presets can be programmed for each band enabling up to 18 FM stations and 12 AM stations to Select the desired band and station Using the remote control press and hold the preset number 1 6 until that preset is shown to the right of the selected station Press the P button to cycle th...

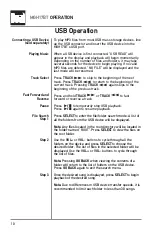
Page 10: ... to resume playback Press SELECT to enter the file folder search mode A list of all the folders from the USB device will be displayed Note Any files located in the root directory will be located in the folder named ROOT Press SELECT to view the files on the root folder Use the VOL or VOL buttons to cycle through all the folders on the device and press SELECT to choose the desired folder The list o...

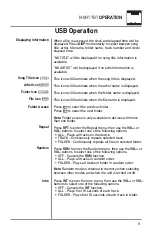
Page 11: ...han one folder Press RPT to enter the Repeat menu then use the VOL or VOL buttons to select one of the following options ALL Plays all tracks on the device TRACK Continuously repeats selected track FOLDER Continuously repeats all files in selected folder Press RDM to enter the Random menu then use the VOL or VOL buttons to select one of the following options OFF Cancels the RDM function ALL Plays ...

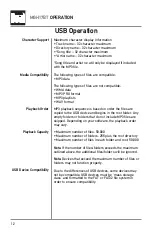
Page 12: ...ty folders or folders that do not include MP3 files are skipped Depending on your software the playback order may vary Maximum number of files 50 000 Maximum number of folders 255 plus the root directory Maximum number of files in each folder and root 50 000 Note If the number of files folders exceeds the maximum outlined above the additional files folders will be ignored Note Devices that exceed ...

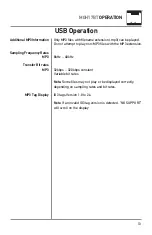
Page 13: ...Hz 48kHz 32kbps 320kbps constant Variable bit rates Note Some files may not play or be displayed correctly depending on sampling rates and bit rates ID3 tags Version 1 0 to 2 4 Note If an invalid ID3 tag version is detected NO SUPPORT will scroll on the display Additional MP3Information Sampling Frequency Rates MP3 Transfer Bit rates MP3 MP3 Tag Display ...

Page 14: ... not reconnect press BAND from Bluetooth mode to reconnect your mobile device To connect a previously paired device that was not recently connected 1 If applicable press and hold BAND to disconnect any connected mobile devices 2 From Bluetooth mode press SELECT Paired Devices will appear on the LCD 3 Press the volume up down buttons to cycle through the list of devices 4 Press SELECT or BAND to co...

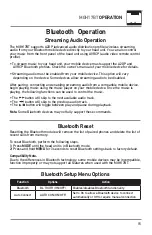
Page 15: ...ontrol the music The button will skip to the next available audio track The button will skip to the previous audio track The button will toggle between play and pause during playback Note Some Bluetooth devices may not fully support these commands Bluetooth Reset Bluetooth Setup Menu Options Streaming Audio Operation ll nn l II Resetting the Bluetooth module will remove the list of paired phones a...

Page 16: ...16 MGH17BT OPERATION Weather Band Operation Press TUNE llor TUNE nnmomentarily to seek the next weather band station Press BAND to select weather band WB Manual Tuning Band ...

Page 17: ...ing each other or touching chassis ground Insulate all bare speaker wires from each other and chassis ground Unit blows fuses Yellow or red wire touching chassis ground Check for pinched wire Speaker wires touching chassis ground Check for pinched wire Incorrect fuse rating Use fuse with correct rating NO FILE appears on display Selected file is not available in direct or alphanumeric search modes...

Page 18: ...urn shipment of the product Specific license conditions and copyright notices for the software can be found via www dualav com What to do 1 Before you call for service check the troubleshooting guide in your owner s manual A slight adjustment of any custom controls may save you a service call 2 If you require service during the warranty period you must carefully pack the product preferably in the ...

Page 19: ...30Hz 2 2kHz Speaker output impedance 4 8 ohms Line output voltage 2 Volts RMS A2DP advanced audio distribution profile AVRCP audio video remote control profile Design and specifications subject to change without notice FM Tuner AM Tuner General Bluetooth Profiles CEA 2006 Power Standard Specifications reference 14 4VDC 0 2V 20Hz 20kHz Power Output 18 Watts RMS x 4 channels at 4 ohms and 1 THD N Si...

Page 20: ... device pursuant to Part 15 of the FCC Rules These limits are designed to provide reasonable protection against harmful interference in a residential installation This equipment generates uses and can radiate radio frequency energy and if not installed and used in accordance with the instructions may cause harmful interference to radio communications However there is no guarantee that interference...

Page 21: ...GH17BT Quick Start Guide Gauge Hole Receiver with Bluetooth To download the complete model specific manual please visit www dualav com support manuals php or call 1 866 382 5476 9AM 5PM EST Monday Friday ...

Page 22: ... hole and secure the stereo using the metal mounting bracket If the bracket needs to be shortened remove the appropriate number of breakaway segments using a pair of pliers Mounting Bracket Break Lines Color Connection Red 12V Ignition Accessory Black Ground Blue Remote Turn on B Gray Right Front Gray Black Right Front Green Black Left Rear Violet Right Rear Yellow Camera lnput RCA Type USBINPUT I...

Page 23: ... 4 Place the radio in front of the dashboard opening so the wiring can be brought through the opening 5 After completing the wiring connections turn the radio on to confirm operation vehicle accessory switch must be on If the radio does not operate recheck all wiring until the problem is corrected Once proper operation is achieved turn the accessory switch off and proceed with final mounting of th...

Page 24: ...dio Press again to resume listening at the previously selected volume Auxiliary Inputs Insert RCA cables into the rear AUX IN connectors Display Press DISP to toggle display between various displayed information Menu Press MENU to access the audio and setup menu options Reset Press and hold the PLAY PAUSE button for more than 10 seconds to reset the unit to default factory settings To download the...

Page 25: ... six presets can be programmed for each band enabling up to 18 FM stations and 12 AM stations to be stored in memory Storing Presets IR remote control only Recalling Presets Up to 18 FM stations and 12 AM stations can be stored To store a station select the desired band and station Press and hold the desired preset button 1 6 for more than 2 seconds Press the P buttons to cycle through the 1 6 pre...

Page 26: ...TUNE or TUNE to fast forward or reverse a track Press II to temporarily stop playback Press II again to resume playback Press ti to select the next folder Press U to select the previous folder Folder access is only available on devices with more than one folder Press and hold BAND to enter Repeat Random or Intro menu then turn the volume up down key to select one of the following options RPT ALL O...

Page 27: ...r s manual for your device for more details The device name is The Bluetooth passcode is 1234 Note The head unit can be in any mode of operation when pairing is performed The head unit supports A2DP wireless streaming audio from a Bluetooth mobile device directly to your head unit The following functions can be used to control the music Press to skip to the next available audio track Press to skip...

Page 28: ...anual Tuning Press TUNE or TUNE momentarily to seek the next weather band station Band Press BAND to select Weather Band WB To download the complete Owner s Manual for your radio please visit www dualav com support manuals php ...

Page 29: ...product or damage occurring during return shipment of the product What to do 1 Before you call for service check the troubleshooting guide in your owner s manual A slight adjustment of any custom controls may save you a service call 2 If you require service during the warranty period you must carefully pack the product preferably in the original package and ship it by prepaid transportation with a...

Page 30: ...nst harmful interference in a residential installation This equipment generates uses and can radiate radio frequency energy and if not installed and used in accordance with the instructions may cause harmful interference to radio communications However there is no guarantee that interference will not occur in a particular installation If this equipment does cause harmful interference to radio or t...

Page 31: ...ose of their respective owners Dual Electronics Corp Toll Free 1 866 382 5476 Monday Friday 9AM 5PM www dualav com Dual Electronics Corp All rights reserved The Bluetooth word mark and logos are registered trademarks owned by Bluetooth SIG Inc NSC VOl ...

Reviews: