background image


XNAV3550 

PORTABLE GPS NAVIGATION SYSTEM 

USER’S MANUAL 


Summary of Contents for NavAtlas XNAV3550

Page 1: ...XNAV3550 PORTABLE GPS NAVIGATION SYSTEM USER S MANUAL ...

Page 2: ...t user modes 19 4 2 Changing the user mode 19 4 3 Standard mode 21 4 4 Extended mode 21 5 Navigation 22 5 1 General information on navigation 23 5 2 Starting XNAV3550 24 5 2 1 Extended mode 24 5 2 2 Standard mode 26 5 3 Indicating a destination 27 5 3 1 Entering an address 28 5 3 2 Selecting a point of interest 29 5 3 3 Indicating destinations on the map 36 5 3 4 Favorites 39 5 3 5 Recent destinat...

Page 3: ...map 68 7 Useful functions for navigation 70 7 1 Adding a route point during navigation 71 7 2 Next destination 72 7 3 Blocking a route section 72 8 Configuring XNAV3550 74 8 1 Settings 75 8 1 1 User mode 76 8 1 2 Map information 76 8 1 3 Route information 77 8 1 4 Representation 78 8 1 5 Automode 79 8 1 6 Routing options 80 8 1 7 Itinerary 80 8 1 8 Time zone 81 8 1 9 Format 81 8 1 10 Home address ...

Page 4: ...USER S MANUAL XNAV3550 Introduction 3 1 Introduction Topics covered in this chapter 1 1 Search facilities and conventions page 4 1 2 Liability page 4 1 3 Support page 5 1 4 Trademarks page 5 ...

Page 5: ...oftware s user interface Also used for highlighting warnings and notices bold italic Registered names and trademarks SMALL CAPITALS Window and dialogue box titles underlined italic The name of the user mode which is concerned by the current section You need not reed sections that don t concern the user mode you are currently working with Symbol Use Indicates hints and notes that may ease the use o...

Page 6: ... legislation and to the rights of their respective owners without reservation All mentioned names of products societies or brands may be registered trademarks of their respective owners Every right that is not explicitly accorded is reserved The absence of an explicit labeling of registered trademarks does not allow the conclusion that this brand was not subject to the rights of third party Ù Outl...

Page 7: ...begin 6 2 Before you begin Topics covered in this chapter 2 1 The basic principle of navigation page 7 2 2 Important safety information page 8 Safety information on the GPS receiver Safety information on the installation in the vehicle ...

Page 8: ...ective satellites This information serves for calculation your current geographic position The signals of at least three satellites are needed to determine the longitude and the latitude With the signals of at least four satellites the elevation may be calculated too The determination has an accuracy of about 9 feet Navigation with GPS The delivered maps contain the geographic coordinates of the p...

Page 9: ...to do so Caution The road layout and the traffic signs are absolutely prior to the instructions of the navigation system Caution You must not follow the instructions of XNAV3550 except when the circumstances and the road traffic regulations allow doing so XNAV3550 will guide you to your destination even when you have left your planned itinerary Note We recommend effecting route planning before beg...

Page 10: ...on The installation of the GPS receiver must not interfere with the sure operation of your car Note Do not varnish the GPS receiver Doing so might impede the reception of GPS signals Note Do not use any harsh solvents for cleaning the GPS receiver A damp cloth is sufficient You might damage the case of the GPS receiver Note Do not unplug by pulling the cable This might damage the cable Note Do not...

Page 11: ...NAV3550 Operating the navigation software 10 3 Operating the navigation software Topics covered in this chapter 3 1 Software keyboard page 11 3 2 Command buttons page 12 Command buttons with caption 3 3 Lists page 14 ...

Page 12: ...nter small letters or special characters when entering a destination s city or street name XNAV3550 replaces these characters automatically When you are looking for e g a French city called Héroïnès simply type HEROINES Entering a space deleting a character Tap the icon to enter a space character Tap the icon to delete the character at the left of the cursor Switching between character and number ...

Page 13: ...ries Moving the cursor If you want to delete another character than the one to the left of the cursor position or if you want to insert a character at another place than at the end of the text you have to move the cursor to the respective place Just tap the place where you want to have the cursor 3 2 Command buttons Icons The following buttons appear at the bottom of every XNAV3550 screen Return T...

Page 14: ...Navigation may begin Tap the GPS icon to display the current GPS status Entry Significance GMT Greenwich Mean Time Time of London ignoring daylight saving time Longitude Latitude Current position Indication of east longitude and north latitude Satellites Number of received satellites At least three satellites must be received for navigation purposes HDOP Horizontal Dilution of Precision Indicates ...

Page 15: ...e Yes No On Off When you tap one of these buttons the caption switches to the other possibility This change must be confirmed by clicking another button normally OK or Save before the current screen closes 3 Buttons to enter data Subsequently these buttons will be referred to as entry fields The caption either your last entry or please select They are buttons like City or ZIP Street Category of a ...

Page 16: ...try in a 2nd or 3rd line In a list of cities there is indicated the country or state or province the respective city belongs to Icons At the right hand side of lists there are three icons OK Tap this icon to confirm the selection of the entry with the focus which is placed directly at the left of the OK icon Up Tap this icon to scroll the list one item up Down Tap this icon to scroll the list one ...

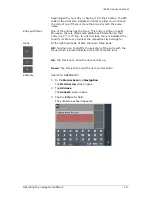
Page 17: ...ters ABER All cities beginning with ABER or having ABER in their names are listed When the list is very long you may enter one more letter in order to shorten the list Enter N All cities beginning with ABERN or having ABERN in their names are listed ...

Page 18: ...ng the navigation software 17 5 Tap the Down icon repeatedly until ABERNATHY appears directly under the white entry field The entry ABERNATHY has the focus 6 Tap The ADDRESS screen reappears ABERNATHY is entered into the City field ...

Page 19: ...SER S MANUAL XNAV3550 User modes 18 4 User modes Topics covered in this chapter 4 1 Two different user modes page 19 4 2 Changing the user mode page 19 4 3 Standard mode page 21 4 4 Extended mode page 21 ...

Page 20: ...e ready to spend some time in getting used to operate the complete functionality work in extended mode Some configuration settings have an effect on the work in standard mode but can only be changed in extended mode For further information please refer to Configuring XNAV3550 4 2 Changing the user mode You may at any time switch to the other user mode 1 In the MAIN SCREEN tap Settings The SETTINGS...

Page 21: ...ch to becomes the caption of the entry field 4 Tap Save to save the changes Note When you switch to standard mode a dialog window asks you whether you want to keep the configuration changes you have made in extended mode This dialog window appears even when you have not made any configuration changes Tap Yes if you want to keep these changes The USER MODE screen closes and you are in the Main scre...

Page 22: ...a saved destination Ù Save destinations Ù Select a destination from the recent destinations list Ù Change some configuration settings 4 4 Extended mode Survey In extended mode you dispose of the complete functionality of XNAV3550 You may for example indicate and navigate to more than one destination route planning with stopovers You may change all configuration settings If you want to use the comp...

Page 23: ...electing a point of interest Indicating destinations on the map Favorites Recent destinations Using your home address 5 4 Destination management page 42 Saving a destination Renaming a destination Deleting a destination 5 5 Route planning Itineraries with stopovers page 45 Indicating route points Editing saving and managing itineraries Calculating the route Displaying the route on the map Simulati...

Page 24: ...will guide you to your destination even when you have gone off course from your route Obstructed GPS reception When you turn off the GPS receiver or when the reception of GPS signals is obstructed XNAV3550 does not close but navigation is interrupted As soon as the GPS receiver works again the navigation system notices a possible change of your current position and recalculates the route You may s...

Page 25: ...essage appears 2 Tap the I accept button If you do not accept and if you tap the I decline button the software terminates 5 2 1 Extended mode The MAIN SCREEN appears Main screen All functions of the program are accessible via the MAIN SCREEN Note When you turn your device on it shows the screen which was displayed when it was turned off Nevertheless you may access the MAIN SCREEN from all other sc...

Page 26: ...e planning Tap the Route planning button for route planning purposes For details please refer to Route planning Itineraries with stopovers Show map Tap the Show map button to display the map which is currently in use Select map Tap the Map button to select another map from the storage card which is currently inserted For details please refer to Working with the map Settings Tap the Settings button...

Page 27: ...ss the MAIN SCREEN from all other screens by tapping One destination Tap the Navigation button to indicate a destination for navigation no stopover For details please refer to Indicating a destination Navigation homewards Tap the Home icon to navigate to your home address For details please refer to Using your home address Favorites Tap the Favorites button to navigate to a favorite For details pl...

Page 28: ...tings Quit Tap the Quit button to quit XNAV3550 5 3 Indicating a destination Basic principle of navigation In this chapter you will learn about the possibilities for indicating and managing destinations in XNAV3550 For details on how to start navigation to a destination please refer to Starting navigation Indicating a destination In XNAV3550 there are several possibilities to enter or to select de...

Page 29: ...s or provinces of which at least a part is represented on the currently loaded map may be selected 1b On the DESTINATION screen tap Address Standard mode 1 In the MAIN SCREEN tap Navigation The DESTINATION screen opens 1a Tap the Region entry field and select the country or state or province of your destination if it is not yet indicated Note Only countries or states or provinces of which at least...

Page 30: ...your destination into the Nr field if you know it Note If the house numbers of the respective street are stored in the database of places you may tap the field besides the Street field If no house numbers are stored the respective field is deactivated The software navigates to the respective street 5 Or enter the name of an intersection into the Intersection entry field if you want to define an in...

Page 31: ...CREEN tap Navigation The DESTINATION screen opens Tap the Region entry field and select the country or state or province of your destination if it is not yet indicated Note Only countries or states or provinces of which at least a part is represented on the currently loaded map may be selected 1a On the DESTINATION screen tap Point of interest The POINT OF INTEREST screen opens 1b On the POINT OF ...

Page 32: ...S position Selecting a Point of interest nearby The POI NEARBY screen opens 2 Enter the radius around your current position within which you want to search for points of interest into the Radius entry field 3 Select the main category of points of interest to search for from the left one of the two Category list fields e g Garage Only points of interest situated within the indicated radius will be ...

Page 33: ...shorten the Point of interest list This list may become very extensive especially in big cities For information on saving destinations please refer to Saving a destination Point of interest in a certain city Extended mode 1 In the MAIN SCREEN tap Navigation The DESTINATION screen opens Tap the Region entry field and select the country or state or province of your destination if it is not yet indic...

Page 34: ... MAIN SCREEN tap Navigation The DESTINATION screen opens Tap the Region entry field and select the country or state or province of your destination if it is not yet indicated Note Only countries or states or provinces of which at least a part is represented on the currently loaded map may be selected 1a On the DESTINATION screen tap in a browsed city ...

Page 35: ...ng your City or ZIP entry are listed 4 Select the Subcategory of points of interest to search for from the right one of the two Category list fields e g Cinema 5 Select the correct destination from the Point of interest list field For information on working with lists please refer to Lists Note You need not make entries into the Category and Subcategory fields Their purpose is only to shorten the ...

Page 36: ...N SCREEN tap Navigation The DESTINATION screen opens Tap the Region entry field and select the country or state or province of your destination if it is not yet indicated Note Only countries or states or provinces of which at least a part is represented on the currently loaded map may be selected 2 On the DESTINATION screen tap Point of interest The POINT OF INTEREST screen opens 3 On the POINT OF...

Page 37: ...on on working with lists please refer to Lists Note You need not make entries into the Category field Their purpose is only to shorten the Point of interest list This list may become very extensive especially in big cities 5 3 3 Indicating destinations on the map You may indicate a destination directly on the map In addition to cities and streets you may also select points of interest quickly This...

Page 38: ...t the country or state or province of your destination if it is not yet indicated Note Only countries of which at least a part is represented on the currently loaded map may be selected Indicating a destination on the map 1 On the DESTINATION screen tap Select on map The MAP screen opens 2 Tap on the place you want to determine as destination and hold ...

Page 39: ... following options This function is only available when GPS reception is possible The GPS symbol must be GPS ready Tap the Start navigation button to start navigation to the selected place Caution Using this function while you are already navigating deletes all current destinations stopovers and destination point Tap the Save button to save the selected place You may then at any time select this p...

Page 40: ...e next stopover of your itinerary Your route will be recalculated immediately 5 3 4 Favorites Survey All destinations you have saved by tapping the Save button are listed on the FAVORITES screen On this screen you may Ù select destinations for navigation purposes Ù rename destinations and Ù delete destinations from the list Extended mode 1 In the MAIN SCREEN tap Navigation The DESTINATION screen o...

Page 41: ...rogress of the calculation You may begin navigation to the selected destination once route calculation is complete For information on deleting or renaming saved destinations please refer to Destination management 5 3 5 Recent destinations Survey All destinations you have navigated to recently are listed on the RECENT DESTINATIONS screen On this screen you may Ù select destinations for navigation p...

Page 42: ...aded map may be selected 1b On the DESTINATION screen tap Recent destinations Standard mode 1 In the MAIN SCREEN tap Recent destinations Recent destinations The RECENT DESTINATIONS screen opens 2 Tap the entry of the desired destination For information on working with lists please refer to Lists 3 Tap The route to the selected destination will be calculated A message window will inform you on the ...

Page 43: ...igation starts The calculation is based on the settings you have configured in SETTINGS ROUTING OPTIONS For details please refer to Settings 5 4 Destination management Survey Destinations may be stored in two lists Ù the FAVORITES Ù the RECENT DESTINATIONS list Every destination you are indicating and the destinations from the RECENT DESTINATIONS list may be added to the FAVORITES This makes sense...

Page 44: ...pened the RECENT DESTINATIONS list as described in Recent destinations 1 Tap the Save icon If you have opened the RECENT DESTINATIONS list tap the Edit icon The NAME OF DESTINATION screen opens 2 Enter a name for the destination For information on the use of the keyboard please refer to Software keyboard 3 Tap The destination has now been added to the FAVORITES ...

Page 45: ...TES screen opens 2 Select the destination you want to rename For information on working with lists please refer to Lists 3 Tap the Edit icon The NAME OF DESTINATION screen opens 4 Enter the new name of the destination For information on the use of the keyboard please refer to Software keyboard 5 Tap The destination is now renamed ...

Page 46: ...o Lists 2 Tap the Delete icon The CONFIRM screen opens 3 Tap to delete the destination from the list The destination is now deleted from the list 5 5 Route planning Itineraries with stopovers This function is only available in Extended mode For information on how to change the user mode please refer to Changing the user mode Route planning You may plan itineraries without receiving GPS signals e g...

Page 47: ...g route points Planning itineraries 1 On the MAIN SCREEN tap Route planning The ROUTE PLANNING screen opens 2 Tap the Add route point icon to enter the first route point The DESTINATION screen opens 3 Indicate the destination as described in Indicating a destination 4 Tap Add to route ...

Page 48: ...to the itinerary 5 5 2 Editing saving and managing itineraries Survey You may plan as many itineraries as you want e g for holidays You may save them and use them later for navigation purposes At any moment you may add route points modify the order of the route points or display the itinerary on the map The following commands are available on the ROUTE PLANNING screen ...

Page 49: ...the order Route point up Tap this icon to navigate to the respective route point earlier example route point 3 becomes route point 2 Route point down Tap this icon to navigate to the respective route point later example route point 2 becomes route point 3 Deleting and adding route points Delete route point Tap this icon to delete the selected route point from the list This icon is deactivated when...

Page 50: ...r a name for the itinerary For information on the use of the keyboard please refer to Software keyboard 3 Tap OK Note Only the route points will be saved If you load an itinerary you will have to recalculate it Load itinerary This icon is deactivated if there is no saved itinerary available 1 Tap this icon to load a saved itinerary e g to modify it The SELECT ITINERARY screen opens 2 Select the it...

Page 51: ...f there is no saved itinerary available The SELECT ITINERARY screen opens 2 Select the itinerary you want to rename For information on working with lists please refer to Lists 3 Tap the Edit icon The NAME OF THE ITINERARY screen opens 4 Enter the new name of the itinerary For information on the use of the keyboard please refer to Software keyboard ...

Page 52: ...OK to load the renamed itinerary OR Tap the Back icon to open the ROUTE PLANNING screen without loading an itinerary Delete itinerary 1 Tap the Load itinerary icon This icon is deactivated if there is no saved itinerary available The SELECT ITINERARY screen opens For information on working with lists please refer to Lists ...

Page 53: ...eted route is no more listed 5 5 3 Calculating the route An itinerary may be calculated even without GPS reception in order to get an impression on the route The system assumes then the first route point to be the start point of the route Note When you start navigation the system identifies your current position and makes it the start point The first indicated route point is then the first stopove...

Page 54: ...r detailed information on setting the route options please refer to Routing options Note The standard settings for the route options may be changed on the ROUTE OPTIONS screen For detailed information on changing the standard settings refer also to Configuring XNAV3550 3 Tap the Calculate route icon The route is being calculated A message window informs you on the progress of calculation ...

Page 55: ... the ROUTE PLANNING screen Furthermore the distance and the estimated duration of each stage will be indicated with the selected route point entry 5 5 4 Displaying the route on the map Show route Tap the Show on map button to display the entire route on the map The map screen opens The route is highlighted in orange The route points are marked by flags For information on working with maps please r...

Page 56: ... navigation along the itinerary when the route has been calculated Note The reception of GPS signals is not necessary for the simulation Simulation is restricted to routes of 60 miles max 1 Tap the Show on map button The route is displayed on the map 2 Tap this icon The ADDITIONAL FUNCTIONS screen opens ...

Page 57: ...The ADDITIONAL FUNCTIONS screen opens 2 Tap Quit navigation 5 6 Starting navigation Precondition You have entered a destination as described in Indicating a destination OR You have selected a destination from the FAVORITES as described in Favorites OR You have selected one of your RECENT DESTINATIONS as described in Recent destinations OR You have planned or loaded an itinerary as described in Rou...

Page 58: ...ns may be changed in SETTINGS ROUTING OPTIONS For detailed information on changing the standard settings refer to Settings The system calculates the route The map screen opens Your current position is indicated by a green arrow The route is highlighted in orange Note When you start navigation after having planned or loaded an itinerary then your current position is the start point of the route The...

Page 59: ...sage appears You have two possibilities Ù Wait until navigation starts This will happen as soon as the GPS reception is sufficient Ù Tap Cancel and restart navigation as soon as the reception of GPS signals is convenient You may notice that by watching the GPS symbol on the screen it becomes GPS ready when the reception is good ...

Page 60: ... the map 59 6 Working with the map Topics covered in this chapter 6 1 Selecting a map page 60 6 2 Operating the map page 61 6 3 Representation of the map in navigation mode page 66 6 4 Displaying additional information on the map page 68 ...

Page 61: ...in Selecting a map Note In case the Installer Tool does not start automatically start the Windows Explorer Select the directory of your DVD drive and double click the setup exe file Selecting a map To load another map which is available on the currently inserted storage card proceed as follows 1 If the desired map is on another storage card than the currently inserted one open the MAIN SCREEN and ...

Page 62: ...The MAIN SCREEN opens 6 2 Operating the map Survey There are various pieces of information available on the MAP screen Learn in this chapter about the possibilities for working with the map which depend on whether you are in navigation mode or not Displaying the map You may display the map Ù while planning a route Ù in order to show destinations on the map or Ù in order to select destinations on t...

Page 63: ... map button on the ADDRESS screen after having entered an address The MAP screen opens The map is being displayed automatically when you start navigating Tapping the map Tapping short any place on the map makes the ADDITIONAL FUNCTIONS screen appear Depending on whether you are in navigation mode or not this screen offers different functions Tapping long a certain place on the map tap and hold mak...

Page 64: ...ze icon to toggle between Frozen map and Frozen position Frozen position default This mode button down makes the map scroll continually Your current position green arrow is always centered in the bottom third of the map Frozen map This mode button up freezes the map Your current position green arrow moves over the map and may even leave it This mode applies automatically when you scroll the map in...

Page 65: ...ientate the map in driving direction 3D view Tap this icon to display the map in 3D mode bee flight view 2D view Tap this icon to return to the 2D mode standard Zoom in Tap Zoom in to scale the map down Zoom bar Tap one of the zoom bar sections to modify the scale of the map Zoom out Tap Zoom out to scale the map up Additional functions Tapping this icon or tapping short any place on the map makes...

Page 66: ...ailable in navigation mode For details please refer to Blocking a route section Interim destination This function is only available in navigation mode Tap Interim destination to add a new route point to your itinerary The route will be recalculated and the newly added route point will be the first destination to navigate to Navigation to the other route points will be executed later For details pl...

Page 67: ...ny B will be your next destination Refer also to Next destination 6 3 Representation of the map in navigation mode In navigation mode there is some assistance for navigation some information on the route and one more command button being displayed Assistance for navigation The following assistance for navigation is being displayed at the left and at the bottom of the map Field Information c If the...

Page 68: ...t to turn on h The lower street field indicates the name of the street you are currently on Information on the route At the right of the map the following information on the route is being displayed Field Information This symbol means stage All information displayed below refers to the next route point ETA Estimated time of arrival Remaining time to arrival estimated Remaining distance to arrival ...

Page 69: ... or by tapping the Additional Functions button or short into the map and selecting Settings The SETTINGS screen opens 2 Select Map information using the arrow buttons Info bar The Info bar at the bottom of the map displays the scale of the map the inclination the compass the altitude and the current speed 3 Tap the respective command button to display On or not Off the Info bar Points of Interest ...

Page 70: ...of the map Section Information This symbol means route All information displayed below refers to the final destination This symbol means stage All information displayed below refers to the next route point This section is only available if you have indicated more than one destination to navigate to Line 2 ETA Estimated time of arrival Line 3 Remaining time to arrival estimated Line 4 Remaining dis...

Page 71: ...550 Useful functions for navigation 70 7 Useful functions for navigation Topics covered in this chapter 7 1 Adding a route point during navigation page 71 7 2 Next destination page 72 7 3 Blocking a route section page 72 ...

Page 72: ... route will be recalculated in order to make the new route point the next destination to navigate to The other remaining route points will be navigated to after the new one Adding a route point Precondition The map is being displayed in navigation mode 1 Tap short on any place on the map 2 Tap Interim destination The DESTINATION screen opens 3 Indicate the new route point as described in Indicatin...

Page 73: ...e Company B The system recalculates the route Company B will be your next destination 7 3 Blocking a route section Blocking a route section manually You may block a route section manually in order to evade it Manual blocking forces a recalculation of the route Presume that you are driving on a freeway and a radio message announces a traffic jam 4 miles ahead of your current position With the Block...

Page 74: ...on of the route The indicated route section will be evaded On the map it will be highlighted in red Unblocking a route section 1 Tap short on any place on the map 2 Tap Unblock The route section is now unblocked The navigation system uses the route which had been calculated originally ...

Page 75: ...ng XNAV3550 74 8 Configuring XNAV3550 Topics covered in this chapter 8 1 Settings page 75 User mode Map information Route information Representation Automode Routing options Itinerary Time zone Format Home address Product information ...

Page 76: ...Route information Ù Representation Ù Automode Ù Routing options Ù Itinerary Ù Time zone Ù Format Ù Home address Ù Product information On the MAIN SCREEN tap the Settings button to configure XNAV3550 On the SETTINGS screen tap the arrow icons to select the configuration you want to modify Tap the Save button to apply your modifications if you have made some ...

Page 77: ...ctory settings 1 If you want to restore the factory settings tap the Factory settings command 2 Confirm the restoration 8 1 2 Map information This function is only available in Extended mode For information on how to change the user mode please refer to Changing the user mode Info on the map On the MAP INFORMATION screen you may effect the following modifications Element Signification Info bar The...

Page 78: ...emaining distance to the final destination estimated Tap the respective command buttons to display On or not Off the respective information on the map All information displayed below refers to the final destination ETA at next dest Time to next dest Dist to next dest ETA Estimated time of arrival at the next route point Remaining time to the next route point estimated Remaining distance to the nex...

Page 79: ...on On the REPRESENTATION screen you may effect the following modifications Setting Signification Skin Skins are made to personalize the user interface of XNAV3550 Tap the Skin field Select one of the available skins and tap OK Brightness day Tap this field and select the brightness 1 8 of the display in Day mode Brightness night Tap this field and select the brightness 1 8 of the display in Night ...

Page 80: ...No Autozoom With Autozoom the system changes the scale of the map depending on your current speed When you drive slowly the scale becomes small When you drive fast the scale becomes high 2D Autozoom Select the default for navigation with 2D view Low Autozoom Standard Autozoom High Autozoom or No Autozoom With Autozoom the system changes the scale of the map depending on your current speed When you...

Page 81: ...tion Signification Permitted The respective kind of street will be regarded for route calculation Avoid The respective kind of street will be avoided if reasonable Forbidden The respective kind of street will be disregarded for route calculation 8 1 7 Itinerary This function is only available in Extended mode For information on how to change the user mode please refer to Changing the user mode Pro...

Page 82: ...g into another time zone you will have to adjust the respective setting 8 1 9 Format Units On the FORMAT screen determine which units are to be used for time and distance indications Setting Signification Time Tap the Time field to toggle between 12 hours AM PM and 24 hours time format Distance Tap the Distance field to toggle between kilometers or miles distance units 8 1 10 Home address Home add...

Page 83: ...50 82 Settings 8 1 11 Product information Product information On the PRODUCT INFORMATION screen the name and the version of the software are displayed Tap Show intro to make the system explain its most important functions ...

Page 84: ...ormation and calculates the longitude and the latitude of its own current position The signals of at least three satellites are needed to determine the longitude and the latitude With the signals of at least four satellites the elevation may be calculated too The determination has an accuracy of about 3 yards HDOP The Horizontal Dilution of Precision HDOP indicates the quality of position determin...

Page 85: ...the map 36 Points of interest 29 Recent destinations 40 Saved destinations 39 Info bar 68 76 Information Route 69 Stage 67 69 Interim destination 65 71 Itinerary 80 Itinerary planning 45 K Keyboard 11 M Main screen 24 26 Map 61 2D view 64 3D view 64 Day Night 65 Display 25 61 Freeze 63 Hide show icons 63 Info bar 68 Information 68 Itinerary 64 Orientation 64 Points of Interest 68 76 Route 64 Scrol...

Page 86: ...ck 73 Routing options 80 S Screen Additional functions 65 Configuration 75 Destination 28 Favorites 40 Point of interest 30 Recent destinations 41 Route planning 46 Settings 75 Search facilities 4 Security information 8 Service 5 Settings Auto mode 79 Format 81 Home address 81 Info on the map 76 Itinerary 80 Representation 78 Route info 77 Routing options 80 Speed profile 80 User mode 76 Skins 78 ...

Reviews: