6
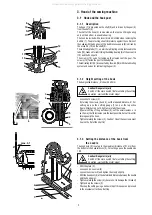
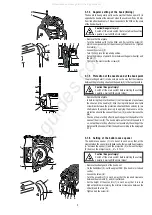
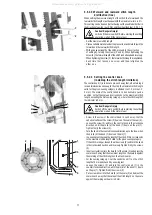
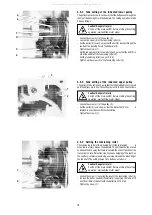
3.2.4 Side setting of the needle bar holder
The correct position of this holder is in such case, when the needle bar
is lined up with the presser-foot bar. The needle bar holder can be set
as follows:
Caution! Danger of injury!
Switch off the main switch! Before starting the setting
operation, wait until the motor stops!
- Loosen the screw (1) of the pin (2).
- Loosen the screw (3) of the guide pin (4).
- In shifting the pin (2) set the needle bar holder on the measure A
= 8 mm
(distance between the front face of the arm and the front face
of the safety bolt (5) of the needle bar holder)
/at the same time the
pin (4) shifts/.
- The guide pin (4) is to be set in such a way that the needle bar holder
moves easily.
- Tighten the screws (1 and 3).
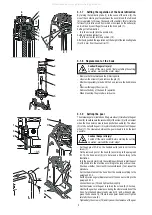
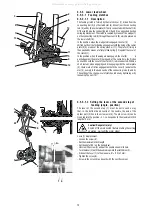
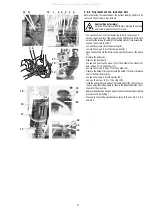
3.2.5 Setting the needle (the needle bar holder)
in the direction of sewing
When shifting out the needle from the throat plate insert, at the moment,
when the needle eye is at the level of the top surface of the throat plate
insert (3), the distance between the needle and the wall of the throat
plate insert must be A = 0.2 mm.
Caution ! Danger of injury!
Switch off the main switch! Before starting the setting
operation, wait until the motor stops!
- Set the maximum allowed stitch length.
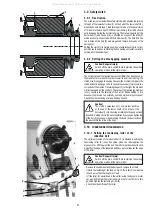
- Set the handwheel (1) to the angle of 246
°
and lock it with the screw
(2).
-
Loosen the screw (4) of the lever (5).
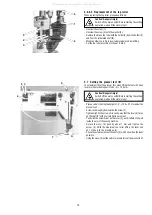
- By turning the needle bar holder (6) on the pin (7) set the required
distance A = 0,2 mm.
- Tighten up the screw (4) and check up the setting.
Caution!
A faulty setting may cause bending or breaking of needles
against the throat plate insert.
2
5
3
A
4
5
6
7
1
2
246
o
A
1
3
4
All manuals and user guides at all-guides.com


