101
E.2 REPLACING A MODULE OF THE SOLAR ARRAY
(a) Work on the solar array early in the morning or in the evening. Completely cover
the front of the solar array with thick cloth or a sheet. The solar array must not be in
bright sunshine when you work on it except when you are checking performance.
(b) Disconnect the wires from the solar array at the charge regulator terminal strip.
Use insulated tools and is careful not to touch the terminals with your hands as you
get an electric shock.
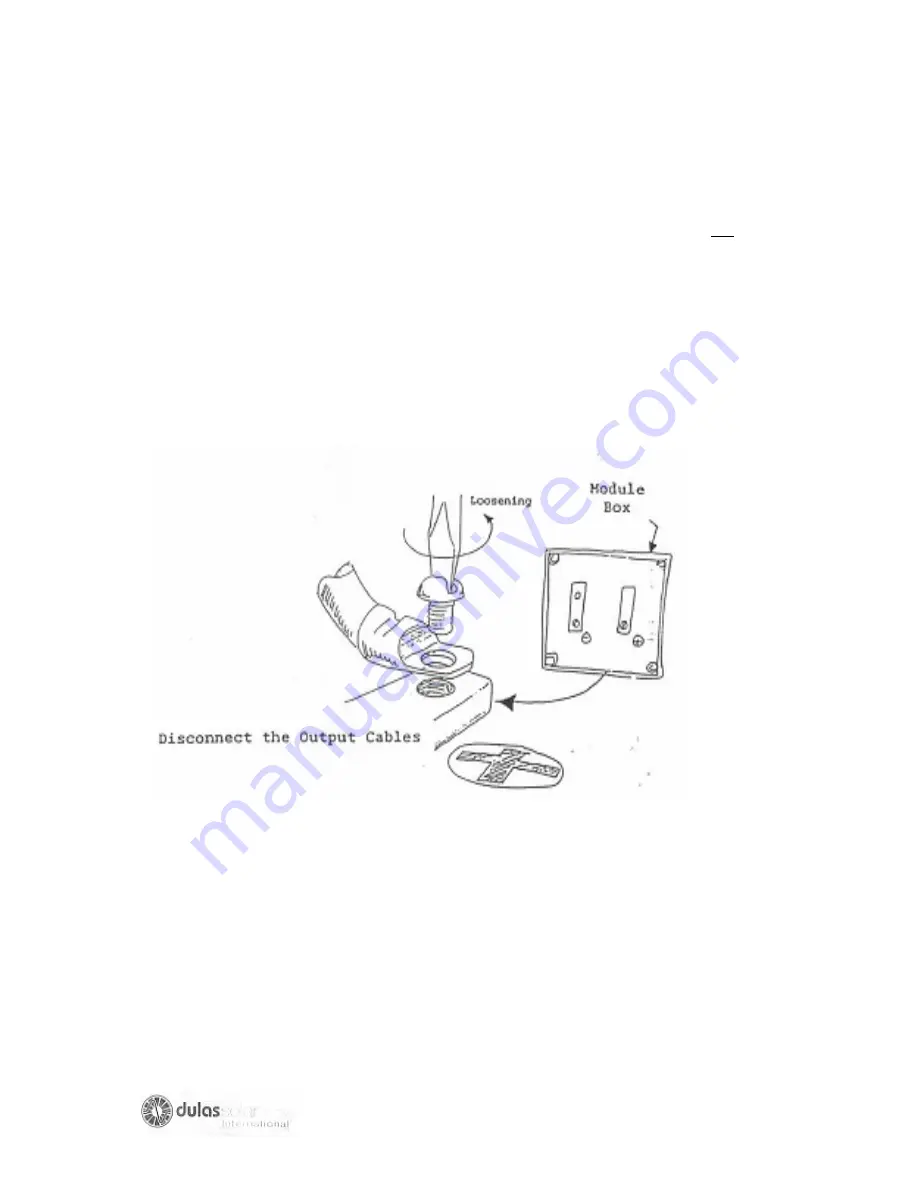
(c) Remove the lid of the junction box at the back of the faulty module.
(d) Mark the positive wire and the negative wire. Then disconnect the module output
cables from the positive and negative terminals in the terminal box.
(e)
Loosen the mounting bolts from the module and remove the module from the
solar array frame.
(f)
Place the new module (which has been checked to be of the correct type and
good performance) in the solar array frame and tighten the mounting bolts.
Summary of Contents for VC150
Page 1: ......
Page 3: ...3 SECTION I ...
Page 4: ...4 ...
Page 24: ...24 MODULE AND BATTERY WIRING DIAGRAMS SYSTEM WIRING DIAGRAM ...
Page 25: ...25 SYSTEM WIRING DIAGRAM GENERAL LAYOUT DIAGRAM ...
Page 26: ...26 GENERAL LAYOUT DIAGRAM ELECTRICAL CIRCUIT DIAGRAM ...
Page 27: ...27 ELECTRICAL CIRCUIT DIAGRAM REFRIGERATION CIRCUIT DIAGRAM ...
Page 28: ...28 REFRIGERATION CIRCUIT DIAGRAM ...
Page 29: ...29 SECTION II ...
Page 38: ...38 ...
Page 39: ...39 ...
Page 42: ...42 ...
Page 44: ...44 ...
Page 50: ...50 ...
Page 124: ...124 ANNEX 1 COMPONENT LAYOUTS OF SOME COMMONLY USED SOLAR REFRIGERATOR ...
Page 125: ...125 ...
Page 126: ...126 ...
Page 127: ...127 ...
Page 128: ...128 ...
Page 129: ...129 ...
Page 130: ...130 ANNEX II ADDITIONAL EPI TOOL KIT NEEDED FOR PHOTOVOLTAIC REFRIGERATOR REPAIR ...
Page 136: ...136 ...
Page 137: ...137 ...


