


CAriNg fOr YOur
PAINTPOD
drAiNiNg ANd CLeANiNg
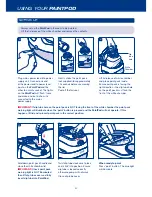
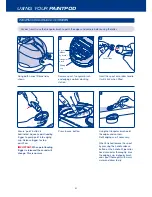
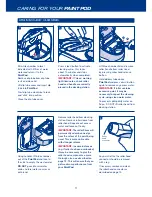
Draining
Leaving paint pack in
PaintPod,
place roller head and roller handle
correctly in docking station, close
lid and ‘click’ shut.
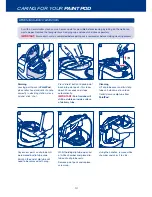
As with a normal roller, clean as much excess paint as possible before cleaning by rolling on the wall or on
waste paper. Remove the triangular brush, edging cup and spout and rinse separately.
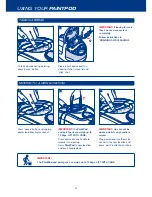
IMPORTANT:
Ensure drain cycle is completed before paint pack is removed or before starting cleaning process.
Press ‘drain’ button to drain paint
back into paint pack – this takes
about 30 seconds and stops
automatically.
IMPORTANT:
Paint residue will
still be visible on inside surface
of delivery tube.
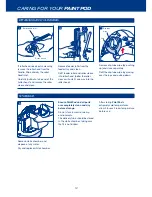
Cleaning
Lift dip tube cover and twist dip
tube anti-clockwise to unlock.
Carfully remove dip tube from
PaintPod.
d
f
e
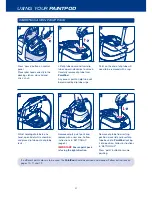
Any excess paint on dip tube will
be removed by dip tube wipe.
Paint on the end of dip tube will
need to be removed with a rag.
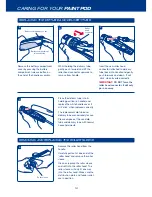
Using the handles, remove white
chamber and carry it to sink.
Whilst holding dip tube, open lid
of white chamber and place dip
tube onto dip tube rests.
Remove paint pack and replace
screw cap.
b
a
1
2
c
1
2
10


