40
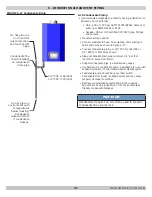
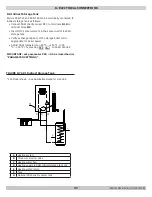
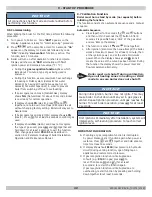
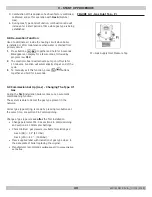
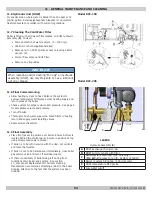
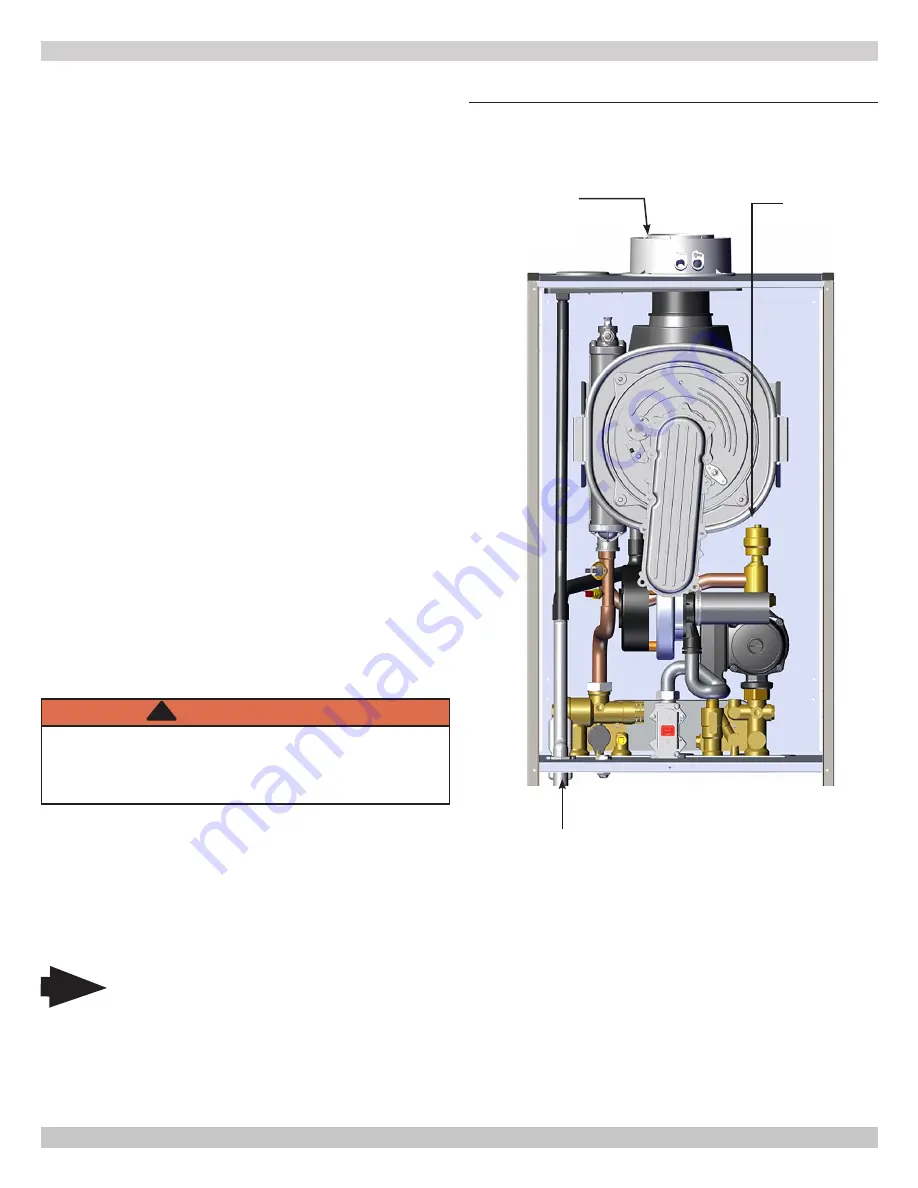
FIGURE 9-1 Condensate Drain Assembly
Model 205 shown (location similar in all sizes)
Pour
approximately
1 cup of water
into flue way of
boiler.
9 - START UP PROCEDURE
9.4 Fill Condensate Trap with Water
WARNING
Asphyxiation hazard! Fill condensate trap before
starting boiler to avoid combustion products escaping
boiler. Failure to follow these instructions could result
in death or serious injury.
!
•
To fill the condensate trap pour water into exhaust vent
until water begins to flow through the siphon.
• Visually inspect the siphon to ensure it is full with clean
water.
• During operation check condensate trap to ensure it
draining properly.
Note
Condensate trap must be manually filled with water
at initial start up.
Condensate Drain
•
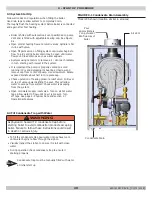
Boiler is fitted with automatic air vent positioned on pump
Vent and is fitted with adjustable sealing cap. See Figure
9-1.
•
Open central heating flow and return valves. Spindle is flat
in-line with valve.
•
Open fill point valve on filling system until water begins to
flow. To aid venting boiler drain may be open until water
flows out. Close drain as soon as water appears.
• Systems using radiators to remove air - Vent each radiator
in turn, starting with lowest in the system.
• It is important the pump is properly vented to avoid
running it dry and damaging its bearings. Unscrew and
remove cap from center of pump. Use screwdriver. Rotate
exposed spindle about half turn, replace cap.
• Check operation of heating pressure relief valve. Pull lever
on top of valve upwards lifting the seat. This will allow
water to escape from system. Check water is escaping
from the system.
• Open cold water supply inlet valve. Turn on all hot water
taps. Allow water to flow until no air is present. Turn
off taps. See page 4- Physical Data and section 2.7
Operational Features.
9.3 System Start Up
Follow all codes and regulations when filling the boiler.
Use drain taps to allow system to completely drain.
Thoroughly flush the heating system before boiler is connected
and again after first heating.
Air Vent
240011947 REV B, [03/31/2018]
Summary of Contents for DCB-125
Page 2: ...DCC 205 ...
Page 4: ...DCB 165 ...
Page 65: ...61 APPENDIX A WIRING DIAGRAMS A 1 MODELS 125 Heat Only 240011947 REV B 03 31 2018 ...
Page 66: ...62 APPENDIX A WIRING DIAGRAMS A 2 MODELS 165 Heat Only 240011947 REV B 03 31 2018 ...
Page 67: ...63 APPENDIX A WIRING DIAGRAMS A 3 MODELS 150 Combi 240011947 REV B 03 31 2018 ...
Page 68: ...64 APPENDIX A WIRING DIAGRAMS A 4 MODELS 205 Combi 240011947 REV B 03 31 2018 ...
Page 69: ...65 NOTES 240011947 REV B 03 31 2018 ...
Page 70: ...66 NOTES 240011947 REV B 03 31 2018 ...
Page 81: ...9 125 WITH ZONE CIRCULATOR PUMPS 125 with Zone Circulator Pumps PN 240011430 REV G 03 31 18 ...
Page 84: ...12 125 WITH ZONE VALVES PIPING DIAGRAM 125 with Zone Valves PN 240011430 REV G 03 31 18 ...
Page 90: ...18 165 with Zone Valves 165 WITH ZONE VALVES PIPING DIAGRAM PN 240011430 REV G 03 31 18 ...
Page 94: ...22 150 205 WITH ZONE PUMPS WIRING DIAGRAM 150 205 With Zone Pumps PN 240011430 REV G 03 31 18 ...
Page 102: ...30 MODEL 125 Heat Only 125 HEAT ONLY WIRING DIAGRAM PN 240011430 REV G 03 31 18 ...
Page 103: ...31 MODEL 165 Heat Only 165 HEAT ONLY WIRING DIAGRAM PN 240011430 REV G 03 31 18 ...
Page 104: ...32 MODEL 150 Combi 150 COMBI WIRING DIAGRAM PN 240011430 REV G 03 31 18 ...
Page 105: ...33 MODEL 205 Combi 205 COMBI WIRING DIAGRAM PN 240011430 REV G 03 31 18 ...
Page 110: ...38 Low Water Cutoff Detail LOW WATER CUTOFF NO NO YES PN 240011430 REV G 03 31 18 ...
Page 111: ...39 NOTES PN 240011430 REV G 03 31 18 ...
Page 112: ......
Page 115: ......
Page 116: ......


