Page 9
1.5 x 2.5m (28mm) Side Store
All dimensions are approximate and subject to the limitations of the material used and the methods of manufacture
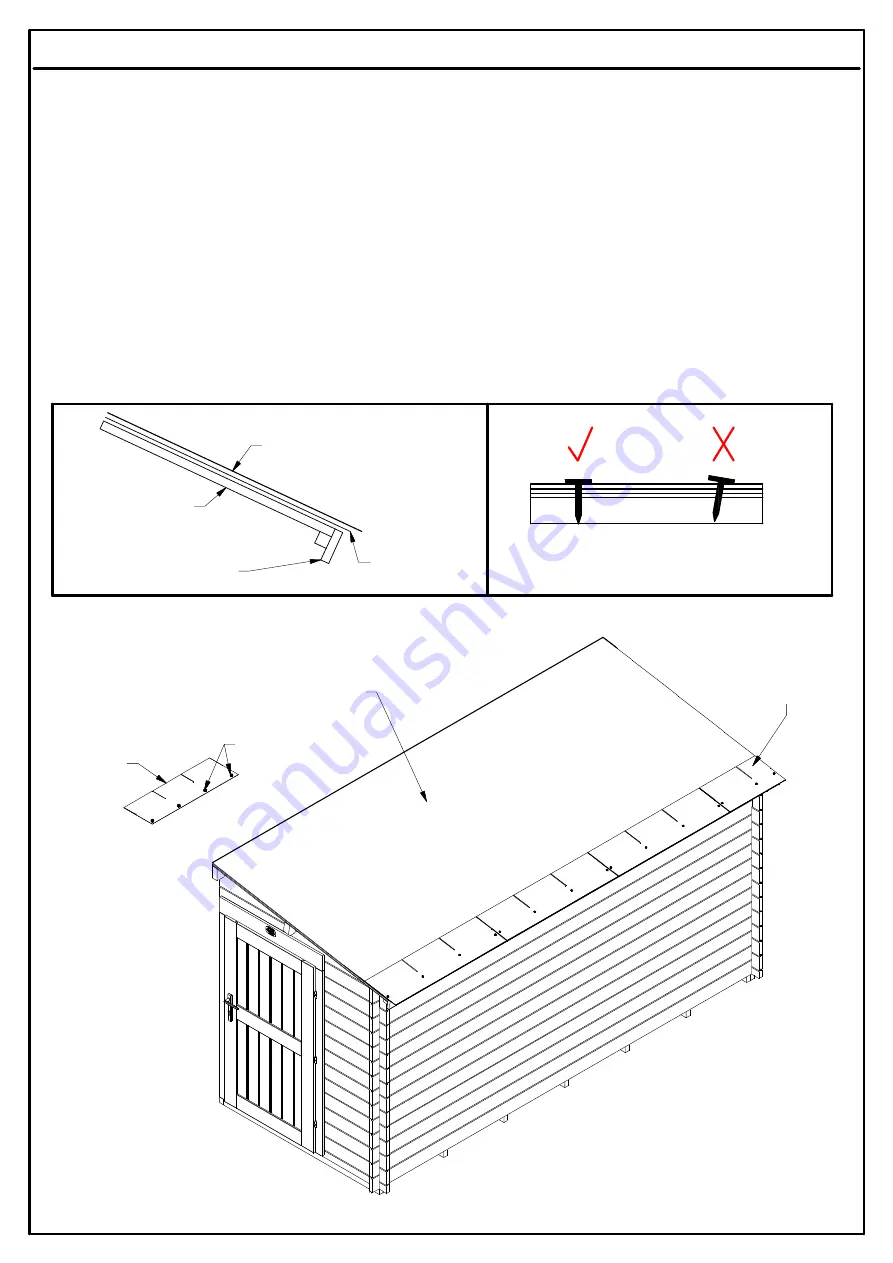
Shingles (15-20mm overhang)
Eaves edging
Roof membrane
(5mm overhang)
Roof board
Roof membrane
First layer of shingles
with the slots/hexagons
facing upwards
Nails
Shingles
Shingles
1. If you have bought roof membrane first fully cover the roof boards using this roof membrane. We suggest to fix it using
a stapler.
2. If your shingles have a peelable plastic backing remove this before installing them to the roof.
3. Starting on the lowest edge of the cabin roof, place a row of shingles over the top of the roof membrane, if you have
purchased this, with the slots/hexagons running upwards and the black edge of the shingle overhanging the roof by
15-20mm and nail along the bottom edge of the tile using 4 nails supplied. Carefully trim off any excess at the end of the
row and keep any full 'tongues'.
4. Lay a second layer of shingles on top of the first row. This time rotate the shingles 180° so that the slots/hexagons are
running downwards. Each row of shingles needs to be offset so cut the first strip into the half. Nail through the center
band of the tile using 4 nails supplied.
5. Lay the next row of shingles with the slots/hexagons in the downwards position, off setting the tiles by half a segment.
Secure by nailing through the centre band.
6. Continue to lay shingles in rows off-set and overlapping each row until you have reached the ridge. (Use the off cuts to
fill in the spaces at the beginning and end of the rows).
7. Once you have reached to top, place one row of shingles offset by half a segment. Nail down the area that covers the
roof board and with the remaining section of shingles, bend and place it up against the side of the cabin to form a 'slide'
look. Please Refer to 'Step F' onwards before securing into place.
Shingles Installation
Step A


