20
5. PREPARING FOR OPERATION
❊
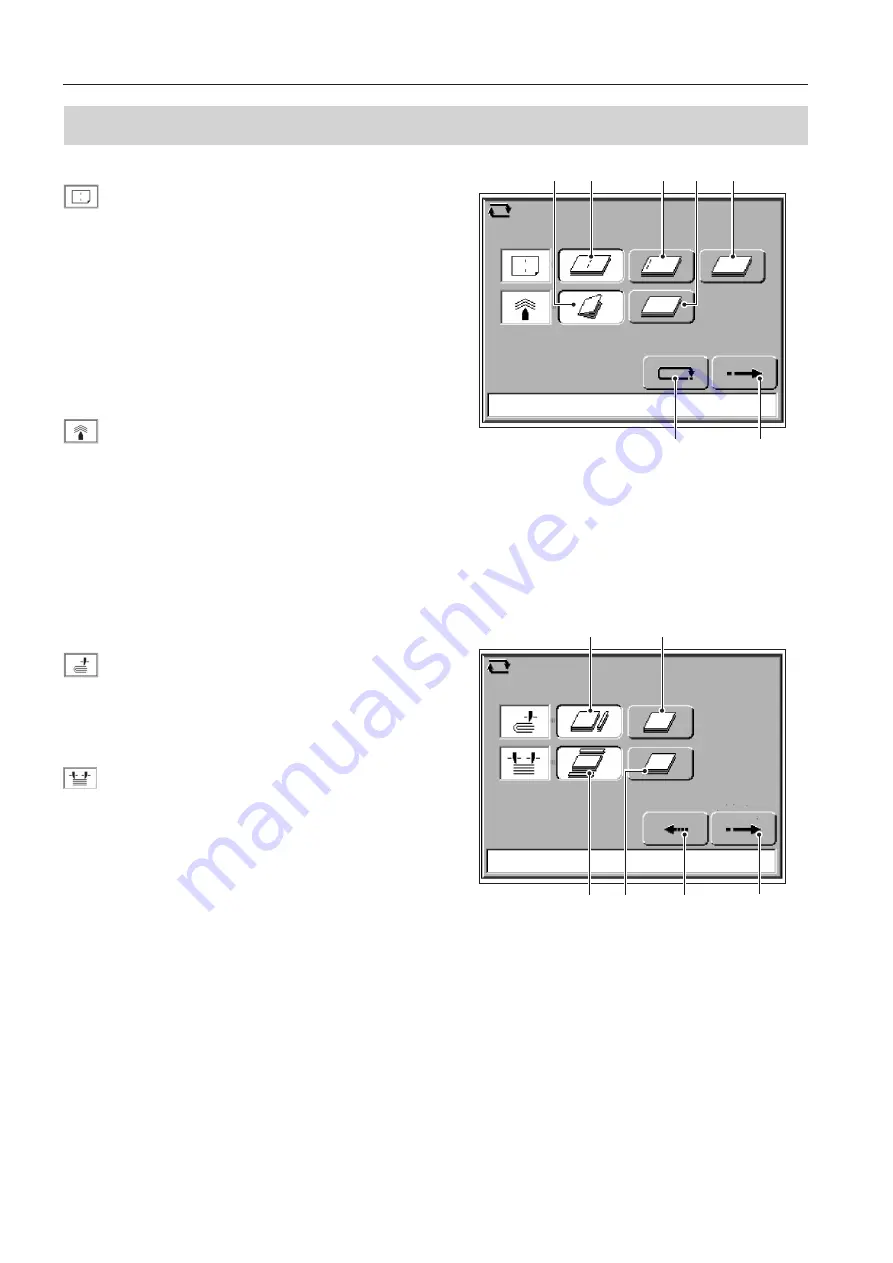
Selecting the binding mode
Select the stitchng and folding mode.
Set the stitching mode.
To perform saddle stitching, select “
1
Saddle
stitching”, to perform side stitching, select “
2
Side
stitching”, and if not performing stitching, select “
3
Stitch Off”.
Select “
2
Side stitching” also for corner stitching.
Selecting “Saddle stitching” automatically sets the
folding mode to “Fold On”. (Can be changed)
Selecting “Side stitching” automatically sets the
folding mode to “Fold Off” and the trimming mode
to “Trim Off”. (Can be changed)
Set the folding mode. To perform folding, select
“
4
Fold On”. If not performing folding, select “
5
Fold Off”.
Selecting “Fold Off” sets the trimming mode to
“Trim Off”.
After setting the binding mode, press the [Next key] to
proceed to the [Select trimming mode] screen.
Pressing the [Cancel key] cancels the values entered,
and then returns to the main menu.
Select the trimming mode.
Set the Fore-edge trim. To perform trimming, select
“
6
Trim On”. If not to perform trimming, select “
7
Trim Off”.
(When DBM-500T is not connected, or when “Fold
Off” is selected, “Trim On” cannot be selected.)
Set the Head/Foot Trim. To perform trimming,
select “
8
Trim On”. If not to perform trimming,
select “
9
Trim Off”.
(When “
7
Fore-edge Trim Off” is selected, “
8
Trim On” cannot be selected.)
After setting the trimming mode, press the [Next key] to
proceed to the [Enter paper size] screen.
1
2
3
4
5
Next key
Cancel key
<Select Binding Mode> Screen
6
7
9
8
Next key
Back key
<Select Trimming Mode> Screen


