29
6. SADDLE STITCHING PROCEDURE
Setting the trimming position
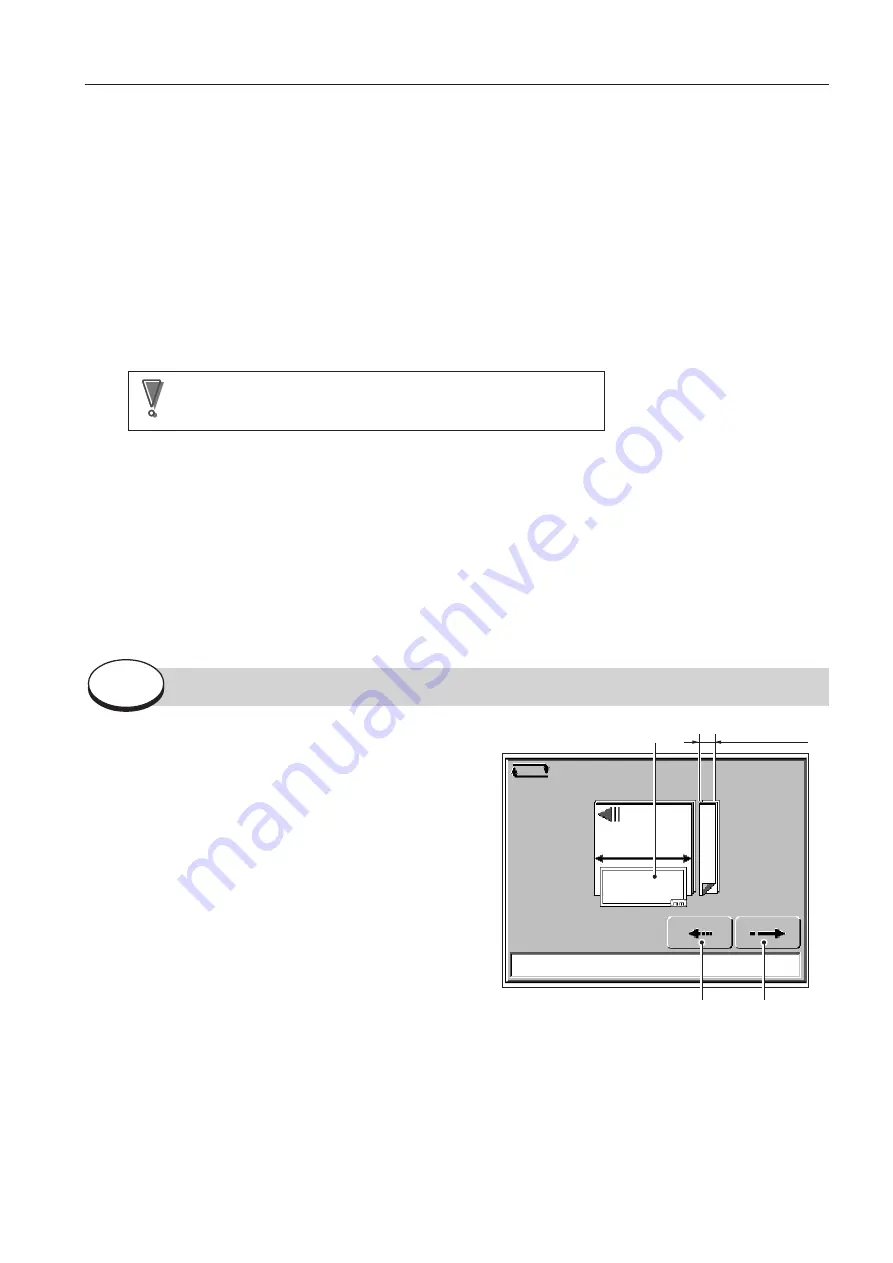
The finished length after Fore-edge Trimming is displayed.
When the paper length is entered, the standard trimming
position will automatically be displayed.
The standard trimming width is 3 mm/0.12 inch.
*
Standard trimming position: (Paper length
÷
2) – 3 mm/
0.12 inch (MAX: 253 mm/9.96 inch)
Here, it is displayed as “207.0/8.15” (420
÷
2) – 3 = 207/
(16.54
÷
2) – 0.12 = 8.15.
If not changing this value, proceed onto the next step.
To change the finished length, press the box
1
to reset
the value displayed to 0, and enter the desired value.
Range of input: 75.0 to 253.0 mm/2.95 to 9.96 inch
(Trimming width within 75 mm/2.95 inch)
Press the [Return key] to confirm the value.
Pressing the box again while entering the value returns
the original value.
After entering the trimming position, press the [Next key]
to proceed to the “Confirm Settings” screen.
Pressing the [Back key] returns to the <Enter Paper Size>
screen.
207 . 0
1
Next key
Back key
Trimming width
<Set Trimming Position> Screen
Step
3
2
2
2
2
2
Enter the width of the paper.
Press the box
2
, and enter “2970/11.69”.
Range of input: 120.0 to 356.0 mm/4.72 to 14.02 inch
Press the [Return key] to confirm the value.
The stitching width is displayed.
The stitching position interval is displayed.
When the paper width is entered, the standard stitching width will automatically be displayed.
*
Standard stitching width: (Paper width
÷
2) mm/inch
Here, it is displayed as “148.5/5.85” (297
÷
2 = 148.5/11.69
÷
2 = 5.85).
When paper width is below 140 mm/5.51 inch, stitching width will always be 70 mm/2.76 inch.
When the standard stitching width set by the paper width entered is inside a stitch prohibited area, a value
avoiding this area will be displayed.
Note
Note
When adjusting the stitching width, avoid the stitching prohibited areas.
To change the value, press the box
5
, and enter the desired value.
Range of input: From 70.0/2.76 (Paper width –28.0 mm/1.10 inch)
Press the [Return key] to confirm the value.
After entering the paper size, press the [Next key] and proceed to the <Set Trimming Position> screen.
As paper size is restricted according to binding conditions, the machine will not proceed to the next step if the paper size
entered is not appropriate.
Pressing the [Back key] returns to the <Select Binding Mode> screen.


