D
ura
FLEX
T
RELLIS
Assembly INSTRUCTIONS
TOOLS NEEDED
Drill with #2 Phillips Bit or
Phillips Screwdriver
Super or Crazy Glue
TRELLIS ASSEMBLY
Trellis Horizontal Cross Rail Assembly
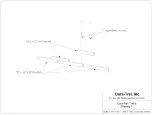
(Refer to Drawing 1) (Make 5 Sections)
Place 3 of the 7/8 x 1 ½ x 12" cross rails on their 7/8" edge, with the pilot holes for screws facing
up. Set 2 of the 7/8 x 1 ½ x 10" cross rails on top of and between the 12" cross rails, lining up the
pilot holes for the screws. Using the hardware bag with the 2" kappet screws, and screw caps,
fasten the 10" cross rails to the 12" rails
Vertical Leg Assembly
(Refer to Drawing 2)
On a clean flat surface lay out the six 72" legs so screw pilot holes are facing up and all angle
bottoms are facing same end. Lay the horizontal cross rail assemblies, across the legs with the
screw heads facing the bottom of the trellis.
Dab household glue over the pilot holes on the legs for one horizontal assembly at a time and fasten
them with the 1 ¼" screws from other hardware bag. (Using glue on the pilot holes of legs will
give the trellis extra sideways strength and stability.) Snap all screw caps over screw heads. Allow
glue to dry before installation.
TRELLIS INSTALLATION
In desired location push the trellis in the ground approximately 6-8". (If soil is extremely hard,
soak and loosen the area with water prior to installing.)
If you encounter missing or defective parts, please contact manufacturer direct at
toll free # below.
Dura-Trel, Inc. ~
PO Box 122, Sheboygan Falls, WI 53085 ~ Toll Free 877-258-6020


