1-7-8
T6550MTI
Mechanical Malfunction determination
1) REEL Malfunction detection
Countermeasure for REEL and CAPSTAN motor
rotation malfunction (Except CASSETTE LOAD-
ING function)
After the Malfunction detection with REEL/CAP-
STAN sensor, the unit shall switch over to STOP
(B) and be REEL Mechanical Malfunction.
a) If the T-REEL pulse is not impressed after a lapse
of 7 sec. at SP, 14 sec. at LP, or more in the REEL
Rotation Mode like PLAY/REC, FS/RS Mode, and
the T-REEL or S-REEL pulse is not impress after a
lapse of 4 sec. or more in REEL Rotation Mode of
FF/REW, it shall be assumed to stop the rotation
and switch over to STOP (B) position, then
POWER be turned OFF and the unit be REEL
Mechanical Malfunction. (T-REEL and S-REEL for
the models on S-REEL and only T-REEL for other
models)
b) If the C-FG pulse is not impressed for a lapse of 1
sec. or more during the CAPSTAN MOTOR rota-
tion, it shall be MOTOR Rotation Malfunction
(REEL Malfunction).
2) DRUM Malfunction detection
Detect the DRUM rotation at the D-FG input termi-
nal.
If the variation of D-FG input level is not detected
for a lapse of 1 sec. or more when D-CONT is "H",
it shall be assumed to be Rotation Malfunction and
be DRUM Malfunction.
When detect Drum Malfunction, POWER shall be
turned OFF after the unit switches over to STOP
(B) Mode.
3) Countermeasure for TAPE LOADING Malfunction
Detect the Malfunction with the LOADING Switch.
a) TAPE LOADING Malfunction
If LD-SW does not go to the established position
after a lapse of 7 sec. or more from TAPE LOAD-
ING or TAPE UNLOADING start, the LOADING
function shall immediately be stopped and POWER
be turned OFF, and inform the Timer about the
LOADING Mechanical Malfunction.
b) LD-SW Position Malfunction at each mode
When the unit operates at each mode, even if the
LD-SW position changes from the established one
in its mode, it keeps the function according to its
mode.
4) Countermeasure for CASSETTE LOADING Mal-
function
a) CASSETTE IN operating Malfunction
If LD-SW does not go to SB position after a lapse
of 5 sec. or more from the CASSETTE insertion
start, the unit starts the CASSETTE OUT opera-
tion.
After switch over to CASSETTE OUT operation and
then a laps of 5 sec. or more from the CASSETTE
OUT operation start, if LD-SW does not go to the
EJ position or if START Sensor and END Sensor
does not turn "ON" at the EJ position, the unit
starts again to insert CASSETTE.
(However in S-INH state, the START/END Sensor
shall be disabled).
b) CASSETTE OUT operating Malfunction
After a lapse of 5 sec. or more from CASSETTE
OUT operation start, if LD-SW does not go to the
EJ position or if START Sensor and END Sensor
does not turn "ON" at the EJ position, the unit
starts to insert CASSETTE.
(However in S-INH state, the START/END Sensor
shall be disabled).
When the unit switches over to CASSETTE inser-
tion at CASSETTE IN or CASSETTE OUT Mal-
function, if LD-SW does not go to the SB position
after a lapse of 5 sec. or more from CASSETTE
insertion start, the function shall immediately be
stopped and POWER be turned OFF, and the unit
be CASSETTE LOADING Malfunction.
c) When POWER is turned ON, if the CL position or
GC position cannot be detected after 5 sec. LD-
REV operation and 5 sec. LD-FWD operation, the
function shall immediately be stopped and POWER
be turned OFF, and the unit be CASSETTE LOAD-
ING Malfunction.
d) When POWER is turned ON without CASSETTE
(EJ position) and LD-SW is monitored all the time,
if the CL or GC position is detected continuously for
1 sec. or more, the POWER shall be turned OFF
and the unit be CASSETTE LOADING Malfunction.
Countermeasure for Mechanical
Malfunction
If the unit detects Mechanical Malfunction, turn the
POWER OFF. If the unit is Mechanical Malfunction,
Key input except POWER key shall be disabled and
CASSETTE insertion disabled. When POWER Key is
entered, the POWER is turned ON and the unit
switches over the EJECT Mode. (Return with POWER
ON)
Summary of Contents for T6605VF
Page 17: ...1 5 4 T6605DC Fig 4 S 10 S 10 S 10 S 10 Anode Cap 10 CRT CRT CBA...
Page 22: ...1 5 9 T6705DC Fig 4 S 10 S 10 S 10 S 10 Anode Cap 10 CRT CRT CBA...
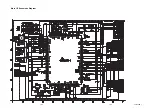
Page 41: ...Main 1 5 Schematic Diagram 1 8 3 1 8 4 T6605SCM1...
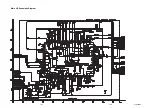
Page 42: ...Main 2 5 Schematic Diagram 1 8 5 1 8 6 T6605SCM2...
Page 64: ...1 14 5 T6605PEX Packing T6605VF S3 S6 X3 S2 X4 X1 TAPE S1 FRONT S4 X2 3...
Page 65: ...1 14 6 T6605PEX T6705VF S3 S6 X3 S2 X4 X1 TAPE S1 FRONT S4 X2 3...
Page 99: ...2 4 9 Z13PDA Fig DM16 43 41 42 L 13 Fig DM17 44 45 Slide P 9...

