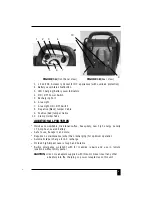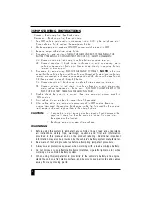
5
JUMP STARTING INSTRUCTIONS
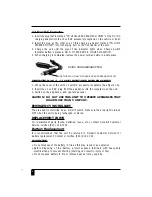
Connect – Red clamp first, then black clamp.
Disconnect – Black clamp first, then red clamp.
1. Turn OFF vehicle ignition and all accessories (radio, A/C, lights, cell phone, etc.).
Place vehicle in “Park” and set the emergency brake.
2. Make sure jump-start system’s ON/OFF power switch is turned to OFF.
3. Remove jumper cables from clamp holder.
4. Procedure for jump-starting a NEGATIVE GROUNDED SYSTEM (NEGATIVE
BATTERY TERMINAL IS CONNECTED TO CHASSIS). (MOST COMMON)
4a. Connect positive (+) red clamp to vehicle battery’s positive terminal.
4b. Connect negative (-) black clamp to chassis or a solid, non-moving, metal
vehicle component or body part. Never clamp directly to negative battery
terminal or moving part..
5. Procedure for jump-starting POSITIVE GROUND SYSTEMS
NOTE:
In the rare
event that the vehicle to be started has a Positive Grounded System (positive battery
terminal is connected to chassis) replace steps 4a and 4b above with steps 5a and
5b, then proceed to steps 6 through 8 below.
5a. Connect negative (-) black clamp to vehicle battery’s negative terminal
5b. Connect positive (+) red clamp to vehicle chassis or a solid, non-moving,
metal vehicle component or body part. DO NOT CLAMP DIRECTLY TO
POSITIVE BATTERY TERMINAL OR MOVING PART
6. Double check the polarity is correct, then turn jump-start power switch to
ON position.
7. Start vehicle (do not turn key for longer than 5-6 seconds).
8. After vehicle starts, turn jump-start’s power switch to OFF position. Remove
clamps (disconnect the negative black jumper cable first, followed by the positive
(red) jumper cable and replace them in the clamp holders.
CAUTION:
•
If engine fails to start, leave ignition key turned off and disconnect the
negative (-) clamp first, then the positive (+) clamp. Try again later –
the engine may be flooded.
• Recharge jump-start system after each use.
WARNINGS:
1. Before using this system to jump-start any vehicle or boat, read and understand
all instructions, safety tips, warnings, cautions and first aid information
provided in this manual and on the product labeling. Additional important
information may also be provided by the vehicle’s battery system manufacturer.
2. Be aware of first aid procedures before attempting jump-start procedure.
3. Always wear protective eyewear when working with a lead acid-type battery.
4. Do not smoke or use inflammable items (matches, cigarette lighters, etc.) while
working on a vehicle’s battery system.
5. When using this jump-starter in proximity to the vehicle’s battery and engine,
stand the unit on a flat, stable surface, and be sure to keep all cords and cables
away from any moving parts.

