


5
Operating Instructions and Parts Manual
80-376
HVLP
SPRAY GUN
®
®
05/15
2015 DURALAST
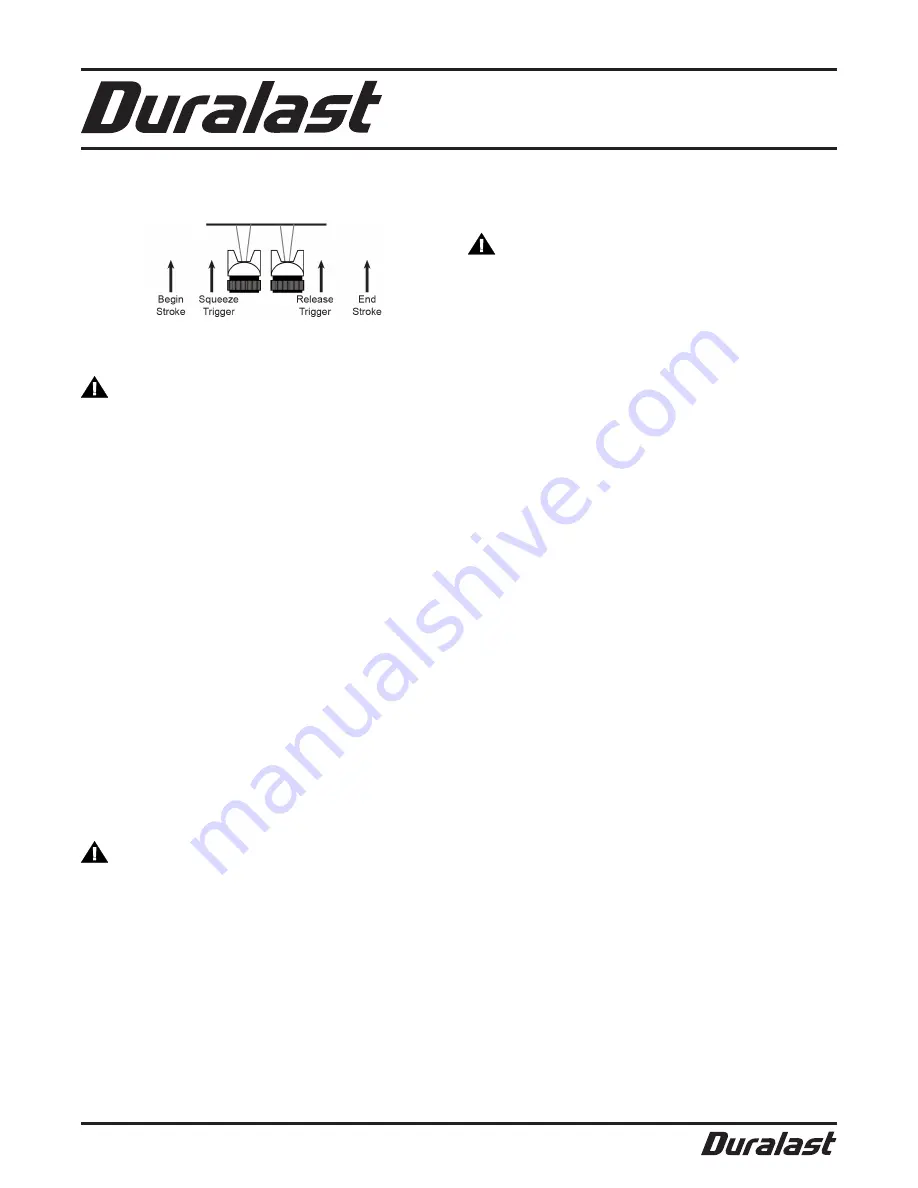
NOTE:
The stroke speed, the Fluid Knob adjustment, and the distance
from the workpiece, will determine how much paint is being applied.
Apply two thin coats rather than one thick coat.
MAINTENANCE
WARNING
Disconnect the HVLP Spray Gun from air supply before changing
accessories, servicing or performing maintenance.
1. Replace or repair damaged parts. Use genuine parts only.
Unauthorized parts may be dangerous and will invalidate the
warranty.
2. Blow out air line to clear it of accumulated dirt and moisture.
3. Clean the HVLP Spray Gun immediately after EVERY use.
4. DO NOT use worn or damaged accessories.
5. To prevent accidents, release trigger, detach air supply, safely
discharge any residual air pressure, and release trigger again after
use.
INSPECTION
NOTE:
These procedures are in addition to the regular checks and
maintenance explained as part of the regular operation of the
air-operated tool. BEFORE EACH USE, inspect the general condition of the
tool. Check for:
•
Loose screws
•
Misalignment or binding of moving parts
•
Clogged nozzle
•
Damaged air supply nose
•
Cracked or broken parts
•
Damaged electrical wiring
•
Any other condition that may affect its safe operation
CLEANING / SOLVENT SELECTION
CAUTION
Do NOT use chlorinated solvents (e.g. 1-1-1 trichloroethylene and
dichloromethane, also known as methylene chloride) to clean spray guns.
Many spray guns contain aluminum, which reacts strongly to chlorinated
solvents. Contact the solvent or coating manufacturer as needed
regarding potential chemical reactions.
1. Follow the paint manufacturer’s recommendations for cleaning,
solvent type and disposing of used solvent.
2. Flush the HVLP Spray Gun a full hose length from the air
compressor.
3. If collecting flushed solvents in a metal container, transfer to a
nonmetal container and flush the metal container.
4. Do NOT immerse the HVLP Spray Gun.
IMPORTANT:
Do not use mineral spirits on latex paints or the
mixture will congeal, making it very difficult to remove.
•
Oil Based Paints: Use mineral spirits.
WARNING
TO PREVENT FIRE, IF A FLAMMABLE SOLVENT
NEEDS TO BE USED, ADHERE TO THE FOLLOWING:
1. Work far away from any ignition sources in a vapor free area.
2. Keep a class ABC fire extinguisher nearby.
AFTER EACH USE:
1. Empty the Cup and fill the Cup with the solvent to clean it.
2. While shaking the HVLP Spray Gun, spray the solvent through the
gun into a container.
3. Once the Cup is empty, repeat the process until the solvent comes
out clean.
4. Disconnect from the air source.
5. After disconnecting, point the HVLP Spray Gun into the spent
solvent container and squeeze the Trigger again to make sure no air
remains.
6. Remove the Nozzle and soak it in the solvent until it is clean.
7. Use an old toothbrush or toothpicks to remove any leftover paint.
8. Inspect the Fluid Needle and make sure it is not bent. If it is bent,
have it replaced by a qualified technician.
9. Use appropriate solvent (See Solvent Selection) to wipe down the
HVLP Spray Gun body.
10. Lubricate the HVLP Spray Gun after cleaning.
11. A non-silicon or a light lubricant may be used on threaded
connections before storing.
NOTE:
To prevent damage to the passages, do NOT use metal objects
to clean the Nozzle.
SOLUTION DISPOSAL
After cleaning, dispose of the cleaning solution according to the solution
manufacturer’s directions and local hazardous waste standards.
Figure I: Paint Stroke Triggering - top view


