background image

8

INFORMATION ON WASTE DISPOSAL FOR CONSUMERS OF 

ELECTRICAL & ELECTRONIC EQUIPMENT.

When this product has reached the end of its life it must be treated 

as Waste Electrical & Electronics Equipment (WEEE). Any WEEE 

marked products must not be mixed with general household waste, 

but kept separate for the treatment, recovery and recycling of the 

materials used. Contact your local authority for details of recycling 

schemes in your area.

Made in China. PR2 9PP

V.1.0

pole of the diode being measured and the black one to the negative pole. 

Read the approximate forward voltage drop of the diode on the display.

Circuit On-Off Measurement

•  Insert the black probe into the COM jack and the red one into the 

V.Ω.mA


jack.

•  Turn the switch to the      position and connect the probes in parallel with 

two points of the circuit being measured. If the resistance between the 

two points is less than 100Ω, the built-in buzzer will sound to indicate the 

continuity between the two points.

Temperature Measurement

•  Turn the switch to the 

°C

 position and insert the black probe of the 

thermocouple sensor into the COM jack and the red into the 

V.Ω.mA

 jack. 

•  Place the operating terminals (temperature measurement terminals) onto 

or inside the object being measured and directly read the temperature 

value in 

°C

 on the display.

•  When the switch is turned to the °C position and the sensor is in an open 

circuit, the display shows room temperature.

Replacement of battery and fuse

•  Under normal conditions it is unnecessary to replace the fuse.

•  Do not replace it until the probes are unplugged and the power is shut 

down. Take out the two screws of the rear cover to remove the housing.

• 

The specification of the fuse is:

- F1 250mA/250V, F210A/250V

(Any replacement should be of the same specification.)

•  The battery for this multimeter is 9V NEDA 1604 or 6F22.

•  Do not put the instrument into use until the rear cover is screwed after 

replacing the battery or fuse.

Summary of Contents for D03125

Page 1: ...1 3 DIGITAL MULTIMETER MODEL D03125 ...

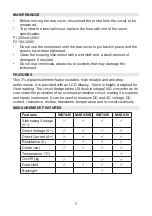
Page 2: ...suring do not touch the input terminal not in use When a measurement range is uncertain turn the function range switch to the maximum range position Before turning the function range switch make sure the probe is open with the circuit being measured Before on line resistance measurement of voltage higher than 60V DC 30V AC remember to keep your fingers behind the hand shield of the probe When meas...

Page 3: ...gital multimeter features stable high reliable and anti drop performance It is provided with an LCD display 15mm in height designed for clear reading The circuit design takes LSI double integral A D converter as its core under the protection of an overload protection circuit making it a superior and handy instrument It can be used to measure DC and AC voltage DC current resistance diodes transisto...

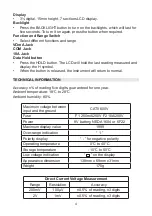
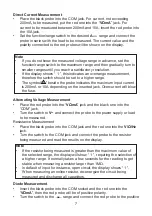
Page 4: ...lay Appearance dimension 138mm x 69mm x 31mm Weight 170g Direct Current Voltage Measurement Range Resolution Accuracy 200mV 100μV 0 5 of reading 3 digits 2V 1mV 0 5 of reading 3 digits Display 3 digital 15mm height 7 sections LCD display Backlight Press the BACKLIGHT button to turn on the backlights which will last for five seconds To turn it on again press the button when required Function and Ra...

Page 5: ...n Alternating Voltage Measurement Range Resolution Accuracy 200V 100mV 1 2 of reading 10 digits 600V 1V 1 2 of reading 10 digits Overload protection 600V DC or RMS Frequency range 40Hz to 400Hz Display Average effective value of sinusoid Resistor Range Resolution Accuracy 200Ω 0 1Ω 0 8 of reading 5 digits 2kΩ 1Ω 0 8 of reading 2 digits 20kΩ 10Ω 0 8 of reading 2 digits 200kΩ 100Ω 0 8 of reading 2 d...

Page 6: ...itch to the range of V and connect the probe to the power supply or load to be measured The polarity touched by the red probe will be on the display Plug the instrument in and check the 9V battery If it is low the symbol will display meaning the battery needs replacing The besides the probe jack indicates that the input voltage or current should not exceed the specified limits in orderto protect t...

Page 7: ...rent will blow the fuse Alternating Voltage Measurement Place the red probe into the VΩmA jack and the black one into the COM jack Turn the switch to V and connect the probe to the power supply or load to be measured Resistance Measurement Place the black probe into the COM jack and the red one into the V Ω Hz jack Turn the switch to the COM jack and connect the probe to the resistor being measure...

Page 8: ...ints is less than 100Ω the built in buzzer will sound to indicate the continuity between the two points Temperature Measurement Turn the switch to the C position and insert the black probe of the thermocouple sensor into the COM jack and the red into the V Ω mA jack Place the operating terminals temperature measurement terminals onto or inside the object being measured and directly read the temper...

Reviews: