FMH Conveyors
®
Operator’s Manual
NestaFlex 376PL Conveyors
13 |
P A G E
EFFECTIVE JUNE 2017 PART # 016842 ©2016 FMH CONVEYORS LLC
Nut, Screw, Washer Replacement
Tools and Parts required: ½” wrench, 7/16” wrench, hex shoulder screw, ¼‐20 hex dimple nut, and a
spring washer.
1.
Extend the conveyor to its fully open position. Remove
and discard the old nut, screw, and spring washer.
2.
Put the spring washer on the screw and insert the
screw through both side link holes.
NOTE: The spring washer (1) must be between the screw
hex head (2) and the side link (3) as shown at right.
3.
Thread a new nut onto the screw. Hold the screw
with the ½” wrench and tighten the nut (4), using the
7/16” wrench. Tighten to 70‐80 lb‐in (7.9 – 9.0 N‐m).
Shaft Replacement
Tools and Parts Required: Two ½” wrenches, a nylon lock nut, and a new shaft
NOTE: Some shafts may pass through other components, such as washers and spacers. Before removing
a shaft, make a note of the position of any such components. During reassembly, return these pieces to
their proper position to ensure the structural integrity and functionality of the conveyor.
1.
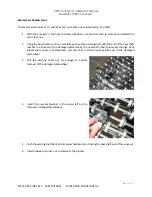
With the conveyor in the fully contracted position, use
the wrenches to remove and discard the nylon lock nut.
2.
Using the replacement shaft as a driver, carefully push
out and remove the damaged shaft. The replacement
shaft should now pass through all of the washers,
spacers, skate wheels, and links in their proper position.
3.
Install a new lock nut to complete the process.

