background image

FMH Conveyors

®

 Operator’s Manual 

NestaFlex 376PL Conveyors


7 | 

P A G E


EFFECTIVE JUNE 2017  PART # 016842        ©2016 FMH CONVEYORS LLC  


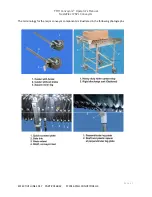
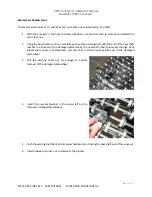
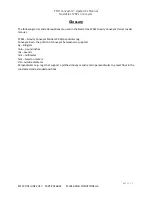
The terminology for the major conveyor components is illustrated in the following photographs.


Summary of Contents for FMH NestaFlex Gravity 376PL

Page 1: ...staFlex Gravity 376PL Conveyor System Operator s Manual FMH Conveyors LLC 9701 E Highland Dr Jonesboro AR 72401 p 800 327 9209 t 870 935 3661 Part Number 016842 Effective June 2017 www fmhconveyors co...

Page 2: ...up of factory trained customer service representatives They can be reached via our toll free number 1 800 327 9209 Whether your needs require assistance from the factory or in the field please do not...

Page 3: ...n 1 Warranty Statement 3 Safety Information 3 Warnings 3 Receiving Information 4 Product Specifications 5 Part Terminology 6 Installation Instructions 8 Operating Instructions 10 Maintenance 10 Troubl...

Page 4: ...ively baggy clothing that could get caught in the system Broken or worn parts must be replaced immediately to ensure the conveyor system remains in a safe proper working condition To extend or contrac...

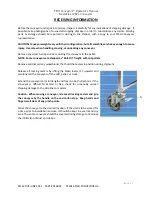
Page 5: ...NOTE Some conveyors are shipped as Roll On freight without pallets Remove and discard any wood blocks that hold the casters in position during shipment Release all locking casters by lifting the brake...

Page 6: ...Link Construction The side links are made of 1 1 4 inch wide steel Side links are assembled with nuts and screws Casters 6 x 2 inch casters are used for easy mobility and end sections have swivel lock...

Page 7: ...r s Manual NestaFlex 376PL Conveyors 6 P A G E EFFECTIVE JUNE 2017 PART 016842 2016 FMH CONVEYORS LLC PART TERMINOLOGY The terminology for the major conveyor components is illustrated in the following...

Page 8: ...Operator s Manual NestaFlex 376PL Conveyors 7 P A G E EFFECTIVE JUNE 2017 PART 016842 2016 FMH CONVEYORS LLC The terminology for the major conveyor components is illustrated in the following photogra...

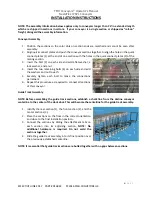
Page 9: ...sert the two remaining bolts 4 on each side and add the washers and nut to each 5 Securely tighten each bolt to make the connections permanent 6 Repeat this procedure as required to connect all sectio...

Page 10: ...en the connectors as they will be removed later 4 With the contracted conveyor against the back stop of the guide track there should be a gap of 4 to 6 inches minimum between the carton stop and the t...

Page 11: ...l are clear of the working area Unlock the locking casters grip the conveyor by the handle at the carton stop and extend the conveyor across the dock area and into the trailer being careful to avoid p...

Page 12: ...equivalent dimple lock nuts 6 inner leg caster 1 Move the conveyor off of the guide track 2 Identify the section of conveyor that contains the inner leg caster to be replaced 3 Separate that conveyor...

Page 13: ...s remove the self tapping screw that secures the H Frame to the leg support bracket and the nut plates discard the nut plates 9 Remove the H Frame 10 Insert the new H Frame by sliding it through the s...

Page 14: ...hten the nut 4 using the 7 16 wrench Tighten to 70 80 lb in 7 9 9 0 N m Shaft Replacement Tools and Parts Required Two wrenches a nylon lock nut and a new shaft NOTE Some shafts may pass through other...

Page 15: ...y push out the existing shaft until the end of the new shaft reaches the location of the damaged skatewheel The new shaft should now pass through all of the washers spacers skatewheels and side links...

Page 16: ...our system The axle restrictor nut plate size is stamped on the part Example 50030 indicates a 1 2 inch per foot pitch 500 and a 3 0 inch axle spacing 30 1 Loosen and back off the self tapping screw 1...

Page 17: ...gaged Over tightened link fastener Loosen concerned link fastener replace lock nut if needed Torque link fasteners to between 70 and 80 lb in 7 9 9 0 N m Damaged Conveyor Check for and replace damaged...

Page 18: ...4 Curve Guard one side or both sides Rigid Discharge Cart Spare Parts To maintain safe operation and extend the life of your Nestaflex 376PL conveyor replace any worn or damaged components before usi...

Page 19: ...FMH Conveyors Operator s Manual NestaFlex 376PL Conveyors 18 P A G E EFFECTIVE JUNE 2017 PART 016842 2016 FMH CONVEYORS LLC...

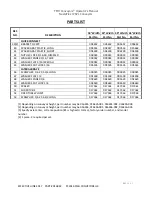
Page 20: ...015440 015657 16 NUT HEX LOCK 5 16 18 NYLON 000022 000022 000022 000022 17 SPACER GRAY PLASTIC LONG 003197 006457 006458 015662 18 SPACER GRAY PLASTIC SHORT 003195 017119 005910 015793 19 LEG SUPPORT...

Page 21: ...FMH Conveyors Operator s Manual NestaFlex 376PL Conveyors 20 P A G E EFFECTIVE JUNE 2017 PART 016842 2016 FMH CONVEYORS LLC...

Page 22: ...5 WASHER SPLIT LOCK 5 16 005535 005535 005535 005535 LATERAL BRACE 46 SCREW HEX 1 4 20 1 3 4 LONG 000025 000025 000025 000025 47 WASHER FLAT 1 4 001338 001338 001338 001338 48 WASHER FENDER 1 4 002629...

Page 23: ...aFlex 376PL Gravity Conveyor Trailer Loader manual 376PL Gravity Conveyor Model 376 Perpendicular Leg Conveyor Bed the portion of conveyor between two supports kg kilogram lb in pound inches lbs pound...

Page 24: ...__________________________________ ________________________________________________________________ ________________________________________________________________ ___________________________________...

Reviews: