Rev.4
26
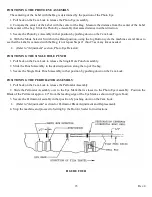
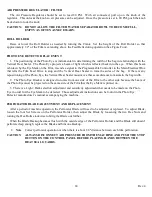
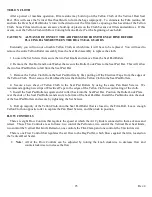
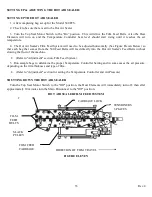
FILM FEED BELTS REMOVAL AND REPLACEMENT:
CAUTION: TURN THE MAIN DISCONNECT ON THE CONTROL PANEL TO THE "OFF" POSITION AND
REMOVE THE AIR SUPPLY FROM THE MACHINE BEFORE MAKING ADJUSTMENTS.
1. Turn the Main Disconnect to the "off" position and remove the Air Supply to the machine.
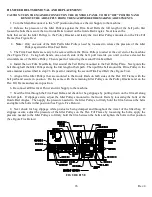
2. Release the pressure of the Idler Pulleys against the Film Feed Belts the full length of the belt path; first
loosen the bolts that secure the two Guide Rails located on the Guide Rail Angles. Next loosen the
bolts that secure the Idler Pulleys to the Pulley Bracket and lastly the four Idler Pulleys mounted on the Flex Fill
Frame (See Figure Five).
•
Note: Only one side of the Belt Path's Idler Pulleys need be loosened to release the pressure of the Idler
Pulleys against the Film Feed Belts.
3. The Film Feed Belts are ready to be removed from the Drive Pulleys located at the exit end of the machine
(See Figure Five). Using both hands, one on each side of the belt, pull towards you until you have cleared the
circumference of the Drive Pulley. Then repeat for removing the second Film Feed Belt.
4. Install the new Film Feed Belts, first around the Tail Pulley mounted to the Tail Pulley Plate. Next guide the
belt through all the Idler Pulleys along the full length of belt path. Then pull the belt around the Drive Pulley in the
same manner as described in step #3. Repeat for installing the second Film Feed Belt (See Figure Five).
5. Align all the Idler Pulleys that are mounted to the Guide Rails on both sides of the Flex Fill Frame with the
belt path and secure in position. Do the same with the remaining Idler Pulleys on the Pulley Bracket and on the
Flex Fill Frame and secure in position.
6. Reconnect all Electrical Power and Air Supply to the machine.
7. Feed the film through the Film Feed Belts, and check for bag slippage by pulling down on the film all along
the belt path. If slippage exists, adjust the Idler Pulleys mounted to the Guide Rails by loosening the bolts at the
Guide Rail Angles. Then apply the pressure needed to the Idler Pulleys to firmly hold the film between the belts
and tighten the bolts in that position (See Figure Five Below).
8. Next check for bag slippage while product is being dumped and throughout the travel of the filled bag. If
slippage occurs, adjust the pressure of the Idler Pulleys on the Flex Fill Frame by loosening the bolts, apply the
pressure needed to the Idler Pulleys to firmly hold the film between the belts and tighten the bolts in that position
(See Figure Five Below).
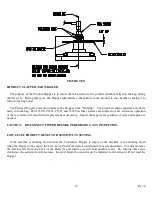
FIGURE FIVE
Summary of Contents for Hamer 540
Page 2: ......
Page 4: ......
Page 7: ...Rev 4 SECTION ONE MODEL 540 FORM FILL AND SEAL MACHINE...
Page 8: ......
Page 14: ......
Page 40: ...Rev 4 31 FIGURE EIGHT FIGURE NINE...
Page 47: ......
Page 55: ...Rev 4 45 SECTION TWO MODEL 540 ASSEMBLY DRAWINGS...
Page 56: ......

