Rev.4
40
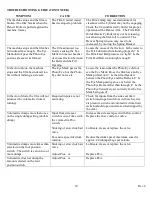
TROUBLESHOOTING GUIDE (CONTINUED)
SYMPTOM
CAUSE
CORRECTION
Side Seal is not being formed
properly.
Film is sticking to the Side
Seal Bar or Teflon Cloth.
Scrape off the Heat Seal Bar. A rapid build up of
film on the Heat Seal Bar indicates that the bar
should be hotter. Remove film from the Teflon
Cloth and Seal Pad Guards. A rapid build up of
film on the Teflon Cloth indicates that the Heat
Seal Bar may be too hot. Rotate the Teflon Cloth
¼ turn and coat the cloth with Dow Corning
Silicone Paste #7. Adjust the Film Guides to
prevent curling as the film passes through the
Vertical Heat Seal.
Poor seal strength
Improper vertical seal
temperature.
Improper seal pad
adjustment.
Excessive tension on the
film.
Film is not stopping soon
enough.
Try increasing the vertical seal temperature.
Check that the Vertical Seal Hot Knife is in
contact with the Seal Pad the entire length of the
bag.
Check the Unwind Assist System for improper
operation, especially the Film Clamp for proper
clearance.
The brake of the Film Feed Clutch is not engaged
properly.
Check that the Seal Pad Guards are set flush with
the Teflon Cloth and the Seal Pad.
Also adjust the pressure on the Idler Pulleys
mounted on the Pulley Bracket.
Check to see that the resistance across the Vertical
Seal Heat Element wires is approx. 40 ohms.
Bag top perforations breaking. Perforation blade
adjustment is too deep.
Flim clamp is not
releasing.
Reduce the blade protrusion from the blade mount.
Clean, lubricate, or replace the air valve.
Temperature Control for the
side seal reads “OPEN”
Open circuit in the
thermocouple wire.
Bad connection in the
temperature control
housing.
Replace eyelet or complete thermocouple wire.
To replace the eyelet, strip off the insulation and
twist wires together.
Push in on the face of the control or pull out on the
face then push it back in.
Temperature control does not
illuminate.
No power to the
temperature control.
Check for air to the machine. Check for a working
air pressure switch. Push in on the face of the
control, or pull out the face and then push it back
in.
Summary of Contents for Hamer 540
Page 2: ......
Page 4: ......
Page 7: ...Rev 4 SECTION ONE MODEL 540 FORM FILL AND SEAL MACHINE...
Page 8: ......
Page 14: ......
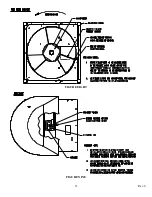
Page 40: ...Rev 4 31 FIGURE EIGHT FIGURE NINE...
Page 47: ......
Page 55: ...Rev 4 45 SECTION TWO MODEL 540 ASSEMBLY DRAWINGS...
Page 56: ......


