20
PF Conveyors | Installation, Operation & Maintenance Manual
u
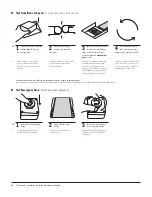
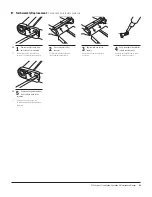
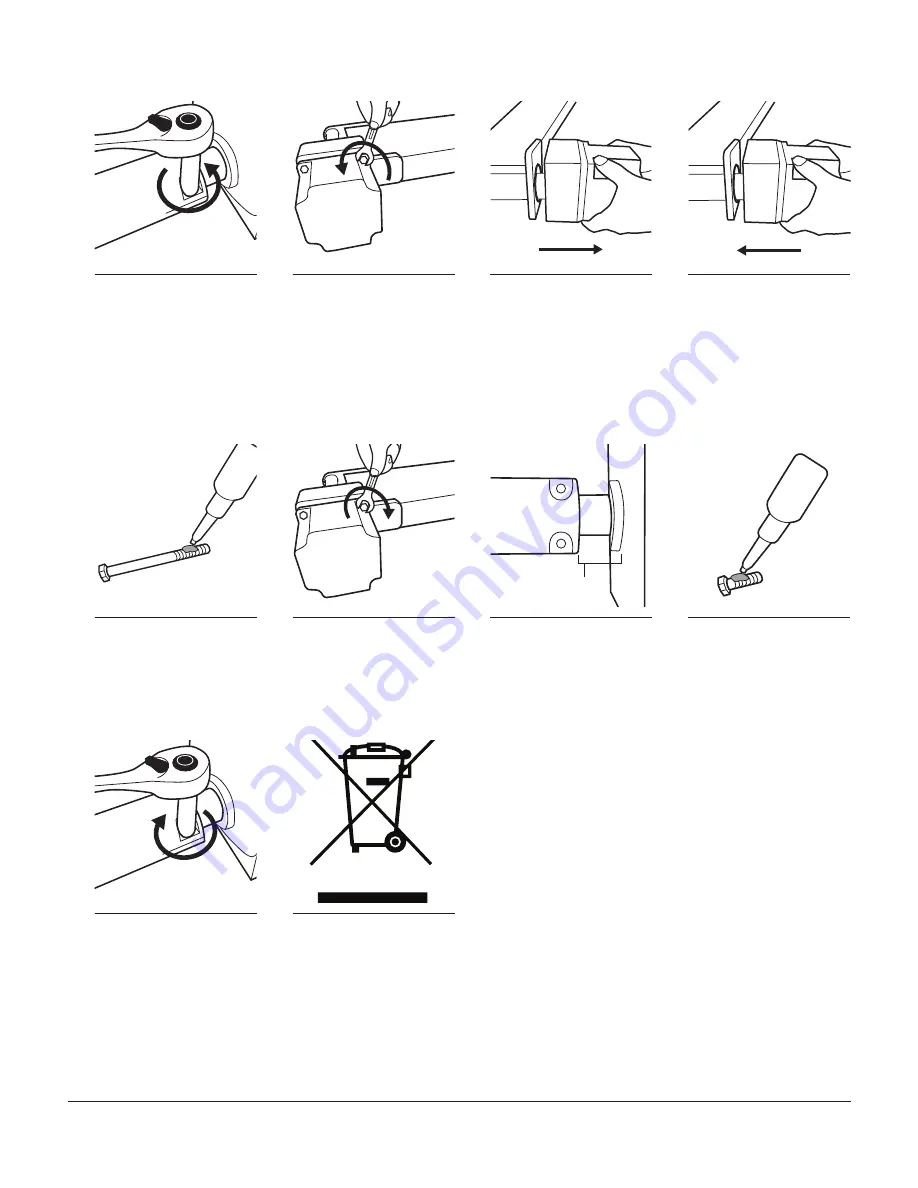
Gearmotor Change
/ Sostituzione del motoriduttore
x2
x4
x4
EN
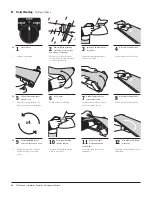
1
Loosen and remove two hex
clamping screws holding drive
pulley to gearmotor using an 8mm
socket
2
Loosen and remove four hex
head bolts holding gearmotor
to mounting plate using a 13mm
wrench
3
Slide gearmotor out of drive
pulley and mounting plate
4
Apply anti-seize to motors
shaft and slide through motor
mounting bracket into pulley
IT
Allentare e rimuovere due viti a testa
esagonale sul cuscinetto opposto al
motore usando una chiave a bus-
sola da 8 mm (fare attenzione a non
perdere le rondelle in gomma)
Allentare e rimuovere quattro bulloni
a testa esagonale che fissano il mo-
toriduttore alla piastra di montaggio
usando una chiave da 13 mm
Sfilare il motoriduttore e il tamburo
motore dalla piastra di montaggio
Allentare e rimuovere due viti di fis-
saggio a testa esagonale che fissano
il tamburo motore al motoriduttore
usando una chiave a bussola da 8
mmo
x4
x4
24mm
EN
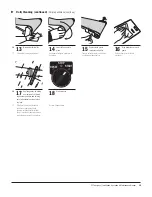
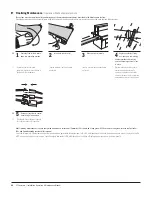
5
Apply removable threadlocker
to motor mounting screws
6
Insert and tighten four motor
mounting screws using a
13mm wrench
7
Ensure gap between motor
and pulley is 24mm
8
Apply removable threadlocker
to pulley clamping screws
IT
Applicare del frenafiletti rimovibile alle
viti di fissaggio del tamburo
Inserire e stringere quattro viti di
montaggio del motore usando una
chiave da 13 mm
Assicurarsi che lo spazio tra il motore
e il tamburo sia di 24 mm
Applicare del frenafiletti rimovibile alle
viti di fissaggio del tamburo
x2
EN
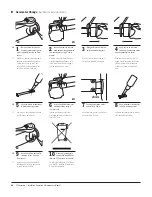
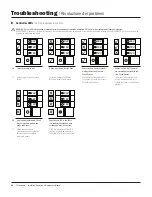
9
Insert and tighten both pulley
clamping screws using an
8mm socket
10
Dispose of gearmotor in
compliance with WEEE or
return to QC Conveyors for disposal.
IT
Inserire e stringere entrambe le viti
di fissaggio del tamburo usando una
chiave a bussola da 8 mm
Smaltire il motoriduttore in conformità
con i RAEE o restituire ai trasportatori
QC per lo smaltimento.


