P a g e
|
58
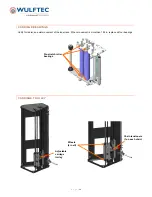
FILM LOADING
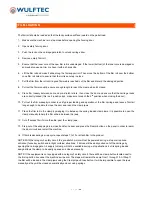
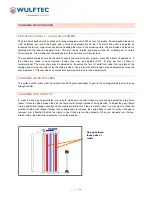
The film roll should be loaded so that the tacky surface will face inward on the pallet load.
1. Make sure the machine is in stop mode before opening the fencing door.
2. Open safety fencing door.
3. Push the lock on the carriage gate latch to unlock carriage door.
4. Remove empty film roll.
5. Ensure that the inner core of the new film roll is undamaged. If the lower (bottom) of the inner core is damaged or
somewhat unwound, trim or shave it with a sharp knife.
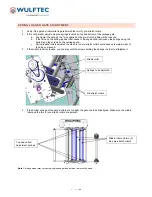
6. Lift the film roll and make it slide along the film support roll. Then move the bottom of the film roll over the bottom
cone film roll holder to ensure that the roll is securely in place.
7. Pull the film from the roll until a good film web is reached, cut the film and discard the damaged portion.
8. Pull out the film manually; ensure enough length to reach the clamp when it’s closed.
9. Place film loosely between door and pre-stretch rollers, then close the door and ensure that the carriage locks
are correctly locked (this is a 2-position lock; make sure to reach the 2
nd
position when closing the door).
10. Pull out the film manually in order to verify proper loading and operation of the film carriage and leave a film tail
long enough to be able to close the door and reach the clamp jaws.
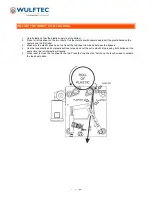
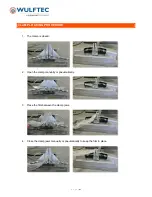
11. Place the film tail in the clamp by wedging it in between the spring loaded clamp jaws. It is possible to open the
clamp manually to help the film slide in between the jaws.
12. Cut off excess film if more than 6in. past the clamp jaws.
13. Step out of the wrapping area, close back fence door and press the Rearm button on the panel in order to rearm
the door circuit and restart the machine.
14. If film breaks during a wrap cycle, repeat steps 7 to 13 or attach film to the product.
NOTE: With the category 3 safety circuit, the pre-stretch motor will not be powered during e-stop or wrap zone
entrance (fence key switch and/or light curtains) situations. Film can still be easily pulled out of the carriage by
opening the carriage gate. Air supply to clamp will not be available during e-stop situations; but its spring loaded
design allows the clamp to be easily opened and closed manually.
NOTE: If the equipment is not equipped with a category 3 safety circuit, there will be a clamp button located next to
the E-stop button box under the machine’s wipe arm. The steps will remain the same from 1 through 10. At Step 11,
the film will be loaded in the clamp jaws using the Clamp Open/Close button. It will be impossible to open the jaws
manually as they will be closed pneumatically and not using springs.


