background image


f) 

Do not wear loose clothing or jewellery.

 Keep your hair, clothing and gloves away 

from moving parts.   

g)


If devices are provided for dust extraction, ensure they are securely connected 

and properly used. 

Using a dust collector can reduce the risk of safety hazards. 


h) We recommend the use of safety eyewear, foot ware, hearing protection and gloves. 


4) 

Power tool use and care 

a)

 Do not use force when using the power tool. Use the correct power tool for your 

application. 

The correct power tool will do the job better and safer at the rate for which 

it was designed.


b) 

Do not use the power tool if the switch does not work. 

Any power tool that cannot 

be controlled with the switch is dangerous and must be repaired by the manufacturer or 

qualified technician. 


c) 

Unplug before adjusting, changing accessories or storing. 

These safety measures 

reduce  the  risk  of  starting  the  power  tool  accidentally. 

NOTE:  Adjustments  and 

changing  accessories  should  be  done  but  the  manufacturer  or  a  qualified 
technician.   

d) 

Store tools out the reach of small children. Do not allow persons unfamiliar with 

the power tools or instructions use this product.

 Power tools are dangerous in the 

hands of untrained users.


e) 

Maintaining power tools. Check for misalignment of moving parts, breakages and 

any other conditions that could affect the power tool’s operation. If damaged, 
have the power tool repaired by a qualified technician before use. 

Many accidents 

occur because of poor maintenance.


f) 

Keep  cutting  tools  sharp  and  clean. 

Properly  maintained  cutting  tools  with  sharp 

cutting edges are less likely to bind and are easier to control. 
g) 

Use the power tool and accessories, in accordance with these instructions. Take 

into account the surrounding conditions and the work that needs to be done. 

Using the power tool for operations different from those instructed could be a safety 

hazard.


5) 

Battery tool use and care 

a) 

Only use the charger specified by the manufacturer. 

A charger that is suitable for 

one type of battery pack could cause a fire hazard when used with another battery pack. 

b) 

When  not  in  use,  keep  the  product  away  from  paper  clips,  coins,  keys,  nails, 

screws  or  other  metal  objects  that  can  make  a  connection  from  one  terminal  to 
another. Shorting the battery terminals together could cause a fie hazard.


c) 

If there is a leakage from the battery, avoid contact.

 If there is accidental contact, 

wash with water.

 If liquid gets in the eyes, seek medical advice immediately. 

Liquid 

from the battery can burn or cause irritation. 

 
6)

    Service 

a

) The power tool must be serviced by a qualified technician using identical replacement 

parts.


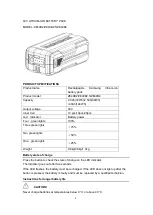
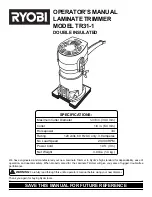
Summary of Contents for 845-742V90

Page 1: ...0 ...

Page 2: ...ONS Model ZE40HT23 Rated Voltage 40V DC Linear No Load Speed 1350rpm Blade length 520mm Cutting capacity 23mm Weight w o battery pack 3 1kg Guaranteed sound power level 92 dB A Battery Pack Lithium Ion ZE40B2 5 Battery Charger ZE40C2 These instructions should be read in conjunction with the instruction manual for the battery pack and charger ...
Page 3: ...wner s manual Protective goggles visor protective helmet hearing protection Wear non slips heavy duty gloves Do not expose to rain Ejected objects and rotating parts can cause serious injuries Keep bystanders a safe distance away from the machine MAJOR PARTS OF THE HEDGE TRIMMER ...

Page 4: ... handle 8 Front handle switch 9 Handle rotation lock button 10 Protective guard 11 Cutting blade SAFETY INSTRUCTIONS INTENDED USE This hedge trimmer is intended for cutting and trimming hedges and bushes in domestic use It is not intended to be used for cutting above shoulder level General Power Tool Safety Warnings ...
Page 5: ... cord Never use the cord for carrying pulling or unplugging the power tool Keep cord away from heat oil sharp edges or moving parts Damaged or entangled cords increase the risk of electric shock e When operating a power tool outdoors use an extension cord suitable for outdoor use Use of a cord suitable for outdoor use reduces the risk of electric shock f If operating a power tool in a damp locatio...

Page 6: ...power tools Check for misalignment of moving parts breakages and any other conditions that could affect the power tool s operation If damaged have the power tool repaired by a qualified technician before use Many accidents occur because of poor maintenance f Keep cutting tools sharp and clean Properly maintained cutting tools with sharp cutting edges are less likely to bind and are easier to contr...

Page 7: ... Check that the battery is securely locked into place Hold the latch on the rear of the battery pack and slide the battery away from the hedge trimmer Starting and stopping the trimmer This trimmer is equipped with a dual switch safety feature The saw will not operate unless both the front handle switch and the rear handle switch are engaged NEVER attempt to interfere with this safety feature by t...

Page 8: ...ugh heavy shrubbery This can cause the blades to bind and slow down If the blades slow down reduce the pace 2 Do not try to cut stems or twigs that are larger than 15 mm thick or those obviously too large to feed into the cutting blade Use a hand saw or pruning cutters to trim large stems 3 An easy way to keep your hedge level is to run a string line guide Stretch a piece of string along the hedge...

Page 9: ...lade before and after each use 2 Before lubricating remove the battery pack and lay hedge trimmer on a flat surface 3 Apply light machine oil along the edge of the top blade 4 Always remove the battery pack before lubricating the blades and never apply oil to moving blades STORING 1 Clean the hedge trimmer thoroughly before storing Store the hedge trimmer with the battery removed in a dry well ven...

Page 10: ...ights 100 Three green lights 75 Two green lights 50 One green lights 25 Weight 0 8kg 0 8kg 1 3kg Battery state of charge Press the button to check the state of charge on the LED indicator The indicator goes out after five seconds If the LED flashes the battery must be recharged If the LED does not light up after the button is pressed the battery is faulty and must be replaced by a qualified techni...

Page 11: ...ct package are not subject to national or international dangerous goods regulations If several machines with lithium ion batteries are transported these regulations may become relevant and special safety measures may be required e g for the packaging In this case find out about the currently valid regulations for the country of use CAUTION Do not post batteries which have a damaged casing Disposal...

Page 12: ...injury only use the charger to recharge ZITEC 40V Batteries Never try to recharge non rechargeable batteries WARNING If the charger is plugged in and no LED lights are illuminated check that the power cord is firmly plugged into the side of the charger and that the electrical outlet is live by testing with a different electrical appliance If the charger still does not illuminate it check with your...

Page 13: ...by pressing and holding the latch button and sliding out of the charger Do not leave the battery on the charger Remove it when it is fully charged Lithium Ion batteries have no memory effect a partial charge will not damage your battery Storage of the charger and battery For long term storage more than 1 month it is preferable that the battery is fully charged and stored in a dry place at a temper...

Page 14: ...T23 Nennspannung 40 V GLEICHSTROM Linear Leerlaufdrehzahl 1 350 U min Länge der Messer 520 mm Schnittleistung 23 mm Gewicht ohne Akkupack 3 1 kg Garantierter Schallleistungspegel 92 dB A Akku Pack Lithium Ionen ZE40B2 5 Akku Ladegerät ZE40C2 Diese Anleitung sollte in Verbindung mit der Bedienungsanleitung des Akku Packs und des Ladegeräts gelesen werden ...

Page 15: ...leitung Schutzbrille Visier Schutzhelm und Gehörschutz Tragen Sie rutschfeste strapazierfähige Handschuhe Setzen Sie das Gerät nicht dem Regen aus Herausgeschleuderte Gegenstä nde und rotierende Teile können schwere Verletzungen verursachen Halten Sie Unbeteiligte in sicherer Entfernung von der Maschine fern ...

Page 16: ...nder Schalter 5 Vorderer Griff 6 Knopf für die Abzugssperre 7 Hinterer Griff 8 Schalter für den vorderen Griff 9 Knopf für die Griffdrehsperre 10 Schutzgitter 11 Schneidmesser SICHERHEITSHINWEISE BESTIMMUNGSGEMÄSSE VERWENDUNG Diese Heckenschere ist fü r das Schneiden und Trimmen von Hecken und Büschen im ...

Page 17: ...iko eines Stromschlags b Vermeiden Sie Körperkontakt mit geerdeten Oberflächen wie Rohren Heizkörpern Herden und Kühlschrä nken Es besteht ein erhö htes Risiko eines Stromschlags wenn Ihr Körper geerdet ist c Setzen Sie Elektrowerkzeuge nicht dem Regen oder der Nässe aus Wenn Wasser in ein Elektrowerkzeug eindringt erhöht sich das Risiko eines Stromschlags d Missbrauchen Sie das Kabel nicht Verwen...

Page 18: ...WERKZEUGEN a Wenden Sie beim Einsatz des Elektrowerkzeugs keine Gewalt an Verwenden Sie das richtige Elektrogerät für Ihre Anwendung Das richtige Elektrogerät erledigt die Arbeit gründlicher und sicherer mit der Geschwindigkeit für die es entwickelt wurde b Verwenden Sie das Elektrowerkzeug nicht wenn der Schalter nicht funktioniert Jedes Elektrowerkzeug das sich nicht über den Schalter steuern lä...

Page 19: ... Kontakt mit dem Akku wenn dieser ausläuft Waschen Sie bei versehentlichem Kontakt mit Wasser Wenn Flüssigkeit in die Augen gelangt suchen Sie sofort einen Arzt auf Flüssigkeit aus der Batterie kann Verbrennungen oder Reizungen verursachen 6 Service a Das Elektrowerkzeug muss von einer qualifizierten Fachkraft mit identischen Ersatzteilen gewartet werden ZUSAMMENBAU UND BEDIENUNG Einsetzen und Ent...

Page 20: ...Auslö seschalter in der Zwischenzeit Schalten Sie dann den vorderen Griffschalter ein Ausschalten der Heckenschere A Lassen Sie den Schalter am vorderen Griff oder den Auslöseschalter am hinteren Griff los um die Heckenschere anzuhalten B Nehmen Sie den Akkupack aus der Heckenschere bevor Sie das Gerät transportieren oder lagern Drehgriff Funktion A Halten Sie die Heckenschere mit beiden Händen ei...

Page 21: ...aagerecht zu halten ist die Verwendung einer Schnurführung Spannen Sie ein Stü ck Schnur entlang der Hecke knapp unterhalb der geplanten Schnittlinie Schneiden Sie die Hecke knapp über dieser Fü hrungslinie 4 Schneiden Sie die Seite einer Hecke so dass sie sich nach oben hin leicht verjüngt die Hecke ist dann unten etwas breiter als oben Dies verbessert die Festigkeit der Hecke und ermö glicht es ...

Page 22: ...s Maschinenöl entlang der Kante des oberen Messers auf 4 Nehmen Sie immer den Akku heraus bevor Sie die Messer schmieren und tragen Sie niemals Öl auf sich bewegende Messer auf LAGERN 1 Reinigen Sie die Heckenschere vor der Lagerung gründlich Lagern Sie die Heckenschere mit entnommenem Akku an einem trockenen gut belü fteten Ort der für Kinder unzugä nglich ist Halten Sie die Heckenschere von ätze...

Page 23: ...Ein grünes Licht 25 Gewicht 0 8 kg 0 8 kg 1 3 kg Ladestand des Akkus Drücken Sie die Taste um den Ladestand auf dem LED Anzeiger zu überprü fen Der Anzeiger erlischt nach fünf Sekunden Wenn der LED Anzeiger blinkt muss der Akku aufgeladen werden Wenn die LED nach dem Drücken der Taste nicht aufleuchtet ist der Akku defekt und muss von einem qualifizierten Techniker ausgetauscht werden Hinweise für...

Page 24: ...en oder internationalen Gefahrgutvorschriften Werden mehrere Maschinen mit Lithium Ionen Akkus transportiert kö nnen diese Vorschriften relevant werden und besondere Sicherheitsmaßnahmen z B für die Verpackung erforderlich sein Informieren Sie sich in diesem Fall ü ber die aktuell gü ltigen Vorschriften für das Verwendungsland VORSICHT Versenden Sie keine Akkus Batterien deren Gehä use beschä digt...

Page 25: ...g 100 W max Eingangsfrequenz 50 60 Hz Eingangsstrom 2 A max Ausgangsspannung 40 V Ausgangsstrom 2 A 5 A VERWENDUNG DES LADEGERÄTS Dieses Ladegerät kann mit einer Eingangsspannung von 230 V und einer Wechselstromfrequenz von 50 60 Hz verwendet werden Das Stromkabel kann an die örtliche Steckdose angepasst werden Um das Risiko von Schäden und Verletzungen zu vermeiden verwenden Sie das ...

Page 26: ...zsteckdose mit 220 250 V Wechselstrom normale Haushaltsspannung an Setzen Sie den Akku in die Schlitze des Ladegeräts ein und schieben Sie ihn hinein bis der Akku einrastet Die LED blinkt grün während der Akku geladen wird Sobald der Akku vollständig geladen ist leuchtet die LED Anzeige konstant grün Entfernen Sie den Akku indem Sie die Verriegelungstaste gedrückt halten und aus dem Ladegerät schi...

Reviews: