background image

Programming

38

Operating Instructions 512/532 - 05.0 - 04/2018

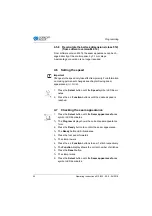
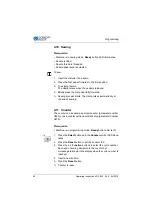
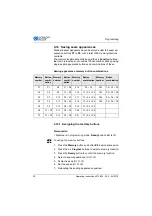
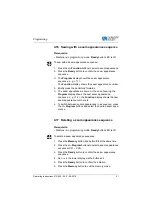
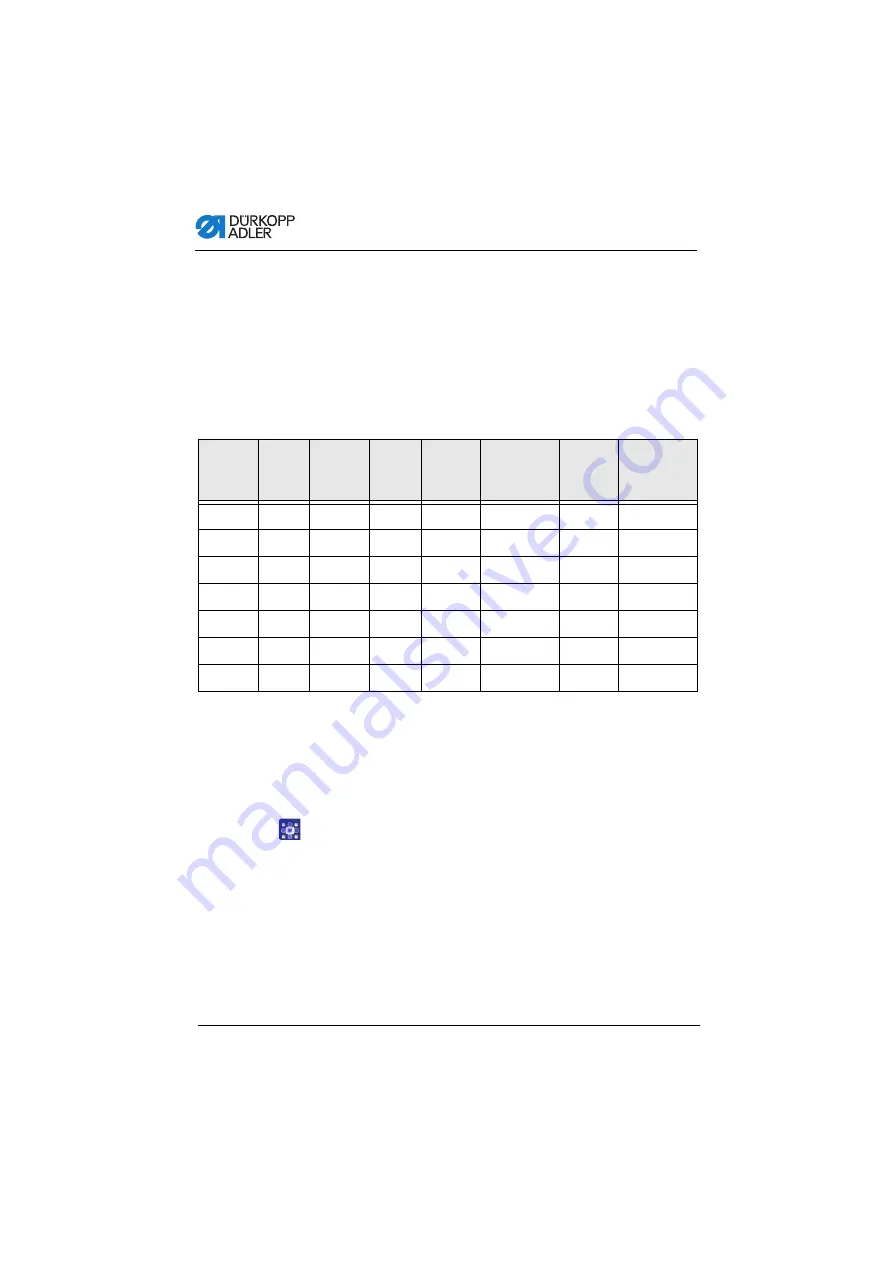
4.14 Saving seam appearances

Standard seam appearances can be stored under the seam ap-
pearance buttons 

P1

to

P5

, with a total of 50 memory locations 

available.
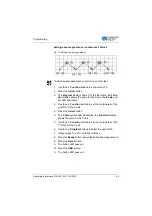
The memory locations are called up via the 

+/– Function

 buttons, 

the memory locations up to number 25 can also be called up using 
single seam appearance buttons and combinations of these.

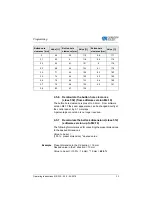
Sewing appearance memory button combinations

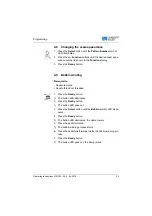
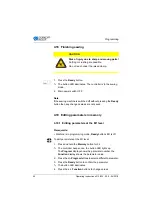
4.14.1 Assigning the memory buttons

Prerequisite:

• Machine is in programming mode, 

Ready

 button LED is off.

To assign the memory buttons:

1.

Press the 

Memory

 button and button 

P2

 in quick succession.

2.

Press the 

+/– Program

 buttons to select a memory location.

3.

Press the 

Ready

 button to confirm the memory location.

4.

Select a seam appearance (

S. 31

).

5.

Scale the axes (

S. 31

).

6.

Set the speed (

S. 34

).

7.

Relocating the sewing appearance position:

Memory 
number

Button 
combi-
nation

Memory 
number

Button 
combi-
nation

Memory 
number

Button 
combination

Memory 
number

Button 
combination

P1

P1

P8

P1 + P4

P15

P4 + P5

P22

P2 + P3 + P4

P2

P2

P9

P1 + P5

P16

P1 + P2 + P3

P23

P2 + P3 + P5

P3

P3

P10

P2 + P3

P17

P1 + P2 + P4

P24

P2 + P4 + P5

P4

P4

P11

P2 + P4

P18

P1 + P2 + P5

P25

P3 + P4 + P5

P5

P5

P12

P2 + P5

P19

P1 + P3 + P4

P6

P1 + P2

P13

P3 + P4

P20

P1 + P3 + P5

P7

P1 + P3

P14

P3 + P5

P21

P1 + P4 + P5

Summary of Contents for 512/532

Page 1: ...Operating Instructions 512 532 ...

Page 2: ...ler AG and protected by copyright Any reuse of these contents including extracts is prohibited without the prior written approval of Dürkopp Adler AG Copyright Dürkopp Adler AG 2018 IMPORTANT READ CAREFULLY BEFORE USE KEEP FOR FUTURE REFERENCE ...

Page 3: ...al 27 3 10 Sewing 28 4 Programming 29 4 1 Control panel 29 4 2 Switching on the machine 30 4 3 Referencing the machine 31 4 4 Selecting the seam appearance 31 4 5 Scaling the axes 31 4 5 1 Scaling the X axis software version up to M2 10 31 4 5 2 Scaling the X axis from software version M2 14 32 4 5 3 Scaling the Y axis software version up to M2 10 32 4 5 4 Scaling the Y axis from software version ...

Page 4: ...ppearances 45 4 22 Working with a USB stick 47 4 23 Loading software from a USB stick 50 4 23 1 Loading the main program 50 4 23 2 Loading seam appearances 51 4 23 3 Setting parameter U085 Class 532 51 4 23 4 Checking the software version 52 4 24 Seam appearances 53 4 24 1 Standard seam appearances for class 512 53 4 24 2 Standard seam images for class 532 57 5 Maintenance 59 5 1 Cleaning 60 5 2 L...

Page 5: ...to the controller 78 6 3 11 Mounting the hood 79 6 3 12 Fitting the eye protection 80 6 4 Fitting the button container class 532 81 6 5 Sewing test 82 7 Decommissioning 83 8 Disposal 85 9 Troubleshooting 87 9 1 Customer Service 87 9 2 Messages of the software 87 9 3 Errors in sewing process 91 10 Technical data 93 11 Appendix 95 ...

Page 6: ...Table of Contents 4 Operating Instructions 512 532 05 0 04 2018 ...

Page 7: ... store them in a place where they are readily available 1 1 For whom are these instructions intended These instructions are intended for Operators This group is familiar with the machine and has access to the instructions Specifically chapter Operation S 15 is important for the operators Specialists This group has the appropriate technical training for perform ing maintenance or repairing malfunct...

Page 8: ...ng Cover Specifies which covers must be disassembled in order to access the components to be set Steps to be performed when operating the machine sewing and equipping Steps to be performed for service maintenance and installation Steps to be performed via the software control panel The individual steps are numbered First step Second step The steps must always be followed in the specified order Lis...

Page 9: ...d symbols levels of danger and their signal words are described separately in the chapter Safety S 7 Location information If no other clear location information is used in a figure indications of right or left are always from the user s point of view 1 3 Other documents The machine includes components from other manufacturers Each manufacturer has performed a hazard assessment for these purchased ...

Page 10: ...use Unauthorized modifications to the machine Use of untrained personnel Use of unapproved parts Transport Dürkopp Adler cannot be held liable for breakage and transport damages Inspect the delivery immediately upon receiving it Report any damage to the last transport manager This also applies if the packaging is not damaged Leave machines equipment and packaging material in the con dition in whic...

Page 11: ...wing work switch off the machine at the main switch or disconnect the power plug Replacing the needle or other sewing tools Leaving the workstation Performing maintenance work and repairs Threading Missing or faulty parts could impair safety and damage the machine Only use original parts from the manufacturer Transport Use a lifting carriage or forklift to transport the machine Raise the machine m...

Page 12: ... damage Stop working if you notice any changes to the machine Report any changes to your supervisor Do not use a damaged machine any further Safety equipment Safety equipment should not be removed or deactivated If it is essential to remove or deactivate safety equipment for a repair operation it must be assembled and put back into operation immediately afterward 2 2 Signal words and symbols used ...

Page 13: ...er to personnel CAUTION with hazard symbol If ignored moderate or minor injury can result CAUTION with hazard symbol If ignored environmental damage can result NOTICE without hazard symbol If ignored property damage can result Symbol Type of danger General Electric shock Puncture Crushing Environmental damage ...

Page 14: ...t could result in serious or even fatal injury if ignored This is what a warning looks like for a hazard that could result in moderate or minor injury if the warning is ignored DANGER Type and source of danger Consequences of non compliance Measures for avoiding the danger WARNING Type and source of danger Consequences of non compliance Measures for avoiding the danger CAUTION Type and source of d...

Page 15: ... property damage if ignored This is what a warning looks like for a hazard that could result in environmental damage if ignored NOTICE Type and source of danger Consequences of non compliance Measures for avoiding the danger CAUTION Type and source of danger Consequences of non compliance Measures for avoiding the danger ...

Page 16: ...Safety 14 Operating Instructions 512 532 05 0 04 2018 ...

Page 17: ...ve the thread reels 2 Thread the needle thread as shown in the following figure Fig 1 Threading needle thread 3 Pull the needle thread approx 4 cm through the needle after threading This ensures reliable sewing on 4 When using silicone oil also thread the needle thread through the optional silicone oiler 1 CAUTION Risk of injury due to sharp and moving parts Punctures and crushing are possible Onl...

Page 18: ... thread for the next seam To set the preliminary needle thread tension 1 Turn the preliminary tensioner 1 clockwise direction for a shorter starting thread 2 Turn the preliminary tensioner 1 counterclockwise direction for a longer starting thread Primary tension of the needle thread To set the primary needle thread tension 1 Set the primary tension of the needle thread 2 to be as low as possible T...

Page 19: ...or Fig 3 Setting the thread regulator The thread regulator 1 regulates the amount of needle thread required for forming the stitch An optimum sewing result is only possible when the thread regulator is exactly adjusted CAUTION Risk of injury due to sharp parts Cutting is possible Only thread the needle thread with the machine switched off 1 Thread regulator 2 Thread tensioning spring 3 Screw ...

Page 20: ...theright smalleramountofneedlethread 3 Tighten the screw 3 Adjustment note When the maximum thread quantity is required then the thread tension spring 2 must be pulled approx 0 5 mm down from its upper end position This occurs when the needle thread loop passes the maximum hook diameter 3 4 Winding the hook thread Fig 4 Winding the hook thread To wind the hook thread 1 Fit the bobbin 2 on the bobb...

Page 21: ...bbin lever 4 into the bobbin 5 Start sewing The bobbin winder stops automatically when the configured bobbin filling length has been reached see Service manual 6 Tear off the thread at the thread clamp 1 after winding Note Ifthethreadmustbewoundwithoutsewingthenthethreadwinding mode can be set in the controller See chapter bobbin winding S 35 ...

Page 22: ...bbin housing flap 1 3 Remove the bobbin housing upper section 2 with the bobbin 6 4 Remove the empty bobbin from the bobbin housing upper section 2 CAUTION Risk of injury due to sharp and moving parts Cutting or chrusing are possible Only replace the bobbin with the machine switched off 1 Bobbin housing flap 2 Bobbin housing upper section 3 Hook cover 4 Hole 5 Tension spring 6 Bobbing 7 Bobbin hou...

Page 23: ...usinguppersection 2 2 Feed the hook thread through the bobbin housing slot 7 under the tensioning spring 5 into the hole 4 3 Pull the hook thread approx 2 5 cm out of the bobbin housing upper 2 The bobbin must rotate in the direction of the arrow when pulling out the hook thread 4 Insert the bobbin housing upper 2 5 Close the hook cover 3 ...

Page 24: ...he threaded hook thread Adjusting the tensioning spring To adjust the tensioning spring 1 Remove the bobbin housing upper section 3 withthe bobbin 2 Adjust the tensioning spring 1 via the adjustment screw 2 until the correct tension is set 3 Insert the bobbin housing upper section 3 CAUTION Risk of injury due to sharp and moving parts Cutting or crushing are possible Only set the hook thread tensi...

Page 25: ...e bar 3 as far as it will go taking care to ensure that the groove in the needle 1 faces the hook tip 3 Tighten the screw 2 4 Always adjust the clearance between the hook and the needle after changing to a different needle thickness Service Instructions CAUTION Risk of injury due to sharp and moving parts Cutting and crushing are possible Only change the needle with the machine switched off 1 Groo...

Page 26: ...perating Instructions 512 532 05 0 04 2018 Otherwise the following errors can occur Changing to a thinner needle Missing stitches thread damage Changing to a thicker needle Damage to the hook tip damage to the needle ...

Page 27: ...tton clamp Class 532 Fig 8 Adjusting the button mount standard clamp CAUTION Risk of injury due to sharp and moving parts Cutting and crushing are possible Only adjust the button mount of the button clamp with the machine switched off 1 Button mount left 2 Lever 3 Knurled screw 4 Button mount right ...

Page 28: ... when the sewing material is inserted The lever 2 regulates the size of the opening in the button mount To adjust the button mount 1 Switch on the machine 2 Press the Ready button Clamp raises pedal ready for sewing 3 Press the Ready button Clamp remains raised pedal is disabled 4 Loosen the knurled screw 3 5 Open the button amount to the correct distance using the lever 2 6 Insert the button 1 Bu...

Page 29: ...al Fig 10 Shank shaper The button clamp can be optionally equipped with a shank shaper 3 Pivoting the shank shaper in out To pivot the shank shaper in or out 1 Manually swing the pivoting lever 2 with shank shaper 3 in and out with the button clamp raised Setting the shank length To set the shank length 1 Turn the adjusting screw 1 Clockwise Shank becomes longer Counterclockwise Shank becomes shor...

Page 30: ... rest position Sewing machine is at a standstill Needle raised clamp raised The Ready button LED illuminates Sewing Insert the material to be sewn Press the pedal forwards to the 1st position The clamp lowers Release the pedal The clamp raises Position the sewing material Briefly press the pedal fully forwards The sewing machine sews at the configured speed Interrupting the sewing process in the m...

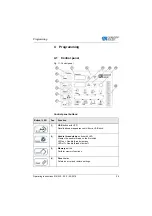
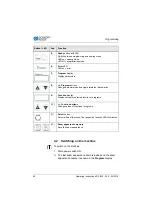
Page 31: ...ns Button LED Pos Function 1 USB button with LED Save load seam appearances to from a USB stick 2 Needle thread clamp button with LED Clamps the needle thread on the first stitch LED on Needle thread clamp on LED off Needle thread clamp off 3 Memory button Perform memory functions 4 Reset button Delete an error and restore settings ...

Page 32: ...rogramming and sewing mode LED on sewing mode LED off programming mode 6 Error LED LED on error 7 Program display Display parameters 8 Program buttons Change parameters and navigate forwards backwards 9 Function display Display values for selected functions programs 10 Function buttons Change values of functions programs 11 Select button Select different functions The respective function LED illum...

Page 33: ...portant Changes to the axes only take effect temporarily For information on making permanent changes and relocating the seam appea rance see chapter saving seam appearances S 38 4 5 1 Scalingthe Xaxis softwareversionuptoM2 10 1 Press the Select button until the X axis symbol LED illumi nates 2 Press the Function buttons until the desired X axis value is reached 100 corresponds to the specified dim...

Page 34: ... 4 5 4 Scaling the Y axis from software version M2 14 From software version M2 14 the seam appearance can be ch anged directly at the control panel by 0 1 mm steps A percentage conversion is no longer required 4 5 5 Recalculate the button hole clearance class 532 software version up to M2 08 The button hole clearance is preset to 3 4 mm 3 4 mm 100 The button hole clearance can be set by changing t...

Page 35: ... 512 software version up to M2 10 The following formula is used for converting the preset dimensions to the desired dimensions Value to be set 100 preset dimension desired value Example Preset dimension in the X direction 16 mm Desired value in the X direction 10 mm Value to be set 100 16 mm 10 mm 62 5 2 59 3 9 115 5 8 171 2 1 62 4 118 5 9 174 2 2 65 4 1 121 6 176 2 3 68 4 2 124 6 1 179 2 4 71 4 3...

Page 36: ... the Select button until the Speed symbol LED illumi nates 2 Press the Function buttons until the desired speed is reached 4 7 Checking the seam appearance 1 Press the Select button until the Seam appearance form symbol LED illuminates The Program display shows the current seam appearance form 2 Press the Ready button to confirm the seam appearance The Ready button LED illuminates 3 Press the foot...

Page 37: ...obbin winding Prerequisite Needle removed Needle thread not threaded 1 Press the Ready button The button LED illuminates 2 Press the Ready button The button LED goes out 3 Press the Select button until the Bobbin symbol LED illumi nates 4 Press the Ready button The button LED illuminates the clamp lowers 5 Press the pedal forwards The bobbin winding process starts 6 Press the pedal fully forwards ...

Page 38: ...ocess starts The clamp raises automatically at the end of sewing 4 11 Counter The counter can be used as an item counter parameter number U020 or as a counter with an automatic stop parameter number U076 Prerequisite Machine is in programming mode Ready button LED is off 1 Press the Select button until the Counter symbol LED illumi nates 2 Press the Reset button to set the counter to 0 3 Press the...

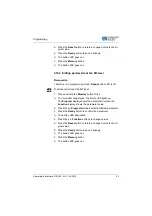
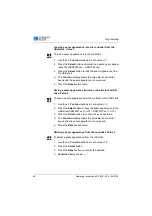
Page 39: ...o longer displayed Prerequisite Machine is in programming mode Ready button LED is off To disable standard seam appearances 1 Press the Memory button and button P1 in quick succession The Program display shows the seam appearance number the Function shows 0 or 1 0 Seam appearance is displayed 1 Seam appearance is disabled 2 Press the Function buttons to select a different seam appearance 3 Press t...

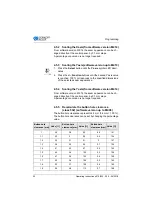
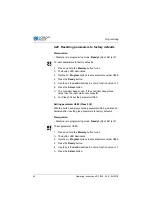
Page 40: ...dy button LED is off To assign the memory buttons 1 Press the Memory button and button P2 in quick succession 2 Press the Program buttons to select a memory location 3 Press the Ready button to confirm the memory location 4 Select a seam appearance S 31 5 Scale the axes S 31 6 Set the speed S 34 7 Relocating the sewing appearance position Memory number Button combi nation Memory number Button comb...

Page 41: ...sew with the memory buttons 1 Pressthedesiredseamappearancememorybutton orbutton combination 2 Press the Ready button 3 Check the seam appearance form 4 Sew with the selected seam appearance 4 14 3 Deleting the memory button assignments Prerequisite Machine is in programming mode Ready button LED is off To delete the memory button assignments 1 Press the Memory button and button P2 at the same tim...

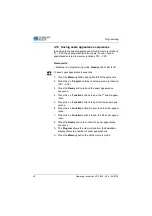
Page 42: ... P3 at the same time 2 Press the Program buttons to select a memory location C01 C25 3 Press the Ready button to save the seam appearance sequence 4 Press the Function buttons to sew the 1st seam appea rance 5 Press the Function buttons to sew the 2nd seam appe arance 6 Press the Function buttons to sew the 3rd seam appea rance 7 Press the Function buttons to sew the 4th seam appea rance 8 Press t...

Page 43: ...wing the Program display shows the next seam appearance sequence e g 1 2 the Function display shows the next seam appearance number etc 4 To switch between seam appearances in a sequence press the Program buttons and select the desired seam appe arance 4 17 Deleting a seam appearance sequence Prerequisite Machine is in programming mode Ready button LED is off To delete a seam appearance sequence 1...

Page 44: ...rerequisite Machine is in programming mode Ready button LED is off To edit parameters at the M1 level 1 Press and hold the Memory button for 3 s The controller beeps once the button LED lights up The Program display shows the parameter number the Function display shows the parameter value 2 Pressthe Programbuttonstoselectadifferentparameter 3 Press the Ready button to confirm the parameter The but...

Page 45: ...ters at the M2 level 1 Press and hold the Memory button for 6 s The controller beeps twice the button LED lights up The Program display shows the parameter number the Function display shows the parameter value 2 Pressthe Programbuttonstoselectadifferentparameter 3 Press the Ready button to confirm the parameter The button LED illuminates 4 Press the Function buttons to change values 5 Press the Re...

Page 46: ...s the Select button The controller beeps once If the controller beeps three times then the reset was not successful 6 For Class 532 set the parameter U085 Setting parameter U085 Class 532 With the button sewing machine parameter U085 must also be adjusted after resetting the parameters to factory defaults Prerequisite Machine is in programming mode Ready button LED is off To set parameter U085 1 P...

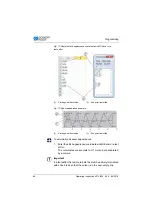
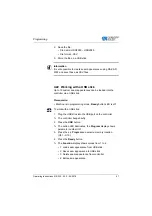
Page 47: ... 10 mm Negative values and comma separated values must not be ente red Information The operator does not need to perform any calculations in order to center the seam appearance The machine automatically cen ters the seam appearance in the middle of the sewing field To subsequently relocate the seam appearance see chapter saving seam appearances S 38 NOTICE Property damage may occur Damage to the c...

Page 48: ...ances 1 Enter the stitch appearance coordinates in MS Excel or a text editor The coordinates are accurate to 0 1 mm and are separated by a comma Important In a text editor the last coordinate line must be actively terminated with a line break so that the cursor is in the next empty line 1 Starting point first stitch 2 End point last stitch 1 Starting point first stitch 2 End point last stitch ...

Page 49: ...a a USB stick Prerequisite Machine is in programming mode Ready button LED is off To work with a USB stick 1 Plug the USB stick into the USB port on the controller The controller beeps briefly 2 Press the USB button The button LED illuminates the Program display shows parameter number U01 3 Press the Program and select a memory location U01 U10 4 Press the Ready button The Function display shows v...

Page 50: ...ice Saving a seam appearance from the controller to the USB stick Value 2 To save a seam appearance from the controller to the USB stick 1 Use the Function buttons to set a value of 2 2 Press the Select button to save the seam appearance to the USB stick HSW2001 csv U01 HSW2010 csv U10 3 Press the Select button to confirm the save operation The Function display shows the value ok the controller be...

Page 51: ...the X axis sym bol LED illuminates 3 Use the Function buttons to set the coordinates of the 1st stitch for the X axis 4 Press the Select button The Y axis symbol LED illuminates the Function display shows the value for the Y axis 5 Use the Function buttons to set the coordinates of the 1st stitch for the Y axis 6 Use the Program buttons to select the next stitch 7 Repeat steps 3 to 5 for all furth...

Page 52: ...ck 3 Press the USB button and wait approx 3 seconds 4 Press the Memory button 5 Use the Function buttons to set a value of 5 in the Fun ction display 6 Press the Select button The download into the controller starts Important The download is finished when no more values are shown in the Function display You must now wait at least 25 seconds before continuing otherwise the controller can be damaged...

Page 53: ...ts Duration is approx 4 min 6 Press the Reset button 7 Pull out the USB stick The software transfer is complete 4 23 3 Setting parameter U085 Class 532 With the button sewing machine the parameter U085 must be set after loading new software Prerequisite Machine is in programming mode Ready button LED is off To set parameter U085 1 Press and hold the Memory button for 6 s The button LED illuminates...

Page 54: ...ps twice the button LED lights up 2 Press the Program buttons and select parameter U097 3 Press the Ready button The current software versions are displayed M X XX Main program P X XX Control panel T X XX Servo motors A X XX Seam appearances 4 Press the Function buttons and check the respective soft ware version 5 Press the Ready button 6 Press the Memory button The button LED goes out ...

Page 55: ...nces 4 24 1 Standard seam appearances for class 512 No Stitch diagram Number of stitches Size mm X x Y 1 42 16 x 2 2 10 x 2 3 16 x 2 5 4 24 x 3 5 28 10 x 2 6 16 x 2 7 36 10 x 2 8 16 x 2 5 9 56 24 x 3 10 64 24 x 3 11 21 6 x 2 5 12 28 6 x 2 5 13 36 6 x 2 5 14 14 8 x 2 15 21 8 x 2 ...

Page 56: ...ating Instructions 512 532 05 0 04 2018 16 28 8 x 2 17 21 10 x 0 1 18 28 10 x 0 1 19 25 x 0 1 20 36 25 x 0 1 21 41 25 x 0 1 22 44 35 x 0 1 23 28 4 x 20 24 36 25 42 26 56 No Stitch diagram Number of stitches Size mm X x Y ...

Page 57: ...ctions 512 532 05 0 04 2018 55 27 18 0 1 x 20 28 21 0 1 x 10 29 0 1 x 20 30 28 0 1 x 20 31 52 10 x 7 32 63 12 x 7 33 24 10 x 6 34 31 12 x 6 35 48 7 x 10 36 48 7 x 10 37 90 24 x 3 No Stitch diagram Number of stitches Size mm X x Y ...

Page 58: ...tructions 512 532 05 0 04 2018 38 28 8 x 2 39 28 Ø 12 40 48 41 29 2 5 x 20 42 39 2 5 x 25 43 45 2 5 x 25 44 58 2 5 x 30 45 75 2 5 x 30 46 42 2 5 x 30 47 91 Ø 8 48 99 49 148 50 164 No Stitch diagram Number of stitches Size mm X x Y ...

Page 59: ... mm X x Y 1 34 6 6 3 4 x 3 4 18 44 6 3 4 x 0 2 35 8 8 19 45 8 3 10 10 20 10 4 12 12 21 12 5 36 6 6 3 4 x 3 4 22 16 6 37 8 8 23 46 6 0 x 3 4 7 10 10 24 10 8 12 12 25 12 9 38 6 6 3 4 x 3 4 26 47 6 6 3 4 x 3 4 10 39 8 8 27 10 10 11 10 10 28 48 6 6 3 4 x 3 4 12 40 6 6 3 4 x 3 4 29 10 10 13 41 8 8 30 49 5 5 5 3 x 2 5 14 10 10 31 8 8 8 15 42 6 6 3 4 x 3 4 32 50 5 5 5 3 x 2 5 16 43 8 8 33 8 8 8 17 10 10 ...

Page 60: ...Programming 58 Operating Instructions 512 532 05 0 04 2018 ...

Page 61: ...lists Service Instructions WARNING Risk of injury from sharp parts Punctures and cutting possible Prior to any maintenance work switch off the machine or set the machine to threading mode WARNING Risk of injury from moving parts Crushing possible Prior to any maintenance work switch off the machine or set the machine to threading mode Work to be carried out Operating hours 8 40 160 1000 Removing l...

Page 62: ...te 1 Area around the hook 2 Bobbin housing and interior Thread cutter Area around the needle WARNING Risk of injury from flying particles Flying particles can enter the eyes causing injury Wear safety goggles Hold the compressed air gun so that the particles do not fly close to people Make sure no particles fly into the oil pan NOTICE Property damage from soiling Lint and thread remnants can impai...

Page 63: ...Maintenance Operating Instructions 512 532 05 0 04 2018 61 Fig 15 Cleaning and checking 1 Underside of throat plate 2 Hook ...

Page 64: ...jury from contact with oil Oil can cause a rash if it comes into contact with skin Avoid skin contact with oil If oil has come into contact with your skin wash the affected areas thoroughly NOTICE Property damage from incorrect oil Incorrect oil types can result in damage to the machine Only use oil that complies with the data in the instructions CAUTION Risk of environmental damage from oil Oil i...

Page 65: ...l of the hook The sewing automat is equipped with an oil wick lubrication sys tem The hook is supplied from the oil reservoir 1 Fig 16 Refilling oil 1 Proper setting The oil level in the oil reservoir 1 must not drop below the lower red marking or be above the upper red marking Container Part no 250 ml 9047 000011 1 l 9047 000012 2 l 9047 000013 5 l 9047 000014 1 Oil reservoir 2 Oil filler opening...

Page 66: ...the gear Fig 17 Refilling oil 2 To lubricate the gear 1 Unscrew the screw 4 from the oil filler opening at the back of the machine 2 Fill oil through the oil filler opening 3 For lubricating the gear maximum 110 ml are necessary Fig 18 Refilling oil 3 When oil splashes at the oil gauge glass during operation enough oil is filled in 3 Oil filler opening 4 Screw 5 Oil gauge glass ...

Page 67: ...its moving parts be lubricated sufficiently Lubrication points on the rear of the machine Fig 19 Lubrication 1 To lubricate the rear of the machine 1 Apply an adequate amount of grease to the fleece 2 to lubri cate the outer side of the cam disk 1 2 Apply a small amount of grease to the joints 3 to ensure they remain flexible 1 Cam disk 2 Fleece 3 Joints ...

Page 68: ...structions 512 532 05 0 04 2018 Fig 20 Lubrication 2 3 Apply a small amount of grease to the inner guide groove 5 and the roller 4 from the outside 4 Apply a small amount of grease to the joints 6 4 Roller 5 Guide groove 6 Joints ...

Page 69: ...on points on the machine head Fig 21 Lubrication 3 To lubricate the machine head 1 Apply grease to cross head backside 9 and the connectors 10 2 Lubricate the groove 8 3 Lubricate the thread lever guide 7 7 Thread lever guide 8 Groove 9 Cross head backside 10 Connectors ...

Page 70: ...Maintenance 68 Operating Instructions 512 532 05 0 04 2018 ...

Page 71: ...inewhosecomponents are entirely supplied by Dürkopp Adler Upper section Accessory pack containing Thread stands Protective cover Fastening material Controller parts set Main switch Control panel Controller Additional equipment Frame with table plate drawer and rods Pedal WARNING Risk of injury Crushing is possible The machine may only be set up by trained specialists Wear safety gloves and safety ...

Page 72: ...den blocks from the table plate Lashing straps and wooden blocks from the frame 6 3 Assembly 6 3 1 Checking the table plate CAUTION Risk of injury from a self manufactured table plate of insufficient load bearing capacity Crushing is possible Ensure that the table plate has sufficient load bearing capacity and strength The cutouts in self manufactured table plates must conform to the dimensions sp...

Page 73: ...e 1 Turn the adjusting screw 1 to ensure that the frame stands securely The frame must stand with all 4 feet on the floor 2 Screw the pedal 2 to the frame brace 3 3 Slide the pedal 2 so that it sits in the middle of the frame brace 3 The frame brace 3 has elongated holes to allow alignment 1 Adjusting screw 2 Pedal 3 Frame brace ...

Page 74: ...ate 1 Place the table plate 4 inverted on a working surface 2 Screw the main power switch 3 to the left of the underside of the table plate 3 Fasten the cables 1 and 2 to the control cabinet 5 on the table plate using cable fastening nails and strain relief clamps 1 Connection cable 2 Connection cable 3 Main switch 4 Table plate 5 Control cabinet ...

Page 75: ...8 73 Fig 24 Completing the table plate 2 4 Place the control cabinet 2 on the underside of the table plate 5 Screw the control cabinet 2 to the underside of the table plate using 3 screws 1 washers retaining rings and nuts 1 Screws 2 Control cabinet ...

Page 76: ...532 05 0 04 2018 6 3 4 Mounting the upper section support Fig 25 Mounting the upper section support To mount the upper section support 1 Insert the upper section support 1 into the hole 2 in the table plate 1 Upper section support 2 Hole ...

Page 77: ...the upper edge of the table plate The frame height should correspond to the physical characteristics of the operating personnel To set the working height 1 Loosen the screws 2 on both of the frame bars 2 To avoid jamming slide the table plate in or out evenly at both sides The scales 1 on the outer sides of the bars serve as an adjustment aid 3 Tighten both screws 2 1 Scale 2 Screws ...

Page 78: ... upper machine section To mount the upper machine section 1 Place the sewing machine 3 on the table plate 2 Fasten the sewing machine 3 at the left and right using the retainers 1 and 2 Screw the retainers in place using the screws 4 hanger 5 and nuts 1 Retainer 2 Retainer 3 Sewing machine 4 Screw 5 Hanger ...

Page 79: ...r 1 Insert the retainer 2 into the hole in the table plate 6 and screw in place using 3 screws 1 2 Screw the oil collection reservoir 5 into the retainer 2 3 Pug the oil line 3 into the oil collection reservoir 5 4 Plug the rubber mounts 4 into the table plate 6 1 Screw 2 Retainer 3 Oil line 4 Rubber mount in the oil collec tion tray 5 Oil collection reservoir 6 Table plate ...

Page 80: ...ler To connect the cables to the controller 1 Connect the cables All cables are labelled appropriately 2 Lay the cables to the control cabinet and bundle together with cable ties DANGER Risk of injury from electricity Unprotected contact with electricity can result in serious injuries or death Work on the electrical system must ONLY be performed by qualified electricians or appropriately trained a...

Page 81: ...he cable plugs 4 Screw the equipotential bonding cables on the control cabinet to the positions marked with earthing symbols 6 3 11 Mounting the hood Fig 30 Mounting the hood To mount the hood 1 Screw the hood 1 to the upper section using 4 screws 2 1 Hood 2 Screws ...

Page 82: ...Instructions 512 532 05 0 04 2018 6 3 12 Fitting the eye protection Fig 31 Fitting the eye protection To fit the eye protection 1 Screw the eye protection 2 to the upper section using 2 screws 1 1 Screws 2 Eye protection ...

Page 83: ...ng the button container class 532 Fig 32 Fitting the button container class 532 To fit the button container 1 Screw the retainer 2 to the table plate 2 Plug the button container 3 into the retainer 2 and secure with a screw 1 1 Screw 2 Retainer 3 Button container ...

Page 84: ...n at medium speed 6 Main power switch OFF 7 Thread the needle and hook threads 8 Select the material to be sewn 9 Start the sewing test at low speed and then continuously increase the speed 10 Check that the seams conform to the desired requirements If not see chapter setting the needle thread tension S 16 CAUTION Risk of injury due to sharp and moving parts Cutting or crushing are possible Only t...

Page 85: ...from soiling 6 Cover the control to protect it from soiling 7 Cover the entire machine if possible to protect it from contam ination and damage WARNING Risk of injury from a lack of care Serious injuries may occur ONLY clean the machine when it is switched off Allow ONLY trained personnel to disconnect the machine CAUTION Risk of injury from contact with oil Oil can cause a rash if it comes into c...

Page 86: ...Decommissioning 84 Operating Instructions 512 532 05 0 04 2018 ...

Page 87: ...able national regulations When disposing of the machine be aware that it consists of a range of different materials steel plastic electronic components etc Follow the national regulations when disposing these materials CAUTION Risk of environmental damage from improper disposal Improper disposal of the machine can result in serious environmental damage ALWAYS comply with the national regulations r...

Page 88: ...Disposal 86 Operating Instructions 512 532 05 0 04 2018 ...

Page 89: ...ibed here Do not attempt to correct the error yourself Error message Description Possible cause Remedy E 8 Table data error Table data could not be read Save the table data anew E 1 0 Seam appearance number error The selected seam appearance is not stored in ROM or has been disabled Seam appearance 0 Press the Reset button to confirm the seam appearance number E 3 0 Needle bar position raised erro...

Page 90: ...atcher position error Thread catcher not in the home position Main power switch OFF Check the sensor E 3 3 2 Clamp foot position error Clamp foot not in the home position Main power switch OFF Check the sensor E 5 0 1 Data read error Data not present or stored in the wrong format Store the data anew on the USB stick E 5 0 2 USB read error MOT file faulty Store the data anew on the USB stick E 5 0 ...

Page 91: ... Plug in the USB stick again E 5 1 3 USB write error Data cannot be copied to the USB stick Check the USB stick Plug in the USB stick again E 5 5 0 Data write error Flash memory transfer error Main power switch OFF Repeat the procedure Replace the mainboard E 5 5 1 Internal process error Software error Main power switch OFF Repeat the procedure Replace the mainboard Replace the software E 7 7 0 3 ...

Page 92: ...t responding Main power switch OFF Check the sensor E 9 1 1 Clamp foot motor error Clamp foot motor not running correctly Main power switch OFF Check the motor and connections E 9 1 2 Internal error Notify DA Service E 9 1 3 Thread catcher search error Thread catcher sensor not responding Main power switch OFF Check the sensor E 9 1 4 Thread catcher motor error Thread catcher motor not running cor...

Page 93: ...threading path Needle is bent or sharp edged Replace the needle Needle is not inserted correctly into the needle bar Insert the needle correctly into the needle bar The thread used is unsuitable Use recommended thread Thread tensions are too tight for the thread used Check thread tensions Thread guiding parts such as thread tube thread guide or thread take up disk are sharp edged Check threading p...

Page 94: ...s installed incorrectly Check the assembly of the reel stand Thread tensions are too tight Check thread tensions Throat plate hook or spread have been damaged by the needle Have parts reworked by qualified specialists Loose stitches Thread tensions are not adjusted to the sewing material the sewing material thickness or the thread used Check thread tensions Needle thread and hook thread have not b...

Page 95: ...ar ance 0 1 mm 10 mm Depens on seam appear ance 0 1 mm 6 8 mm Speed maximum min 1 3000 Speed on delivery min 1 2700 Sewing field size mm max in X direction 40 max in Y direction 30 max in X direction 8 0 max in Y direction 4 0 max in X direction 10 max in Y direction 10 Number of standard patterns 50 33 Number of storable modified patterns 50 Number of sequences 25 Number of seam appearances per s...

Page 96: ...Technical data 94 Operating Instructions 512 532 05 0 04 2018 Width mm 230 Height mm 430 Weight kg 69 Technical data Unit 512 211 01 512 212 01 532 211 01 ...

Page 97: ...Appendix Operating Instructions 512 532 05 0 04 2018 95 11 Appendix ...

Page 98: ...Appendix 96 Operating Instructions 512 532 05 0 04 2018 ...

Page 99: ......

Page 100: ...d GERMANY Phone 49 0 521 925 00 E mail service duerkopp adler com www duerkopp adler com Subject to design changes Part of the machines shown with additional equipment Printed in Germany Dürkopp Adler AG Original Instructions 0791 512740 EN 05 0 04 2018 ...

Reviews: